Photography Tutorials

Lightroom Quick Tips - Why You Should Use Virtual Copies

Blog-Cover-3.jpg

How to use the Lightroom Virtual Copy feature.

In this video I give you a quick tip about why you should be using Lightroom virtual copies.

Get a FREE trail of Adobe Lightroom - Click Here.

Adobe Lightroom is a power house of image editing and organising software. One of the key features is the non-destructive workflow. This is where the original image file is never adjusted. Lightroom simply creates a reference to that file, within the catalogue, and that is what you edit and see within Lightroom.

Sometimes though you might want to edit the image in a number of different ways. This could be a colour version, a black and white version or simply a re-visit to an image you have edited before. Thankfully, Lightroom provides this feature allowing virtual copies to be created. This is where Lightroom creates another reference file from the same original, and untouched, image file meaning you then have two versions of the same image within Lightroom that can be edited in different ways.

To create Lightroom virtual copies simply select the image you want to copy, right click and select ‘Create Virtual Copy’. To then edit a previously edited image from scratch - right click the newly created copy and under ‘Develop Settings’, click ‘Reset’.

Lightroom virtual copies are a powerful and simple feature that can easily be used in your Lightroom workflow.

If you haven't done so already please subscribe to the First Man Photography YouTube channel and it will help you take your photography to the next level.

Lightroom Mobile Tutorial Gone Wrong

Blog-Cover-2.jpg

How to edit Raw Files on an iPad, iPhone or Android using Lightroom Mobile.

To get a FREE trial of Adobe Lightroom and Lightroom Mobile click here - https://www.firstmanphotography.com/get/photography-plan

When I started out shooting this video I had a solid plan in mind and was looking to raise the bar on my normal tutorials. Sometimes things don’t go to plan though and events can take a different direction. Watch the video now to see what happened.

However this is still a video about Lightroom Mobile which is an excellent system that allows us to edit RAW files on mobile devices like an iPhone, iPad or Android device.

Raw files are amazing things and contain a massive amount of data so are not yet the natural Partner of mobile devices. Adobe have therefore come up with a pretty slick method of dealing with this.

We start Lightroom and import your raw files into your computer as Normal. Add the images to a collection and then hit the sync with Lightroom mobile.

Once this is done you can head out with your iPad, iPhone or Android device and start editing the photos. You have access to many of Lightroom’s normal adjustments and are free to head out and edit wherever you choose.

Once the files have been adjusted on the iPad, Lightroom Mobile will sync them back to your computer with the RAW file fully adjusted.

It is an extremely useful, and easy to use feature, when you don't want to carry a laptop around or you quickly want to share or adjust your images whilst showing your work to colleagues, clients or friends.

Give it a try and let me know what you think or if you've already been putting it to good use, I would love to know.

Subscribe to the YouTube channel.

HDR Photography Tutorial - Using Adobe Lightroom

HDR-Blog-Cover.jpg

See more of the world with HDR photography.

In this video I show you how to do HDR photography using a simple technique in Adobe Lightroom. Get a FREE trial of Adobe Lightroom today - https://www.firstmanphotography.com/get/lightroom

HDR stands for high dynamic range.

When we see the world through our own eyes your brain and eyes work cleverly together to perceive many different shades. We can see detail in very bright sunny areas and also lots of detail in shadow areas.

The processor inside a camera is by no means as powerful as our brain so struggles to capture detail in both bright areas and those in shadow. Although cameras increase their dynamic range with every new model that comes out they still have some way to go.

Thankfully we have a way to get round this using HDR photography. All you need is your current gear and the power of Adobe Lightroom. It is a simple method of taking two or three shots with different exposures, to capture the shadows, mid tones, and highlight areas in separate images and then merging them in Lightroom.

When HDR images became popular many people were creating highly stylised pictures that made images look unrealistic and felt like someone had thrown up all over the picture. Thankfully you can use HDR to your advantage to create some beautiful images of scenes where there is high contrast and your camera just cannot cope.

Firstly you need to get out with your camera to somewhere great and capture a beautiful scene. Many cameras now have a HDR mode, like your iPhone, but if you want those high quality images you will want to use your DSLR or mirrorless camera.

The video explains how to do HDR photography:

  • Take an image focusing on the mid tones.
  • Apply those settings to manual mode
  • Use bracketing. This takes three shots consecutively at set exposure intervals.
  • Adjust the bracketing depending on the dynamic range of your scene
  • Take your shot. You need to keep the camera as still as possible. It is possible to handhold but better off using a tripod.
  • Merge in Adobe Lightroom.

HDR photography is fun and easy to do and this tutorial will get you started so you can shoot some beautiful images of your own.

Watch Episode one of the First Man Vlog - https://www.firstmanphotography.com/vlog/vlog-no-1

Subscribe to the First Man Photography YouTube channel.

How I Import, Edit and Organise My Photographs.

Workflow-blog-cover.jpg

See my post processing workflow using Adobe Lightroom.

Your Photography workflow is something that is worth getting right from day one. It will help you to stay organised, work quickly, and easily reference an image again in the future. I have not always followed this advice in the past and it has been a time consuming and unhappy process correcting matters.

Adobe Lightroom now makes organising and editing your photos easier than ever. The catalogue system keeps everything together and allows you to edit in a non destructive manner. However, how you store and organise your files on your hard drives is entirely up to you.

Get a FREE trail of Adobe Lightroom - Click here.

I find that it is best to organise jobs or shoots into year categories first and then something more descriptive as you go down a path level. For example, 2016>Weddings>John & Carrie or 2014>Landscapes>Scotland>Ben Nevis and so on. This could work for you or you might find an equally effective method but some form of categorisation is definitely required to stay organised.

At the beginning of the workflow I extract the images form the camera by removing the memory card and plugging it into a card reader. I find this a faster and much more reliable method than asking your camera to talk to your computer via a USB cable. I will also copy the files directly to my hard drive in the place I want to store them rather than using Lightroom’s import features. This is my own preference but I feel more control using this method.

Once the files are on the hard drive I will then import them into Lightroom by adding the folder to the catalogue. This opens the import window and you can add keywords, to assist your future searches, and add copyright information and change metadata.

The images them begin to load in and you can instantly start to view them. The next step is to grade the images deciding which ones are keepers and which can be discarded (although I never delete images altogether). I then go through a second grading to narrow down to the images I want to use and then edit. Once the images are edited they are ready to be exported and presented to the world.

The final stage of the workflow is to transfer the completed files to an external hard drive where they will live out their days in archive. This is done by dragging the folder containing the images within Lightroom. Doing it within Lightroom ensure both the Lightroom catalogue reference and the physical file are both moved. You are then left with space on your main HD for the next job.

Please make sure you back everything up too. Click the link below to see my back up solution.

https://www.firstmanphotography.com/blog/3-steps-better-photo-storage-backup

Subscribe to the YouTube channel.

London Eye Photo Edit

Blog-Cover.jpg

See how I use Abobe Lightroom to edit this long exposure of the London Eye.

Get a FREE trial of Adobe Lightroom  - Click here.

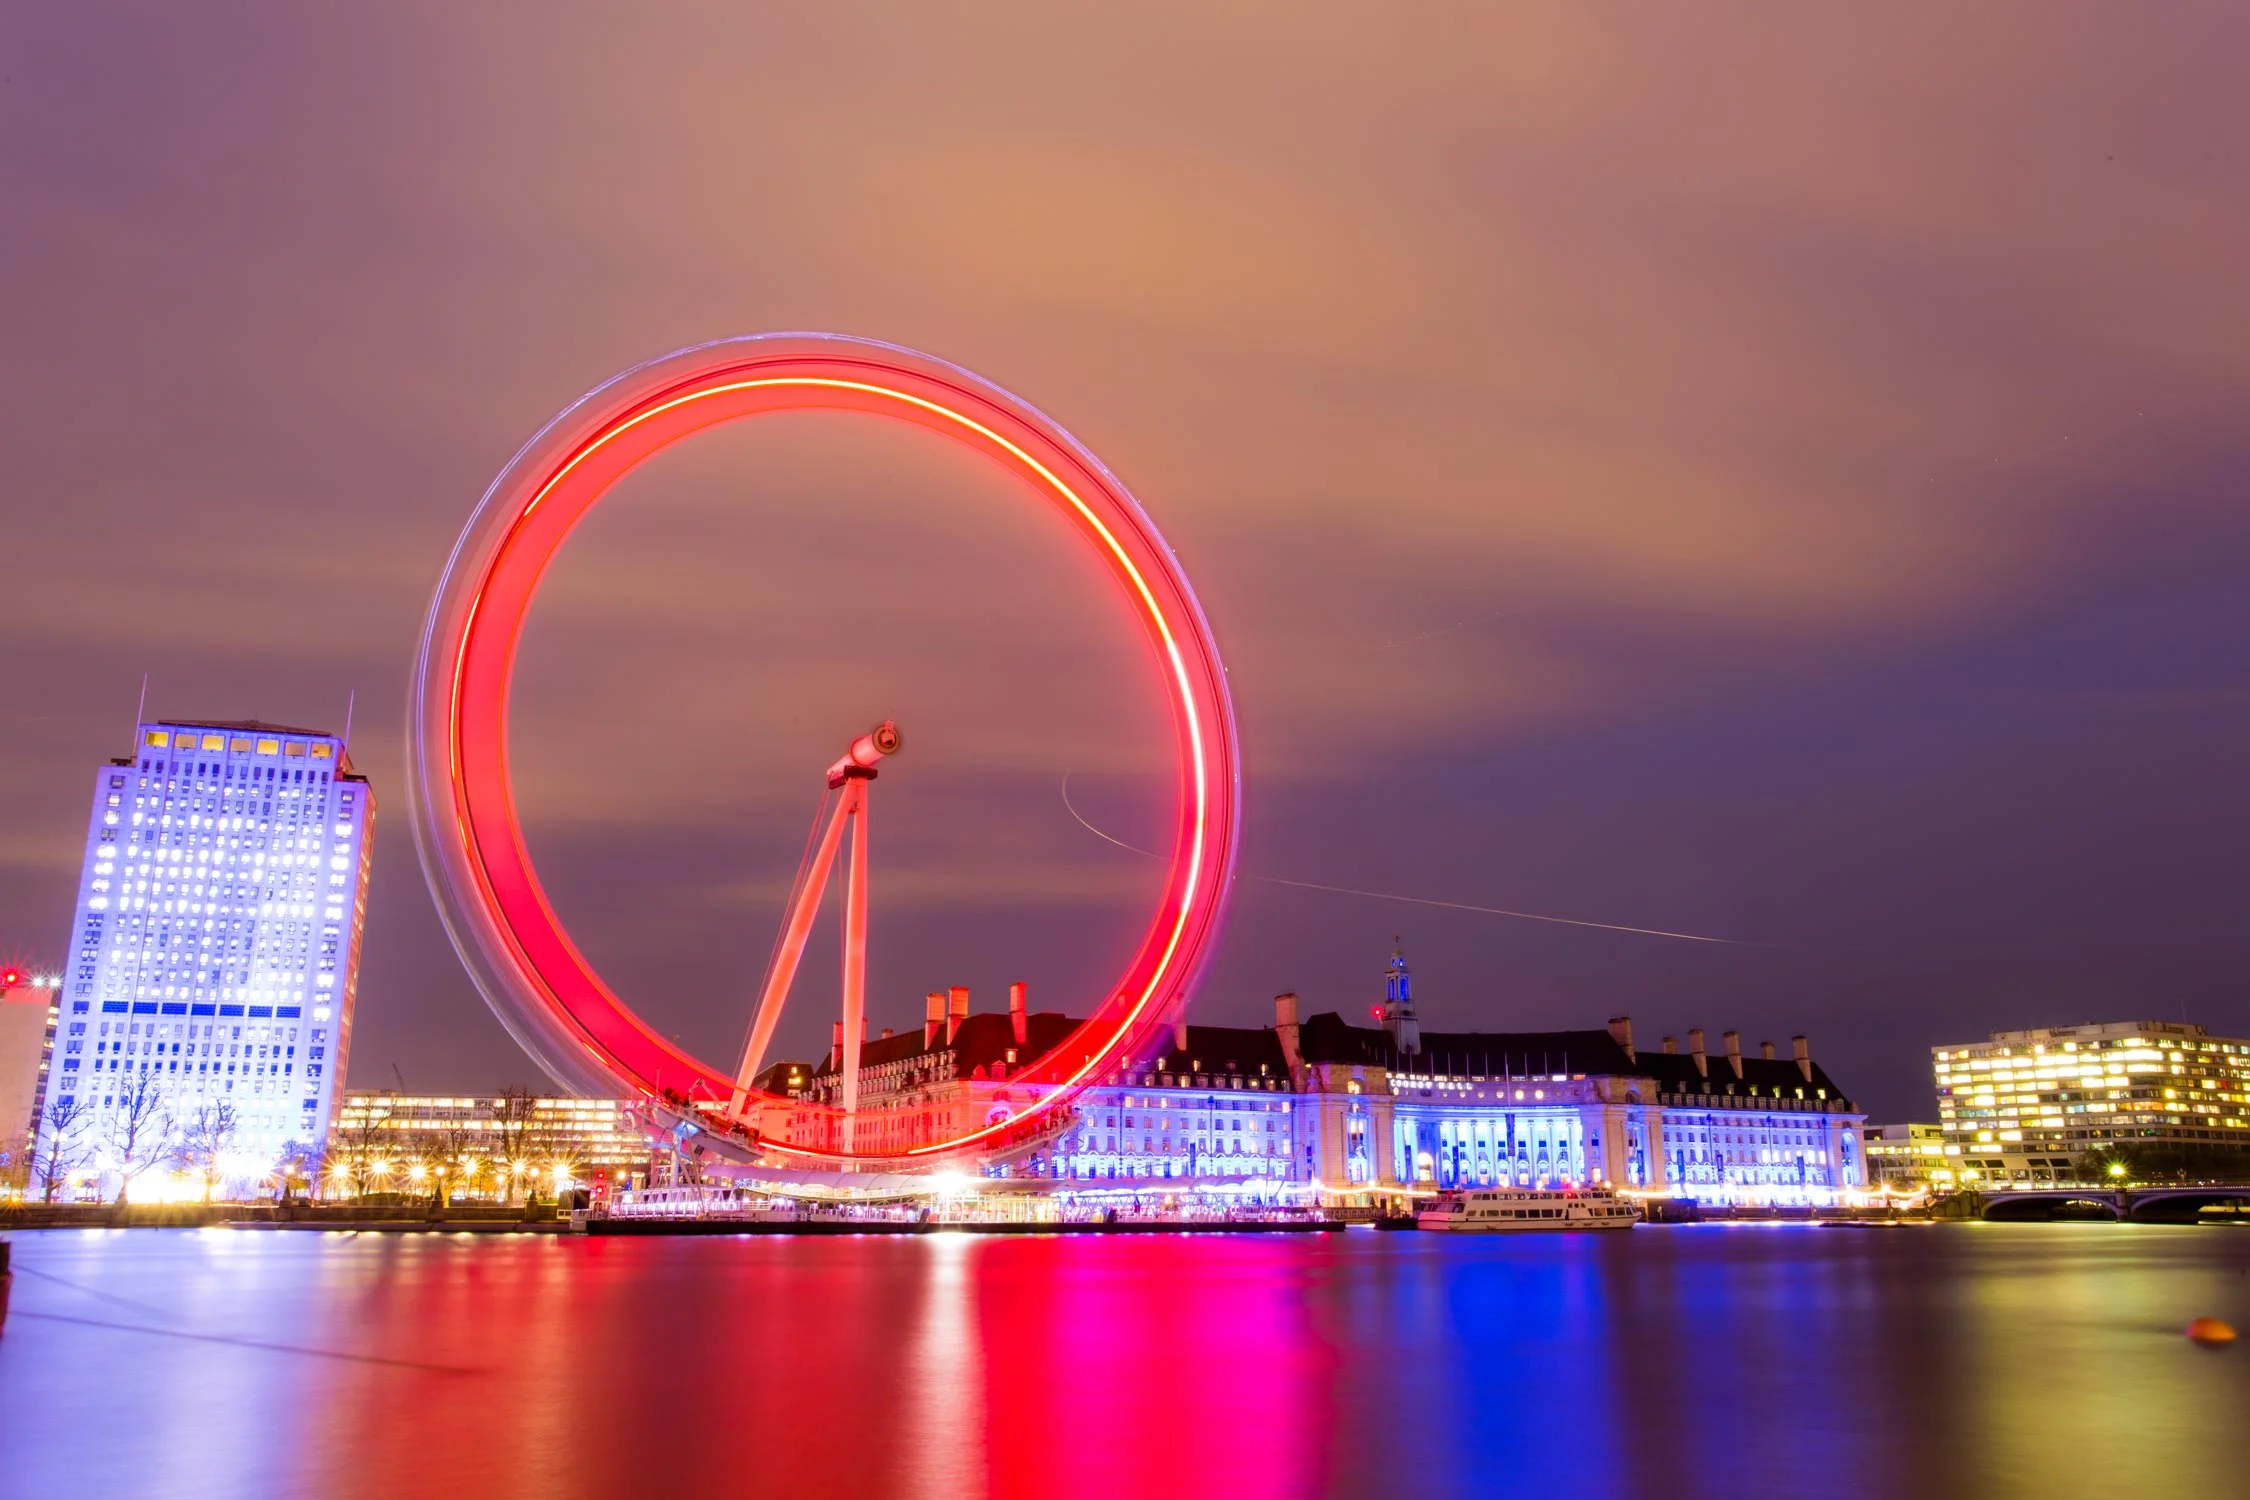
On my recent trip to London I had a very small amount of free time that I put to good use to head out and take a few shots around the Westminster area. This included a long exposure photo of the London Eye. Whilst it is not a totally unique shot, it is one I have wanted to capture for a while to have it in the bag.

Normally when shooting a long exposure I will use a 6 stop or 10 stop neutral density filter to cut down the light coming into my lens. It was already dark in this situation though so using the filters would have resulted in a very long exposure time when maintaining an low ISO. I therefore wanted the longest exposure I could get without the filters and this meant going to f/22 with the Canon 17-40mm lens. The exposure ended up being about 3 minutes which is enough to give the nice ring of light on the wheel and smooth out the River Thames.

I shot the image at 28mm. I would have liked a slightly wider composition but there were floating cranes at either side of me blocking the view.

In the video I put the long exposure image into Adobe Lightroom and go through the edit. The edit is very simple as we remain in Adobe Lightroom but you will be able to get a feel for the editing process I go through when I am in post-production. Hopefully you will be able to pick out what you like, and what you don’t like, and apply the techniques to you own images.

To have a go editing this image click the link below to download the RAW file. Feel free to use image for personal use, including printing. All I ask is that you credit me if you share it online.

Download RAW

If you haven't done so already, please Subscribe to the YouTube channel for new videos every Wednesday and Sunday.

Other videos:


How to Do Time Lapse Photography

Time-Lapse-Blog-Image.jpg

The amazing world of time lapse photography.

Time lapse photography is very simply a series of images taken of the same scene over time and then combined and speeded up into a video sequence effectively speeding up time.  The images are taken a few seconds apart so because time passes between each frame it gives the interesting animated feel that does not exist when simply speeding up standard video.

[embed width="" height=""]https://youtu.be/dH6F8SmbLog[/embed]

Time lapse photography is generally used in video work but can also be an extremely effective tool for photographers to add interest to their portfolio and grab the attention of viewers. Especially on services made for short videos like Instagram and Facebook. Video can make many photographers feel very uncomfortable. However they are well placed to produce great time lapse photography because they are created using a normal camera and requires photography skills such as capturing proper exposure and a great composition.

The only gear you will need is a camera and somewhere stable to mount your it.  A wall or the floor will work but a tripod is ideal. You will also need an intervalometer. Some cameras have this built in and others you will need a separate device. These are extremely cheap to buy online. The intervalometer simply fires the camera over and over again at a set interval.

To shoot time lapse photography you need to be in manual mode so the exposure remains constant throughout the final time lapse video. You will get better shots if you go somewhere interesting that includes a lot of movement. Cities work well with people and vehicles moving around for example.

[embed width="" height=""]https://youtu.be/Uih7uo8G2PQ[/embed]

To shoot your time lapse movie you must be in manual mode. Capturing consistent exposure on each image is vital to making your time lapse look realistic and authentic. Go somewhere interesting that includes some movement. Places like cities work well with lots of traffic and people moving around. Next you need to come up with a great shot bearing in mind you are creating a video. You therefore are composing a 16x9 aspect ratio image as opposed to the usual 3x2. You can use the cameras video mode to give you a better idea of the crop that happens at 16x9.

When setting your interval, five seconds between shots works well. If things are moving faster in your scene try something quicker like 3 seconds. We are creating a video file so you need to think about your video frame rate. I shoot most of my videos at 25 frames per second so when the camera has fired 25 images that will create 1 second of footage. My time lapses in this video are about 8 seconds long so included about 200 images.

The video shows how to put your time lapse video together in Adobe Lightroom and Photoshop so go ahead and give it a try for yourself. Get a FREE trial of Adobe Photoshop and Lightroom - Click here.

Subscribe to the YouTube Channel.

Music:

How to Do Mirror Photography to Capture a Next Level Selfie

Mirror-Photography-Blog-Cover.jpg

Take your selfies to the next level using mirror photography.

Photography in it's purest form often has a reputation for being very serious and stuffy. This is not always underserved given the behaviour of some photographers and the exclusive nature of the art world generally. Whilst I am super serious about my work, I also want it to be fun. I want to have fun doing it and sometimes I want the images themselves to be fun. There is no harm in this and a creating a interesting selfie using mirror photography fits the bill nicely.

In the video we go through how to shoot mirror photography and create an interesting and fun selfie. The video covers how to shoot the shot and then takes you through the relatively easy edit in Lightroom and Photoshop.

To get a FREE trail of Photoshop and Lightroom click the link below.

https://www.firstmanphotography.com/get/photography-plan

Shooting fun photography can be technically challenging and will teach you a lot. Learning the processes involved in capturing images like this mirror photography shot, can help you take your skills to the next level. Selfies have become the domain of smart phones but a good selfie will really make your work stand out from the crowd.

You can use the mirror photography techniques we go through in this video in a variety of situations and really let your imagination run wild. Imagine taking a full length mirror out into the woods and creating an effect where it appears you have stumbled upon the doorway to another dimension. It does not have to be a self portrait either. Employ a friend, a model or anyone else to feature in you image and you will have a lot of fun shooting it.

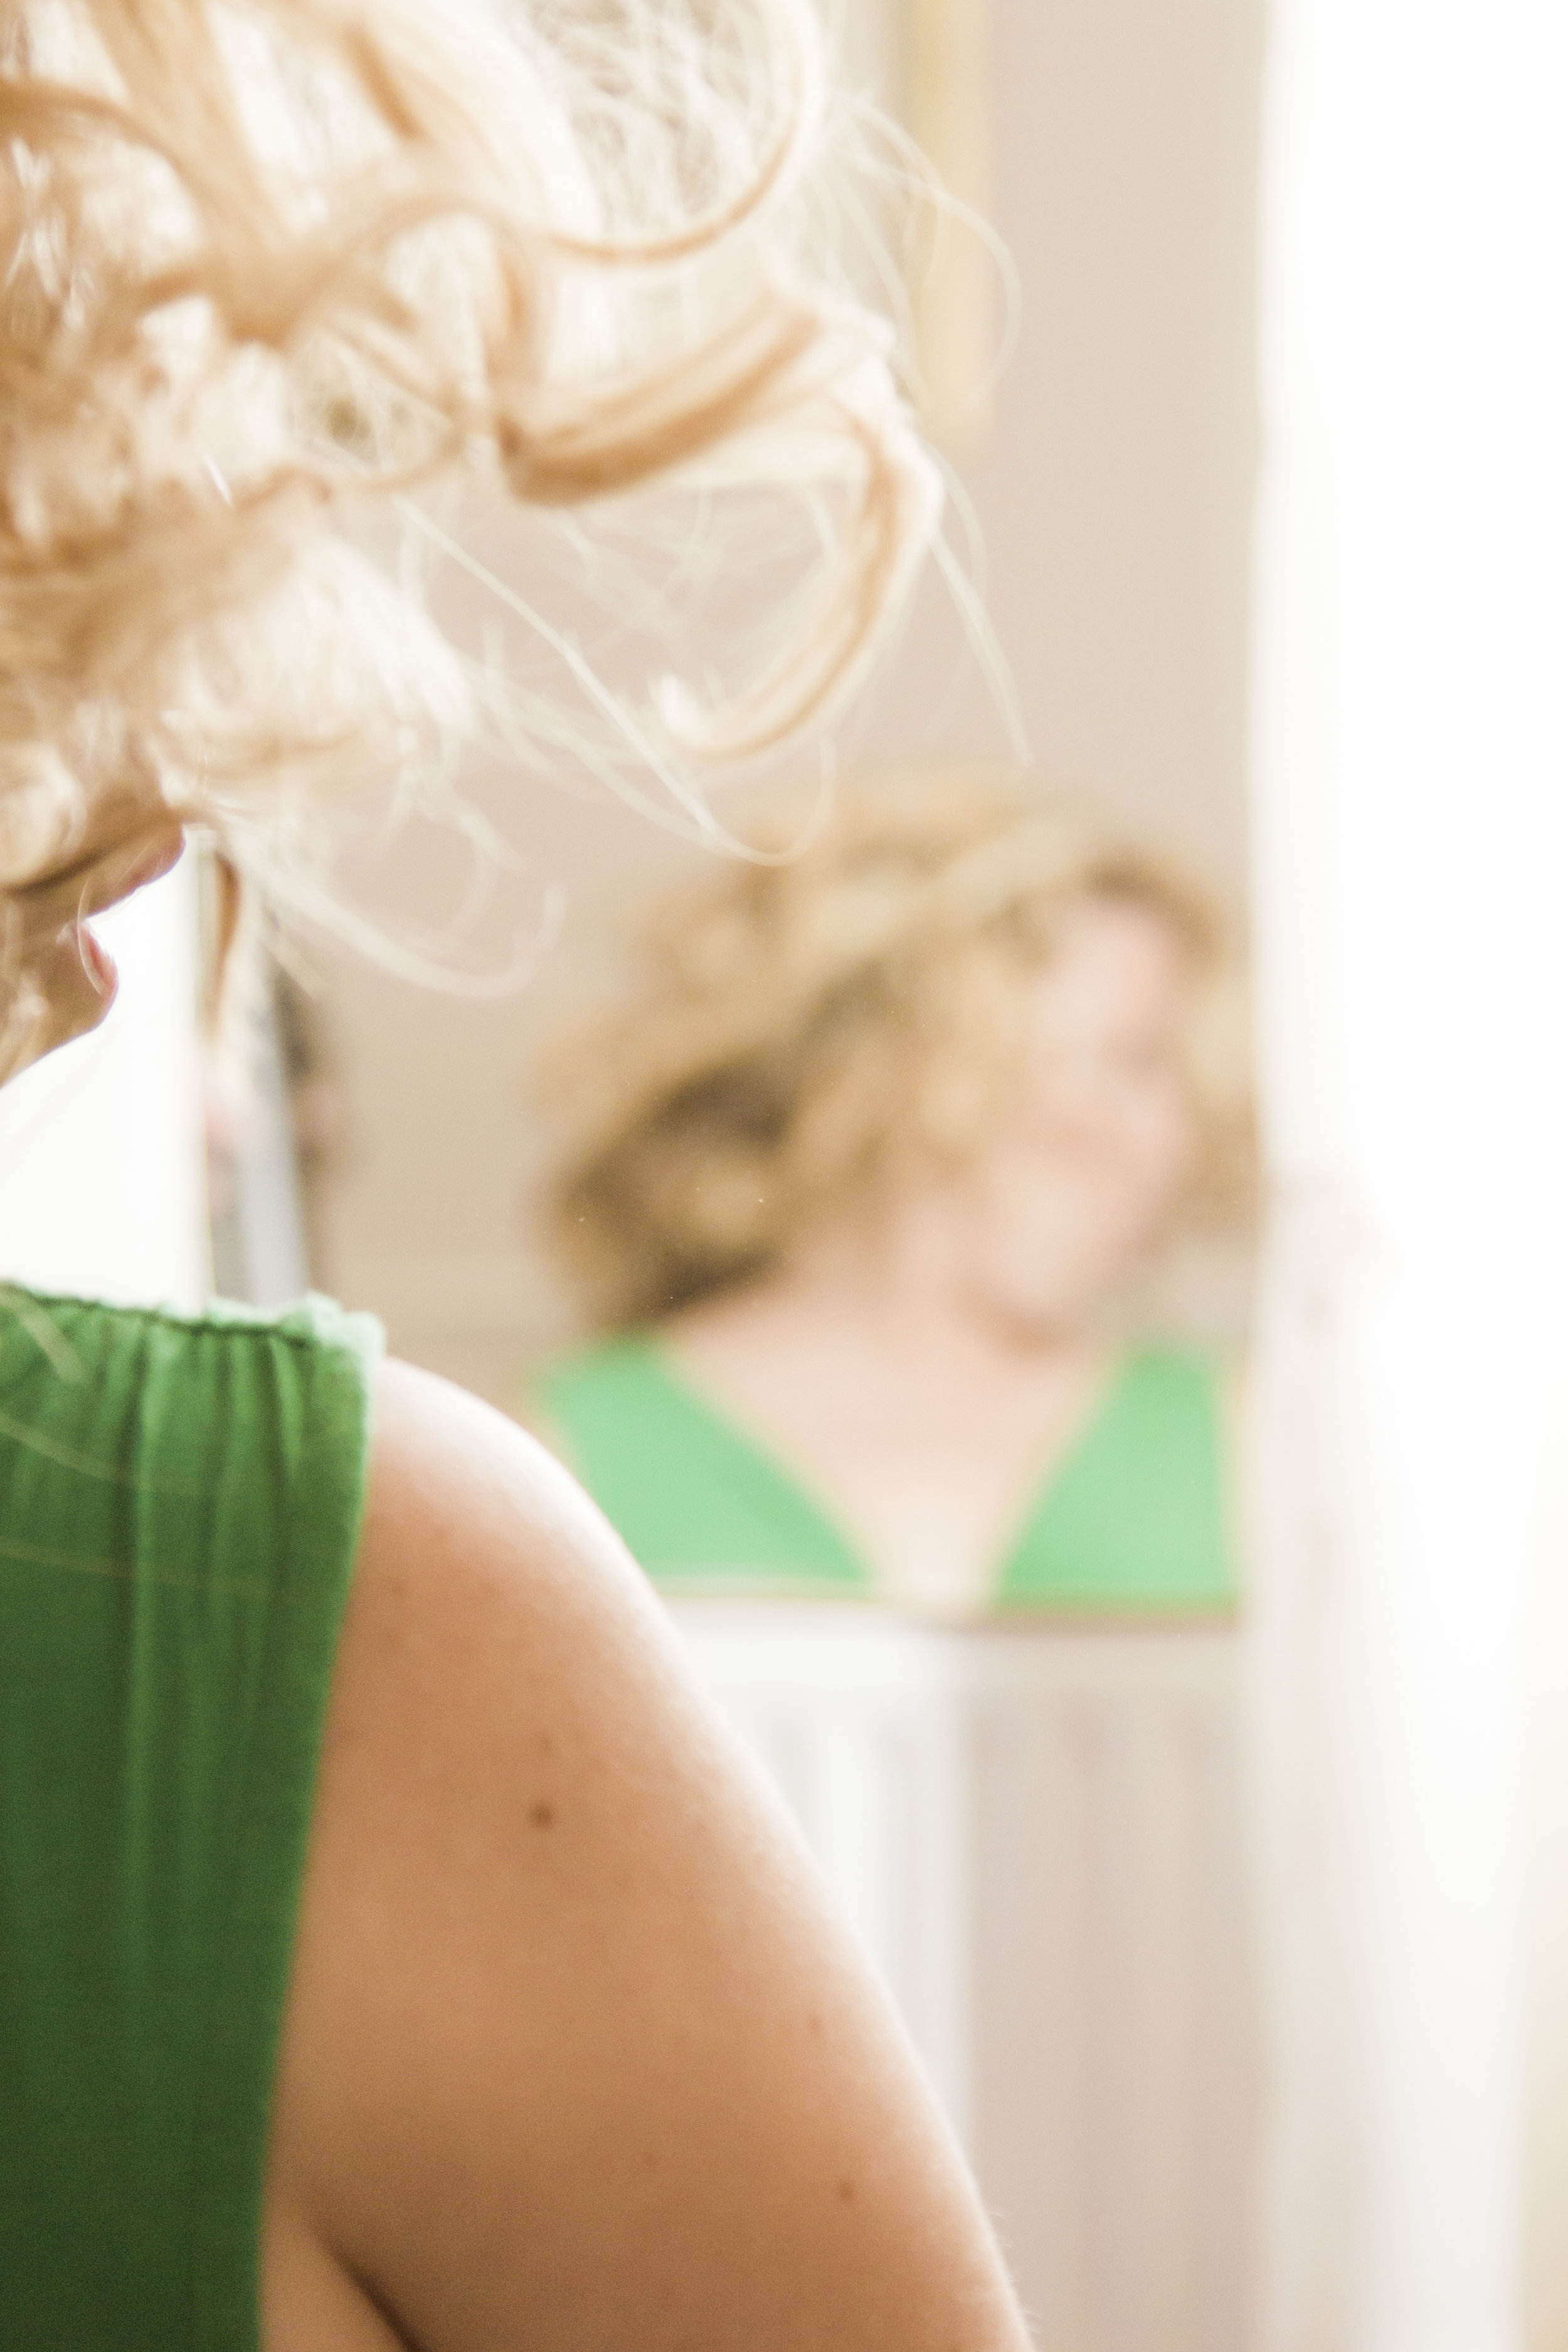
Using mirrors in your photography can work at other times too. For example, shooting the reflection of a bride getting ready for her wedding can add an element of creativity to a moment that is often shot in a relatively dull setting like a hotel room or living room. Just think about where you want your camera to focus. Sometimes you may want the reflection in focus and sometimes the subject themselves. These creative images will always lead to your work being noticed and, for most of us, grabbing the attention of the viewer is what we are aiming to achieve.

reflection photography

Whether you use mirror photography to shoot a creative selfie, add interest to an otherwise standard shot or use it as the theme to a photography project it is entirely up to you. Give it a go and let your creative juices run wild.

Subscribe to the channel. Videos go up on a Wednesday and a Sunday.

Other videos mentioned:

https://www.firstmanphotography.com/blog/5-reasons-photography-project

https://www.firstmanphotography.com/tutorials/how-to-remove-spots-in-photoshop

The Ups and Downs of the Photography Histogram

Histogram.jpg

Use the Histogram to take your images to the next level.

The Histogram is one of the most useful tools in Photography but is also little understood and often ignored. When used correctly it can help to take your images to the next level ensuring the exposure and contrast is the absolute best it can be.

Since the arrival of digital photography assessing your shot is an instantaneous event. Briefly looking down at the camera screen to check your shot is quick, easy and will give a good indication of the exposure and the quality of the image. This is a perfectly acceptable way of shooting. It is quick and effective in the vast majority of situations. When accuracy of exposure is your number one priority then reviewing the histogram and using a light meter may become essential.

The histogram is a mathematical measurement of the image you have captured. It can be used to accurately assess your image for exposure and contrast. The horizontal x-axis represents the tones in the image and goes from 0 - 255 where 0 is absolute black and 255 is absolute white. The vertical y-axis measures how much of each tone there is present in the image. If a tone goes off the chart it indicates that tone has clipped and detail will be lost.

In the video above I explain the histogram. We go through several images with different histogram readings explaining how to interpret them, what they mean and how images can be processed to maximise their potential. There are some occasions where the histogram is of less use such as high key and low key lighting setups and this is also explained.

The histogram serves little purpose to me when shooting. I shoot RAW so do not need to be 100% accurate with my exposure. My process is to estimate the settings I require based on the conditions I see with my eye, take a test shot, look at the screen and then adjust the settings and repeat if required. I generally get within half a stop of the correct exposure which can easily be corrected in post with virtually no drop in quality. Another option is to use a light meter and the histogram, but I value speed and time more than getting everything 'right in camera'.

In post-processing I use the histogram on virtually every shot. In Adobe Lightroom it sits nicely in the top right corner and I reference and look to it throughout my editing process. My main use for it is to ensure proper exposure and be certain of getting absolute black and white.

Shots that are properly exposed with good contrast, bright whites and beautiful deep blacks are the hallmarks of a photographer at the next level; someone who consistently produces beautiful images time and time again. A gallery made up of images created and developed in this way will stand out amongst many others and for most of us that is the attention we seek.

To get a FREE trial of Adobe Lightroom click here.

SUBSCRIBE to the YouTube channel now and follow me on Instagram.

Water Drop Photography Edit Session

Water-Drop-Edit-Session.jpg

Post-processing a water drop photography shoot.

In this video I go through the post processing of the images shot in the previous video where I cover how to use the SplashArt 2 water dropper to shoot water drop photography.

https://www.firstmanphotography.com/tutorials/water-drop-photography-splashart-dropper

Post processing or editing is a vital part of the photography process and when it comes to water drop photography things are no different. The process starts when importing the images to a computer. In the video I already had the images on the computer thanks to shooting the session with the camera tethered. This is an extremely useful way of shooting studio photography as it allows you to view the images full screen rather than relying on the cameras own screen. Instantly being able to see all the detail of an image is a clear advantage.

How to do water drop photography - https://www.firstmanphotography.com/tutorials/water-drop-photography

With the images already on the computer it is then a case of assessing the images and discarding the ones that are not useable or simply not to your standard. Adobe Lightroom offers a number of options to rank and rate your images. My workflow involves initially flagging the images I am happy with and then making a second pass to score the images using the star ratings. This quickly highlights which images from a shoot I will editing, speeding up my workflow.

I then enter into the editing process. With water drop photography, using Adobe Lightroom water drop images from the same shoot can be made to look very different. This comes mainly through the powerful colour adjustments that Lightroom offers when working with RAW images.

The video goes through the editing of the water drop photos with my editing techniques and workflow being explained. The workflow is very similar in any photo shoot so can be applied to almost any type of photography.

Get a free trial of Adobe Lightroom - Click here.

SUBSCRIBE to the YouTube channel and follow me on Instagram

Water Drop Photography - How to Use the SplashArt Dropper

Splashart-Video-Blog-Cover.jpg

Capture water drop collisions using the SplashArt Dropper. 

Water drop photography is a very popular form of photography thanks to the amazing moments in time that it captures. In a previous video I detailed how to do water drop photography using a basic setup with standard household items. The video also touched on how to use an electronic water drop system called the Splashart dropper.

https://www.firstmanphotography.com/tutorials/water-drop-photography

water drop photography


Since that video many of you have been sharing your images and have also invested your time and money into water drop photography and purchased the Splashart dropper. Following that there have been numerous requests for another video detailing how to use the SplashArt Drop System. This video answers that question.

The Splashart Dropper can be purchased here.

The system has a water bath that produces drops through a solenoid and nozzle. The release of the drops is controlled through an electronic control panel.

water drop photography

The SplashArt dropper uses an electric control panel that has four control knobs. The first knob controls the size of the first drop. The second knob covers the time between the two drops. The third controls the size of the second drop and the bottom knob controls the delay between pressing the activation button and when the camera is fired.

Whilst much of water drop photography is automated there is still a large amount of creativity and patience required. It is a matter of trial and error and the creativity comes from your composition, lighting, colour combinations and your post processing. Follow the link below to see how I post-process my water drop photography images.

https://www.firstmanphotography.com/tutorials/how-to-edit-water-drop-photos

If you are shooting water drop photography be sure to follow me on Instagram and share your images every Wednesday for #waterdropwednesday.

SUBSCRIBE to the YouTube channel and take your photography to the next level.

How to Rescue an Underexposed Image

Blog-Cover-2.jpg

Bring an underexposed image back from the brink.

Sometimes mistakes happen. They happen to the best of us. Imagine the scenario where you see an amazing photo opportunity, line up an incredible composition and pull the trigger knowing your shot is going to be great. You look down and are horrified to find the exposure is way off. This could be due to your auto/semi-auto exposure being thrown off or a mistake when shooting in manual. Sound familiar?

With the dawn of digital photography and RAW images we now have the ability to easily and effectively adjust exposure. If a shot is overexposed and the image is ‘blown out’ there is often nothing we can do to recover it. However if an image is underexposed you might be able to rescue it, even if you have missed by around 2 stops.

A question worth considering though is should we be rescuing images?

Many would argue you should capture everything correctly in-camera. Anything else makes you an unskilled heathen, unwelcome in photography high society for evermore. There is such as strange attitude towards post-processing at the moment where everyone is terrified an image may be misrepresenting a situation. Why is photography under such scrutiny when people believe a misleading headline or a five second video on Facebook without a second thought? We so often feel the need to justify our work with comments like ‘no major processing, just small contrast and saturation boost'.  How is this different? Who draws the line where an image goes from being enhanced to manipulated?

This argument is really a misunderstanding of what digital cameras do, whether they are a hardcore DSLR or an iPhone. If the camera is capturing JPEGs, then it is post-processing the image before you ever see it. They add contrast, saturation and sharpness on every single occasion so claiming you 'get it right in-camera' is not be the badge of honour people think it is. An unprocessed image looks like a RAW file image. Flat, with low contrast and very little sharpness.

RAW files capture a large amount of image data that allows a number of changes to be made and this includes a decent exposure range. In the video I show you how to rescue an underexposed image using Adobe Lightroom.

Whilst it is unlikely rescued images will end up displayed on a wall or in your portfolio, they still have a place. It could be an important moment in time captured or simply, an image to share online. Services like Facebook and Instagram compress images heavily and use low resolutions so detail of images often cannot be seen. Sharing your rescued images on these services is a very reasonable way to put extra content out into the world and continue to grow you audience.

So should you rescue your underexposed images? In answer - yes. It is not hurting anyone and it will be your audience who decide whether it is good or not. Personally, I give very little thought and time to those who are critical of my creative process. You are free to not enjoy my methods and my work as I am free to ignore you.

Get a free trial of Adobe Lightroom - Click here.

Follow me on Instagram and SUBSCRIBE to the YouTube channel.

What is the Difference Between Photoshop and Lightroom?

Difference-Between-Photoshop-and-Lightroom-2.jpg

One of the questions I have been asked the most is what is the difference between Photoshop and Lightroom?

Get a free trial of Photoshop and Lightroom by clicking the link below.

https://www.firstmanphotography.com/get/photography-plan

This is a very understandable question considering both programs now do many of the same things. These powerhouses of photography are now the stablemate of pretty much every photographer. If you are just getting started on your photography journey, understanding the difference between Photoshop and Lightroom will really help you progress and use the strengths of each application at the appropriate time.

For the rest of this post and video I will be assuming you are shooting RAW.  You should be in almost all circumstances.

Photoshop is your all out image editing application. It is a beast. It has multiple tools that allow you to edit and manipulate photographs providing a powerful suite of post processing features. It also allows you to create striking graphics, text effects and artworks from scratch that are used to create so much content everyday both inside and outside the world of photography. Lightroom lacks many of these features.

Lightroom on the other hand is purely designed for photographers. The program is designed to organise, edit and enhance your photographs and makes this extremely easy. Unlike Photoshop, it provides a workflow for your post processing from start to finish and includes a mobile app allowing you to work on the go.

Photoshop generally works by opening and editing a single image. Lightroom, on the other hand, lets you to flick through a catalogue of images allowing you to quickly edit and process a series of images. When working with RAW files both use the powerful features of Adobe Camera Raw. In Photoshop this appears as a standalone window where as it is deeply built into Lightroom.

Both applications work seamlessly together. If you start an edit in Lightroom you can move over to Photoshop to make more complex edits, for example, using layers. Save it and the image links back to Lightroom again for export and viewing. Lightroom has powerful export features allowing batch exports of multiple images saving photographers valuable time.

SUBSCRIBE to First Man Photography on Youtube for more Photoshop and Lightroom tutorials.

So which is best for you? Nowadays that is a pointless question. With the Adobe Creative Cloud Photography Plan you can have both for around £8.50/$9.99.  Just hit the link below and you'll get a 30 day free trial.

https://www.firstmanphotography.com/get/photography-plan

3 Steps to Better Photo Storage and Backup

Save the heartache and properly backup your photos.

It is astonishing in this day and age that the idea of backup is still just an afterthought. When you ask someone if they back up their files they casually say, 'no'. Then, noticing your astonishment, try and placate you saying, 'I've been meaning too'.

This is a serious problem. People are not just storing a few Selfies. People are failing to back up documents and files that, on many occasions,

their livelihoods depend on. For many photographers, enthusiasts and professionals alike, their photos and body of work is everything to them. For me, my photographs are my most valued possessions, unique pieces of work that are irreplaceable.  Losing them is unthinkable but sadly stories of such disasters continue to surface regularly.

All this potential heartache can be avoided by following the 3 steps to better photo storage and backup.

1. Camera Backup 

The first and very simple step is to backup the images on your camera. Many new camera's offer dual card slots offering a level of in camera backup but you will still need to transfer the images to a computer or laptop so do it as soon as possible.

If you're using good quality cards corruption is unlikely but theft and physical damage is still a risk at this stage.

There are numerous ways of transferring your files to a computer but I prefer to remove the card from the camera and plug it into a card reader. This removes the camera from the process and offers faster transfer speeds saving time.

2. External Backup

The key to this stage is to ensure you have two copies of all your files. If all your files are on your computer or laptop then you only need to back this up. However storing large numbers of photos, videos and other files takes up a lot of storage. It therefore becomes necessary to store your files on an external drive to free up space on your computer. If you then delete the files from your computer you need to backup the external drive. Ideally on another external or backup hard drive.

With a dedicated backup HD you minimise the risk to all your files stored on various other physical drives. Programs like Time Machine on the Mac and Acronis True Image make the process of backing up your files very easy. Point them to your Backup HD and they will backup your computer/laptop and all external drives. When you first do this, depending on the number of files you have, it could take a long time to transfer the files. However once complete continued backup will be much quicker as they only backup newly created files or those you have worked on and modified. Both programs give you access to previous versions of modified files offering a very powerful backup solution.

Also be sure that your Backup drive has the capacity to store all the files from your other drives combined. I use the Seagate 8TB External Hard Drive to backup all my files. This excellent and very large drive has the capacity to store more photos than you are ever likely to take but as we all start to shoot more video bigger drives, like this Seagate 8TB, are required.

Seagate Backup Plus 8TB – UK

Seagate Backup Plus 8TB – US

That takes care of drive failure but what about the horrendous situation of fire or theft?

3. Offsite or Cloud Backup

The third step is about ensuring your files are not only backed up but also stored for a third time in another physical location entirely. Now if I return from a holiday to find my house burned to the ground my files will not be lost entirely.

It now seems every tech company going is vying for our business in this space. Services like iCloud, OneDrive and Dropbox do a good job of backing up your mobile devices but can become expensive when backing up your entire computer. Services from Flickr and Amazon offer to backup  all your photos at a reasonable price but this can still leave your other files vulnerable, such as your Lightroom catalogue.

I am now using Backblaze after switching from using CrashPlan. It also offers encryption of your files and if you use your own encryption key even Backblaze themselves cannot read the files.

Backblaze is easy to use and is managed through a small, secure application that is installed on you Mac or PC.

Get a 15 day free trial of Backblaze now by clicking the link below.

Try Backblaze Free for 15 days

Your files are now digitally secure. There is however secret option number 4.

4. Print Them

Recently father of the Internet vint Cerf warned that the world is at risk of losing a massive piece of it’s history because it is all stored digitally. Whilst this would likely come about with some world ending catastrophe it is a good excuse to print more of our work. Do it, you won’t be sorry.

I have created the flow chart below as a reference when planning your backup solution. Feel free to download and share it.

backup

If you haven't done so already please SUBSCRIBE to the YouTube channel.

How to Add Vignette in Lightroom

How-to-Add-Vignette-in-Lightroom-2.jpg

Draw attention to your subject by adding a vignette.

To get a FREE trial of Adobe Lightroom Click here.

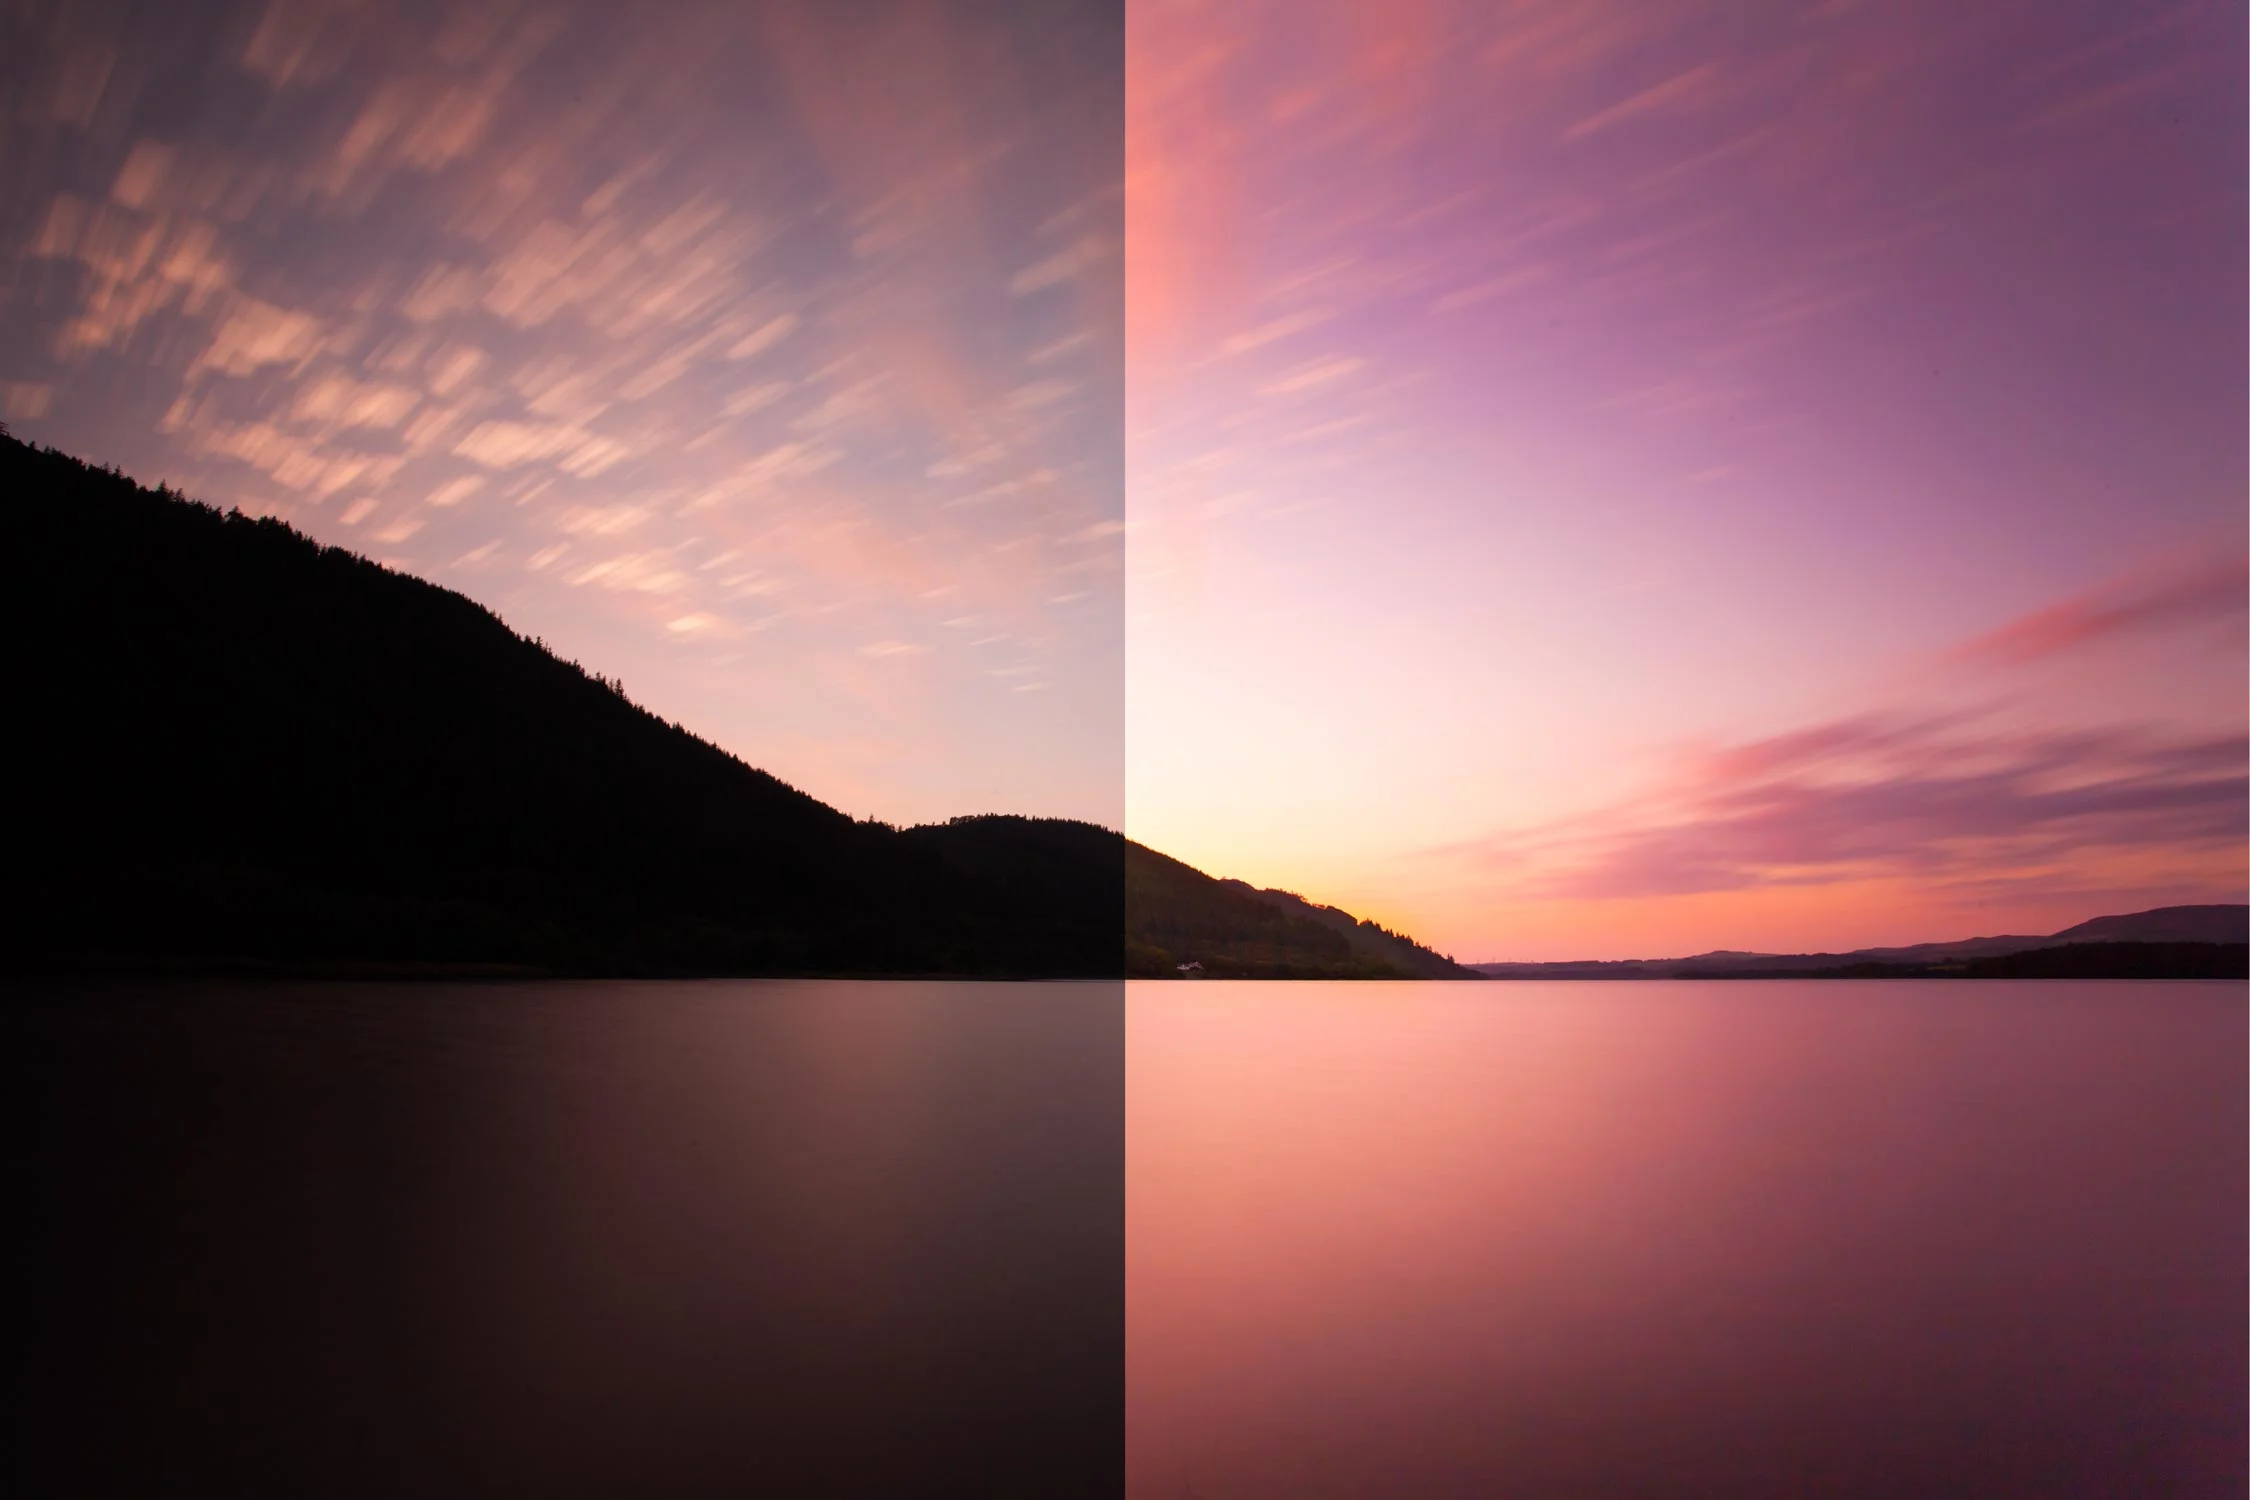
A vignette is the darkened area around the outside of an image. It is caused by the fall off of light from the centre of the frame as light is blocked inside the lens barrel. It happens naturally, often at wide apertures and particularly with prime lenses.

vignette

It is an effect that can be very appealing. It draws attention in towards the main subject in the centre of the frame and masks any distractions around the edges. It is particularly effective in portraits and is often used in wedding photography, placing the focus of the image directly on the happy couple.

When the effect happens naturally you may sometimes want to remove it if it was not part of your planned image. We have covered removing vignette in Lightroom previously and you can watch that here:

https://www.firstmanphotography.com/tutorials/remove-vignetting-in-lightroom

In this video we go through a quick edit in Abobe Lightroom to add a vignette to an image. We take a look at three different types of image to give an idea of how the effect can work in different scenarios.

To add a vignette, load your image into Lightroom and then open the image up in the develop module. Navigate over to the adjustment panel on the right hand side and scroll down to the effects panel. Open this up and then you should see the post-crop vignette section. Drag the slider to the left to add a vignette. The other sliders control the, feather, roundness and midpoint of your vignette.

It is important to edit your image first and add the vignetting at the end of your edit after you have finished cropping. Otherwise you may crop out some of the effect. It is also the kind of effect where less is more. Aim to achieve nice natural looking vignettes that do not overpower your image and achieve the goal of focusing attention onto the subject in the centre of the frame.

Follow me on Instagram - http://instagram.com/adamkarnacz

Landscape Photography Editing - Fine Art Landscape

fine-art-landscape-editing-video-cover.jpg

How I edit a fine art landscape.

In this video we go through the editing techniques and post-processing to create a fine art landscape using Adobe Lightroom.

To get FREE trial of Adobe Lightroom Click here.

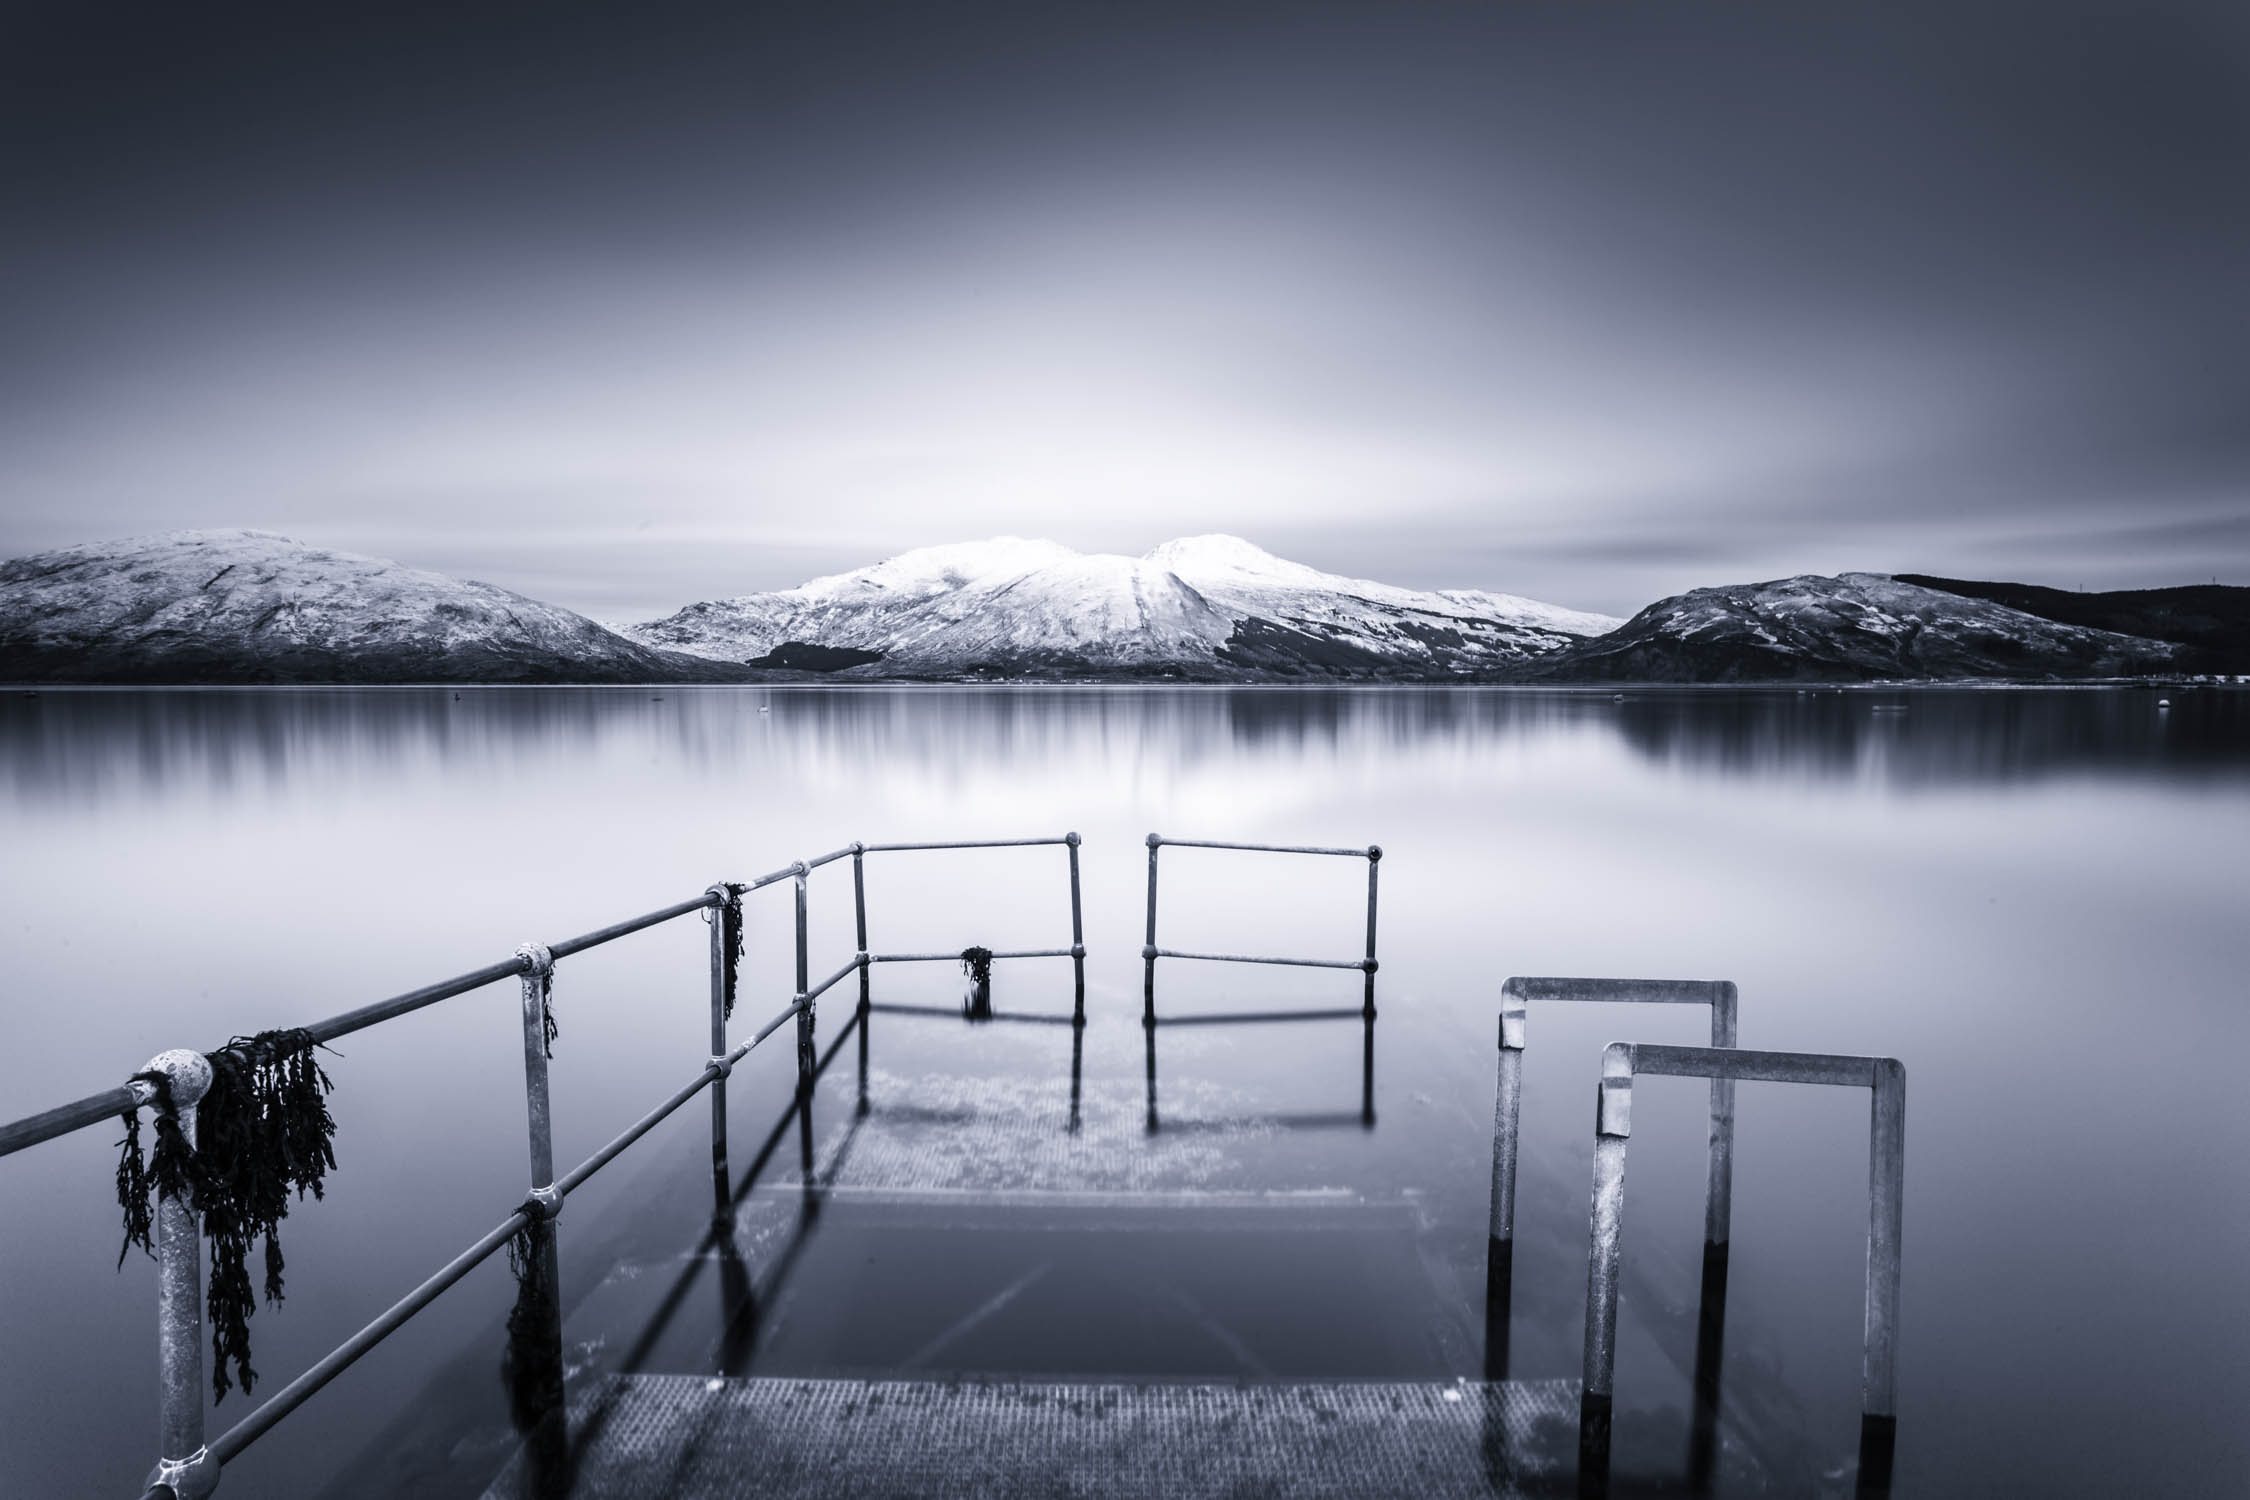
This video has come about thanks to the suggestion of a valued subscriber who asked me to go through the post processing of some images. Happy to oblige I went through the edit of one of my recent shots taken whilst in Glenelg on the West Coast of Scotland. Since we have been on a landscape theme recently I thought some landscape photography editing would be a good place to start.

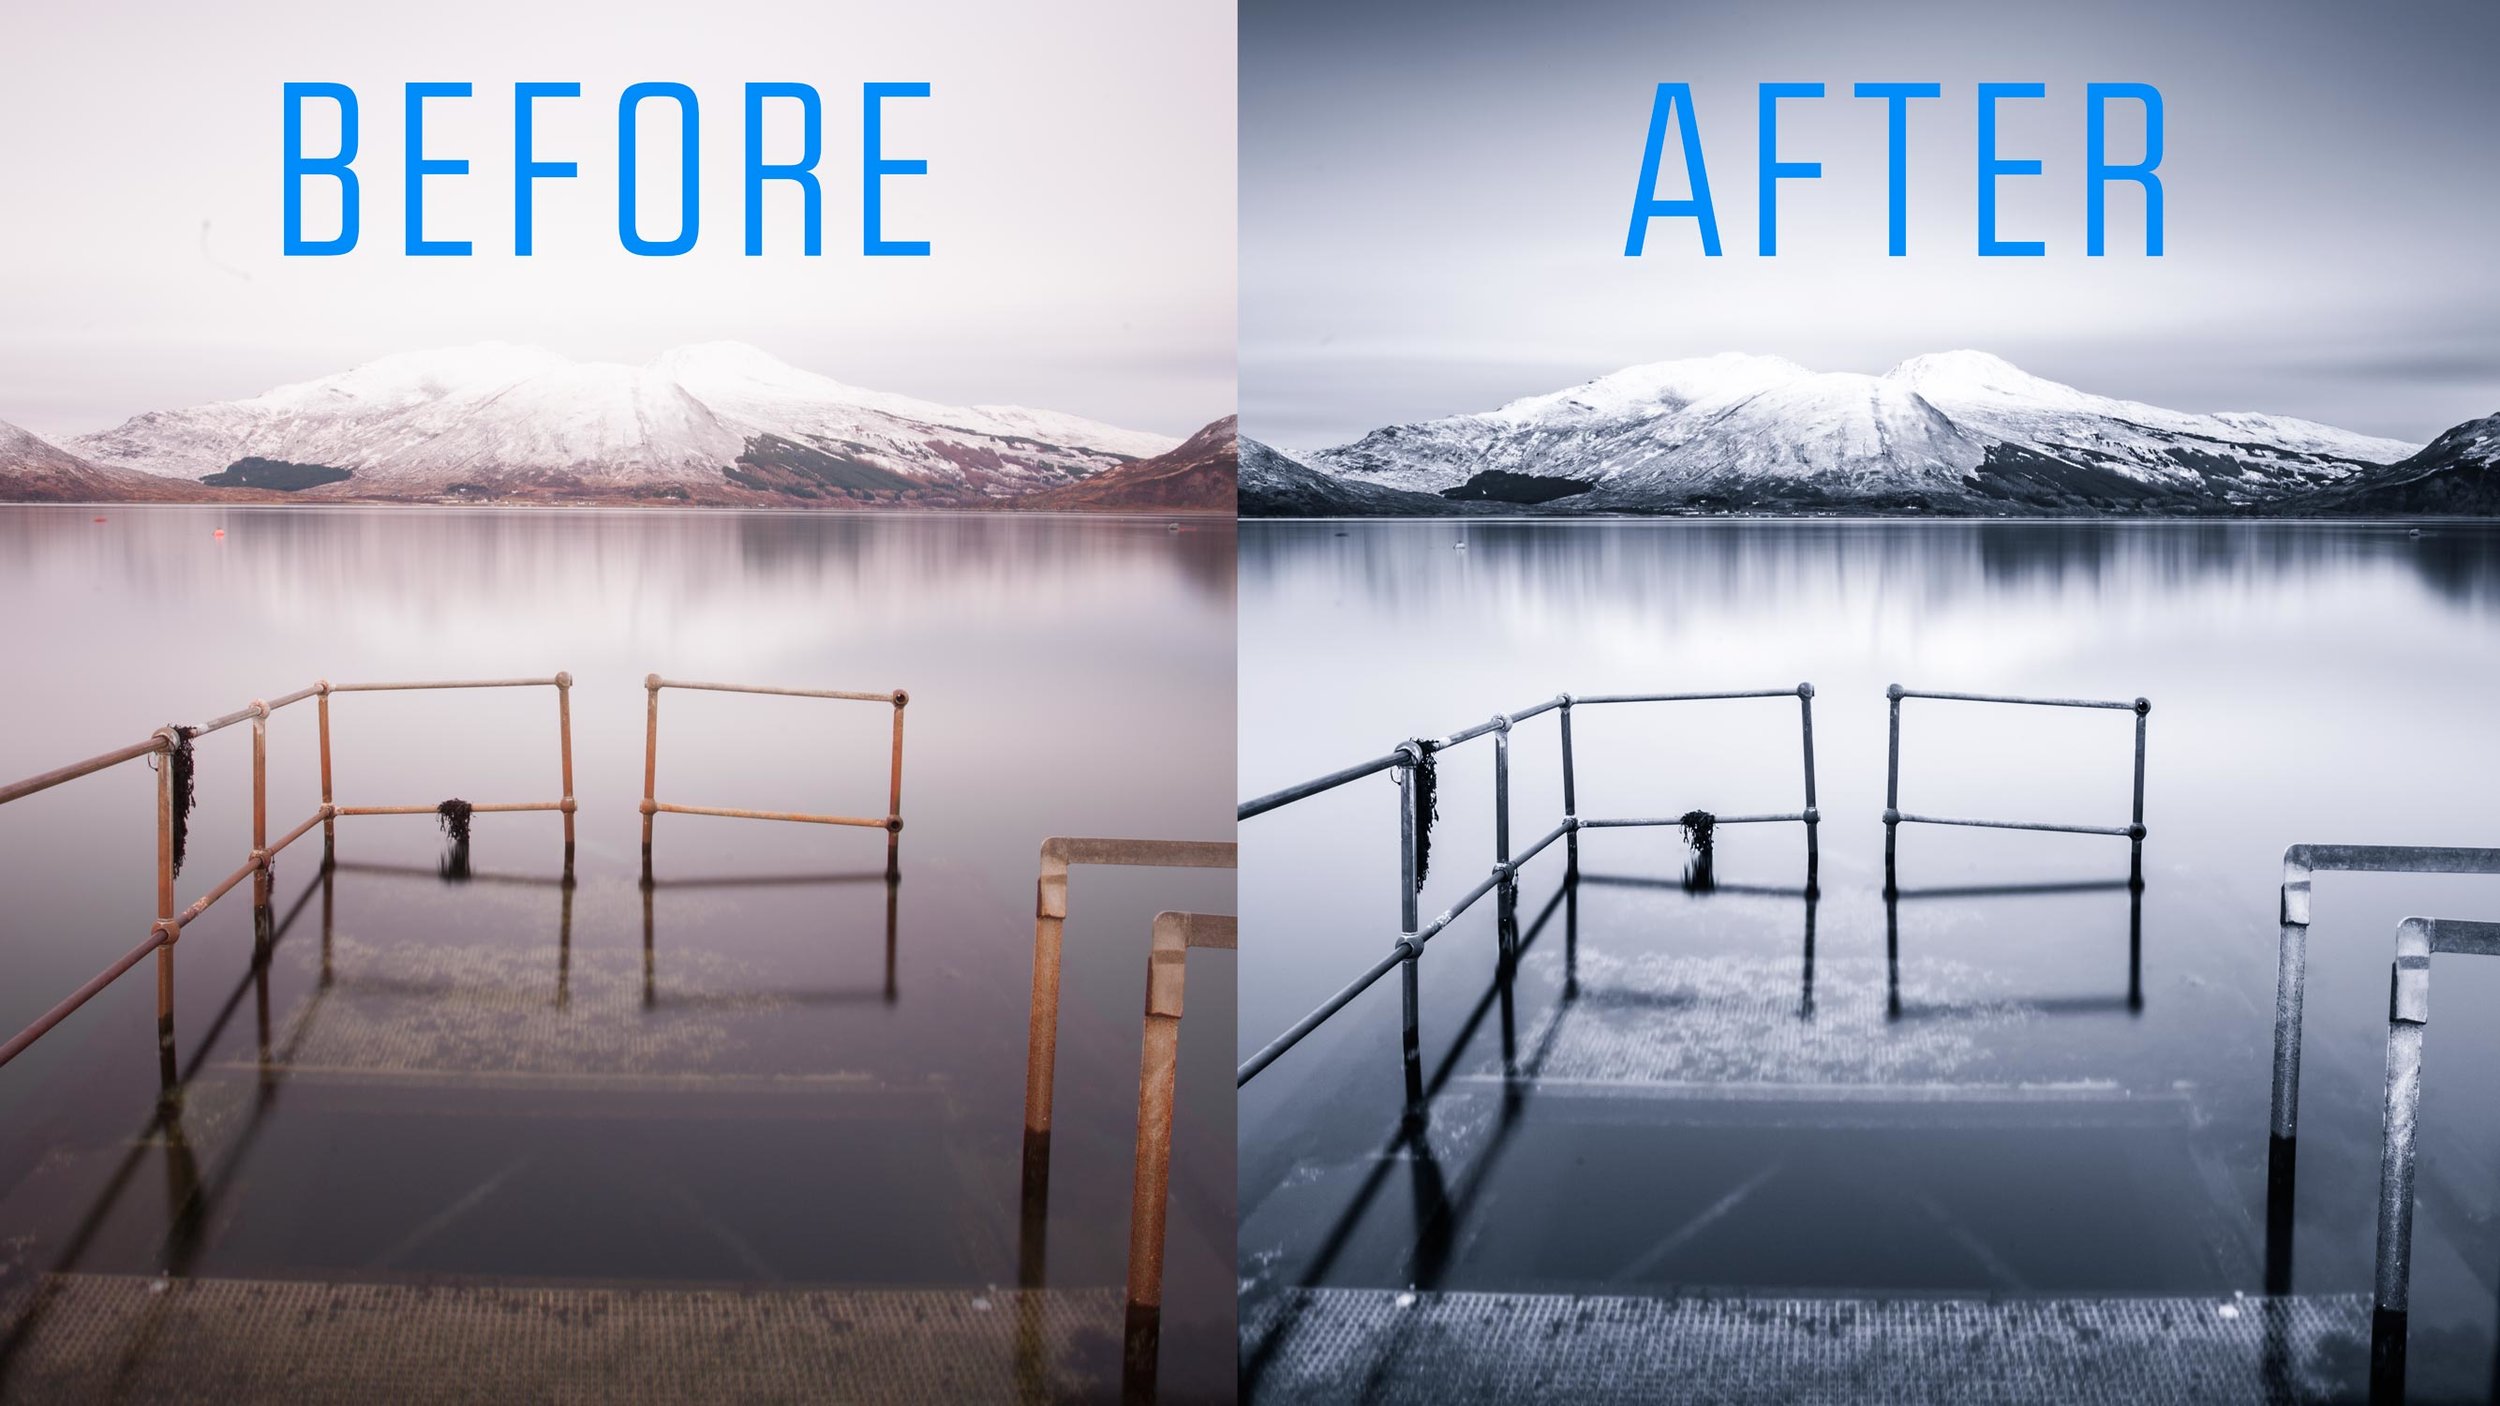
With the conditions I was faced with on the day, the scene immediately screamed black and white. I went ahead and shot a four minute long exposure, planning to turn the image into a fine art landscape photograph. Long exposure lends itself very well to fine art photography.

The fine art landscape editing is done purely in Adobe Lightroom although the final touch is added using Silver Efex form Google's Nik Collection. This final step does not feature in the video as I will be creating future tutorials covering this.

The image used was shot in raw. We go through all the steps and sliders used in Lightroom to post process the image and complete our fine art landscape edit.

During the post processing we use a software version of the ND grad filter and use this to bring out some detail and drama from the sky. This is a very effective landscape photography editing tool and is starting to render the physical version of this filter useless. See my recent video discussing camera filters.

If you enjoy the video and find it useful please let me know and I will make photography editing videos a regular feature.

Follow me on Instagram - http://instagram.com/adamkarnacz

Subscribe to the YouTube channel - Subscribe Now

Camera Filters - Do We Need Them on Our Lens?

lens-filters-2.jpg

The Truth About Camera Filters

In this video we take a look at various camera filters and whether you actually need them.

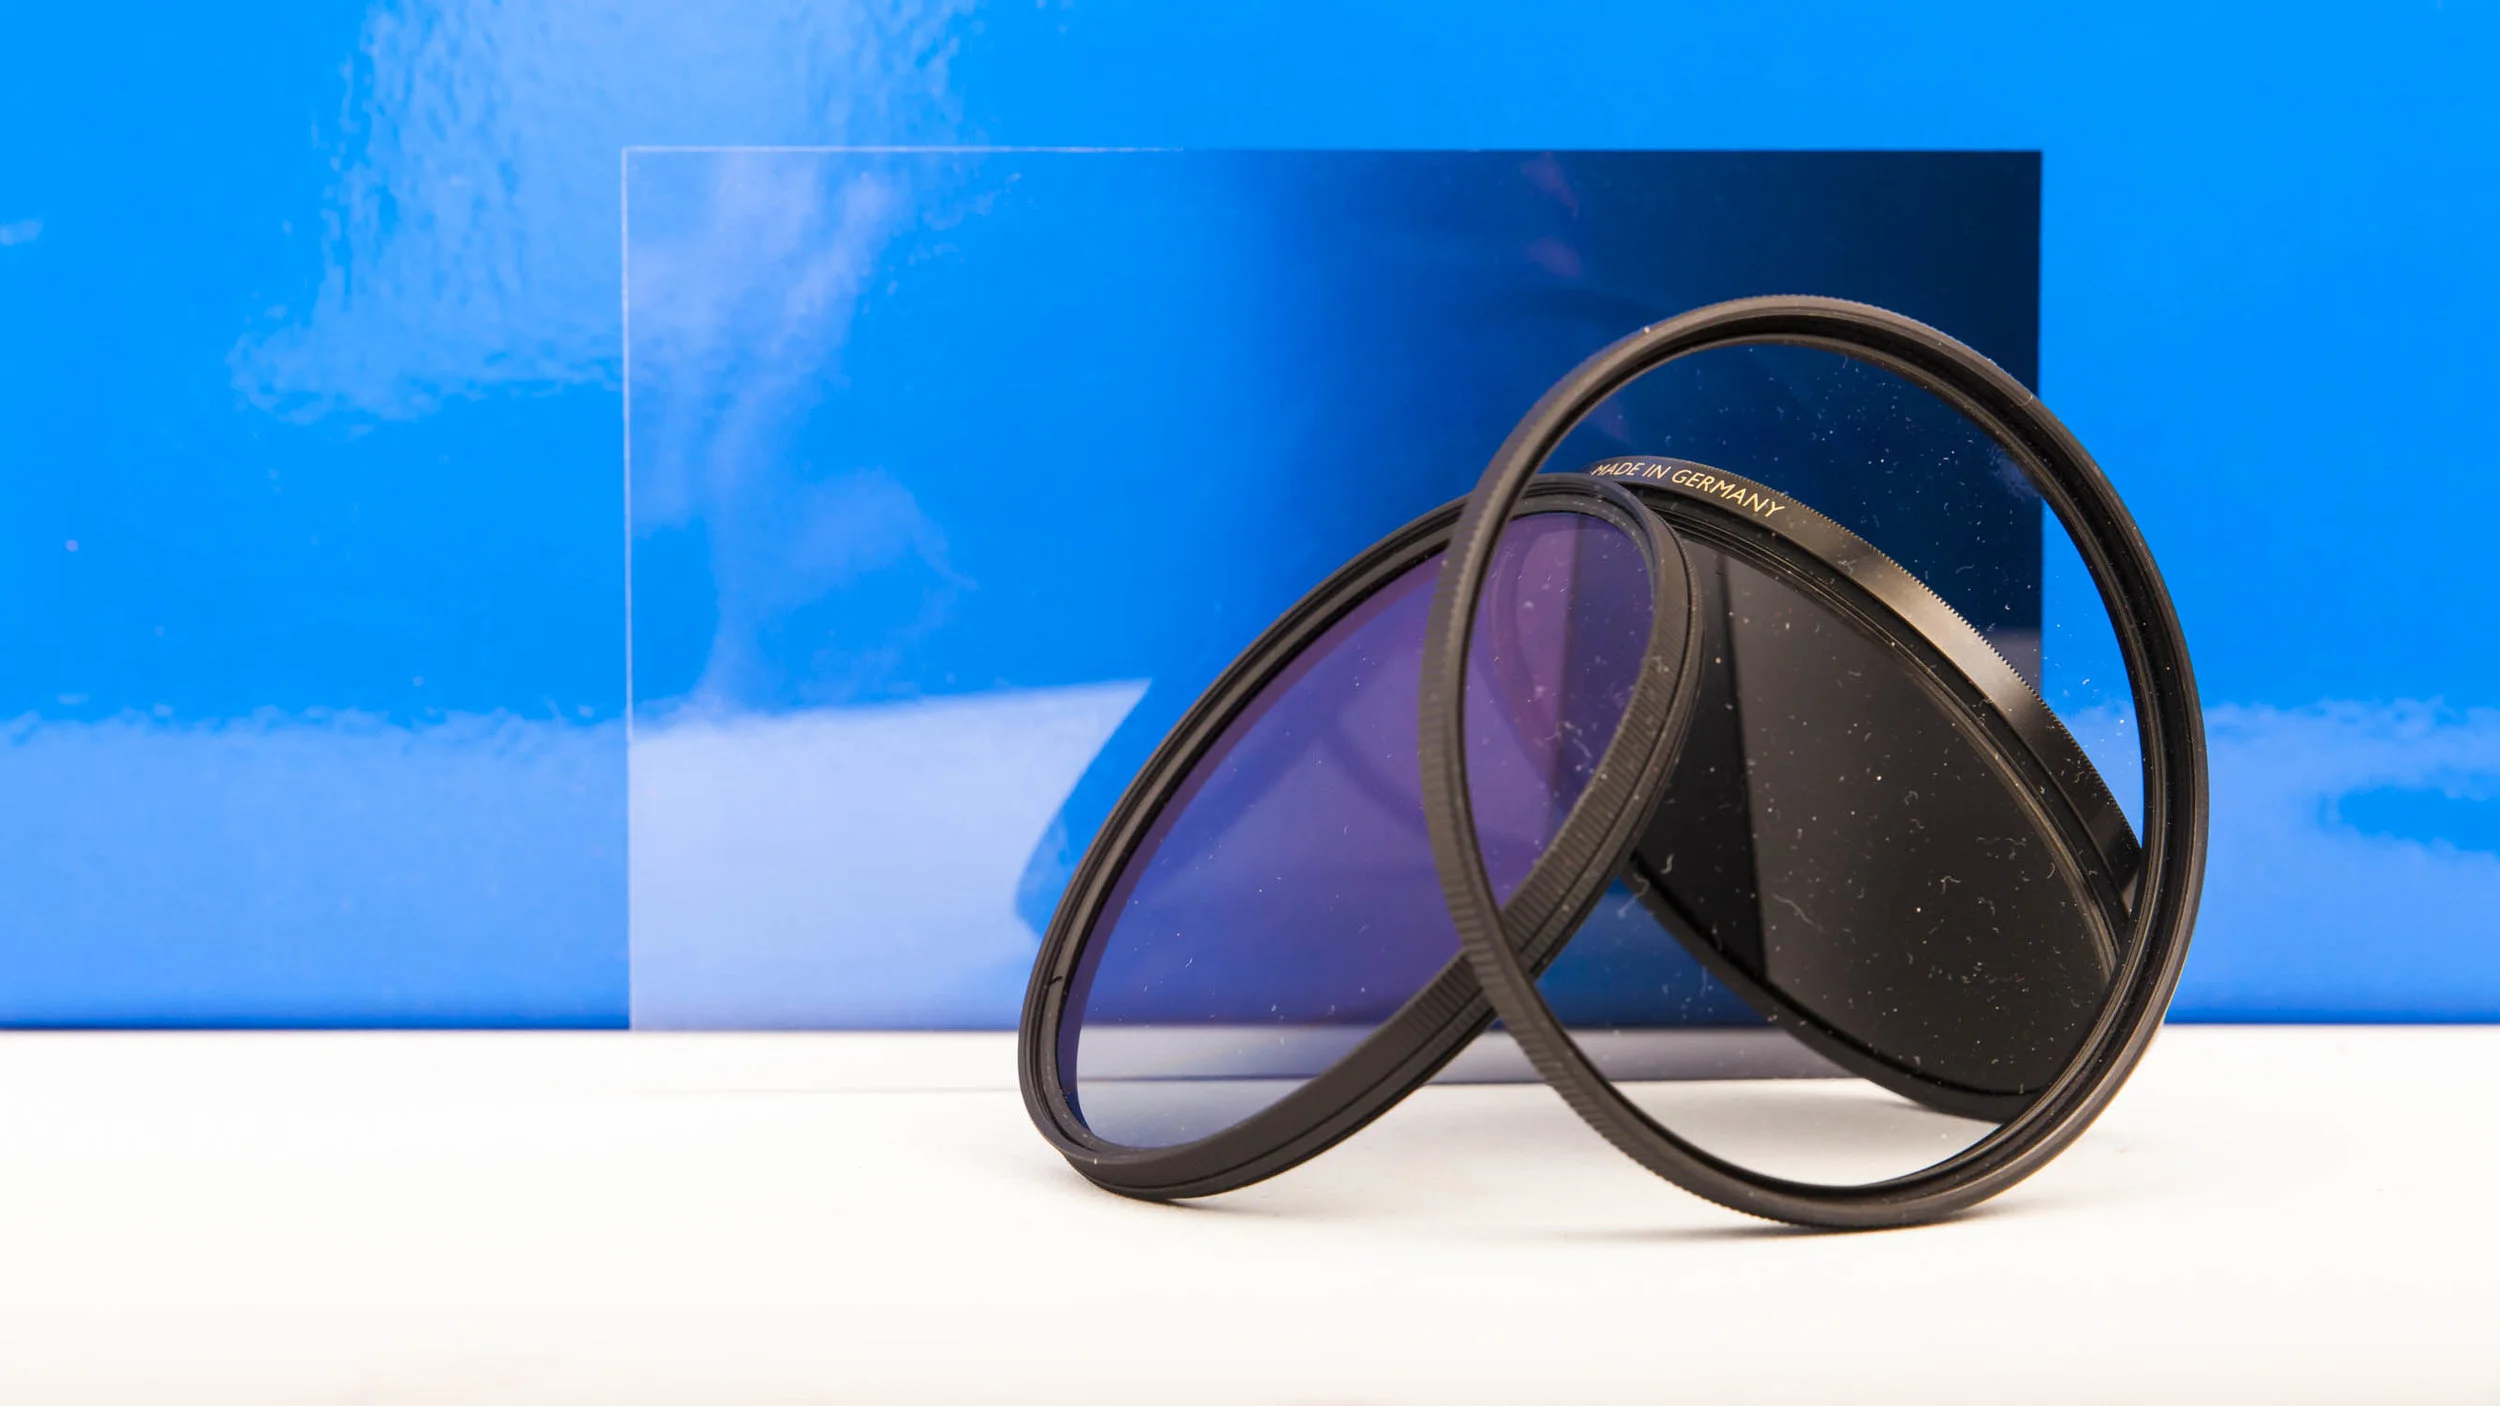
There are many kinds of filters in photography from those we put in front of our lens to software effects in Photoshop and filters on Instagram. They all in some way manipulate our images so accusations of 'cheating' from purists about filters added in post-production I find tiresome. Here we look at the most popular physical filters, talk about how they are used, whether they are needed and discuss any software alternatives.

UV Filters

These are probably the most common type of camera filters and screw to the front of your lens. They claim to block out UV light that can be detrimental to your image. The truth is they are a relic of the film era where film was susceptible to UV light and caused your image to appear hazy. Digital sensors on the other hand do not suffer this problem so the filter may only serve to worsen your image through a slight reduction in contrast. The main reason they are still used however is to protect the expensive piece of glass it is attached too. This is really a personal choice so if they bring you piece of mind, go ahead and use them.

Neutral Density Gradients (ND Grads)

It is possible that ND Grads and filter systems such as those from Lee and Cokin were designed purely to give landscape photographers a sense of superiority and smugness that would intimidate other photographers into never taking another landscape shot again. In reality they are used to balance the exposure between the sky and the rest of an image as the sky is generally much brighter than the ground. The difference is usually anywhere up to around 2 stops. There are hard gradient versions and soft gradient versions and which one you use will depend on how defined your horizon line is.

Whilst the effect these camera filters produce is essential in the majority of landscape photographs, the physical filters themselves are not. They are generally large, clunky and difficult to use along with being expensive. Although you can attach them to different lenses with an adapter, they do not scream versatility and ease of use. With the ever increasing dynamic range of modern cameras it is rendering ND grad filters pointless. The effect can be added very quickly in Lightroom bringing out all the detail of a bright sky or darkened foreground as a long as you shoot in RAW.

Neutral Density Filters

Neutral density camera filters are used to reduce the amount of light coming into the camera by allowing us to use a longer exposure time, or a wider aperture, where otherwise it would be over exposed. ND's are used in video to allow large apertures in very bright conditions to ensure you still get a nice blurred background for you shot.

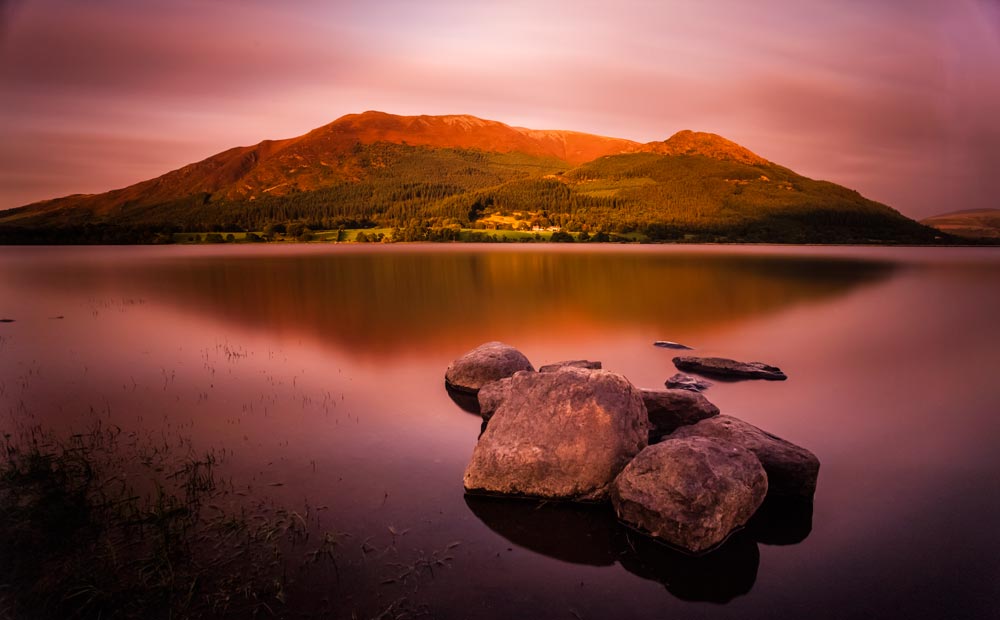
With stills they allow us to use long exposures to smooth out water or show movement in the image.  They vary in strength and filters like the 10 stop 'big stopper' allow for some extreme long-exposure photography. There is currently no way to imitate the effects of these filters in software so they remain vital in many photographers camera bags.

See how to shoot long exposure landscape photography.

Circular Polarisers

Circular polarisers are used to darken and saturate skies and remove harsh glare from water. It does this using science that you can read about elsewhere but the intensity of the effect can be controlled by rotating the filter.

It is a pleasing effect that is not easily added in post-production so remains useful in certain conditions. If there is no blue sky and no reflections or glare then it will serve no purpose other than reducing your exposure by about 1 stop.

Many of these filters can be combined and screwed together to achieve several of the effects in one shot. Just be careful when using extremely wide angles though as the camera might 'see' the edge of the filters creating a very harsh vignette in your image.

Filters can be an expensive addition to you camera bag. Before buying, decide what type of effect you want to achieve and tailor your purchase to this. Personally I shoot a lot of long exposures so ND filters spend a lot of time on my camera. I use circular polarisers now and again and increasingly leave the ND grad system and UV filters at home.

Buy a Big Stopper now - Hoya 77 mm Pro ND 1000 Filter

Follow me on Instagram - http://instagram.com/adamkarnacz


Macro Photography - The Complete Guide

Macro-Advanced-2.jpg

The ultimate video guide to macro photography.

This series of macro tutorials takes you from a basic macro setup, through to a more advanced setup. It concludes by delving into the complex work of macro focus stacking. Also included is a water drop photography tutorial. This is a practical and extremely fun use of macro photography.

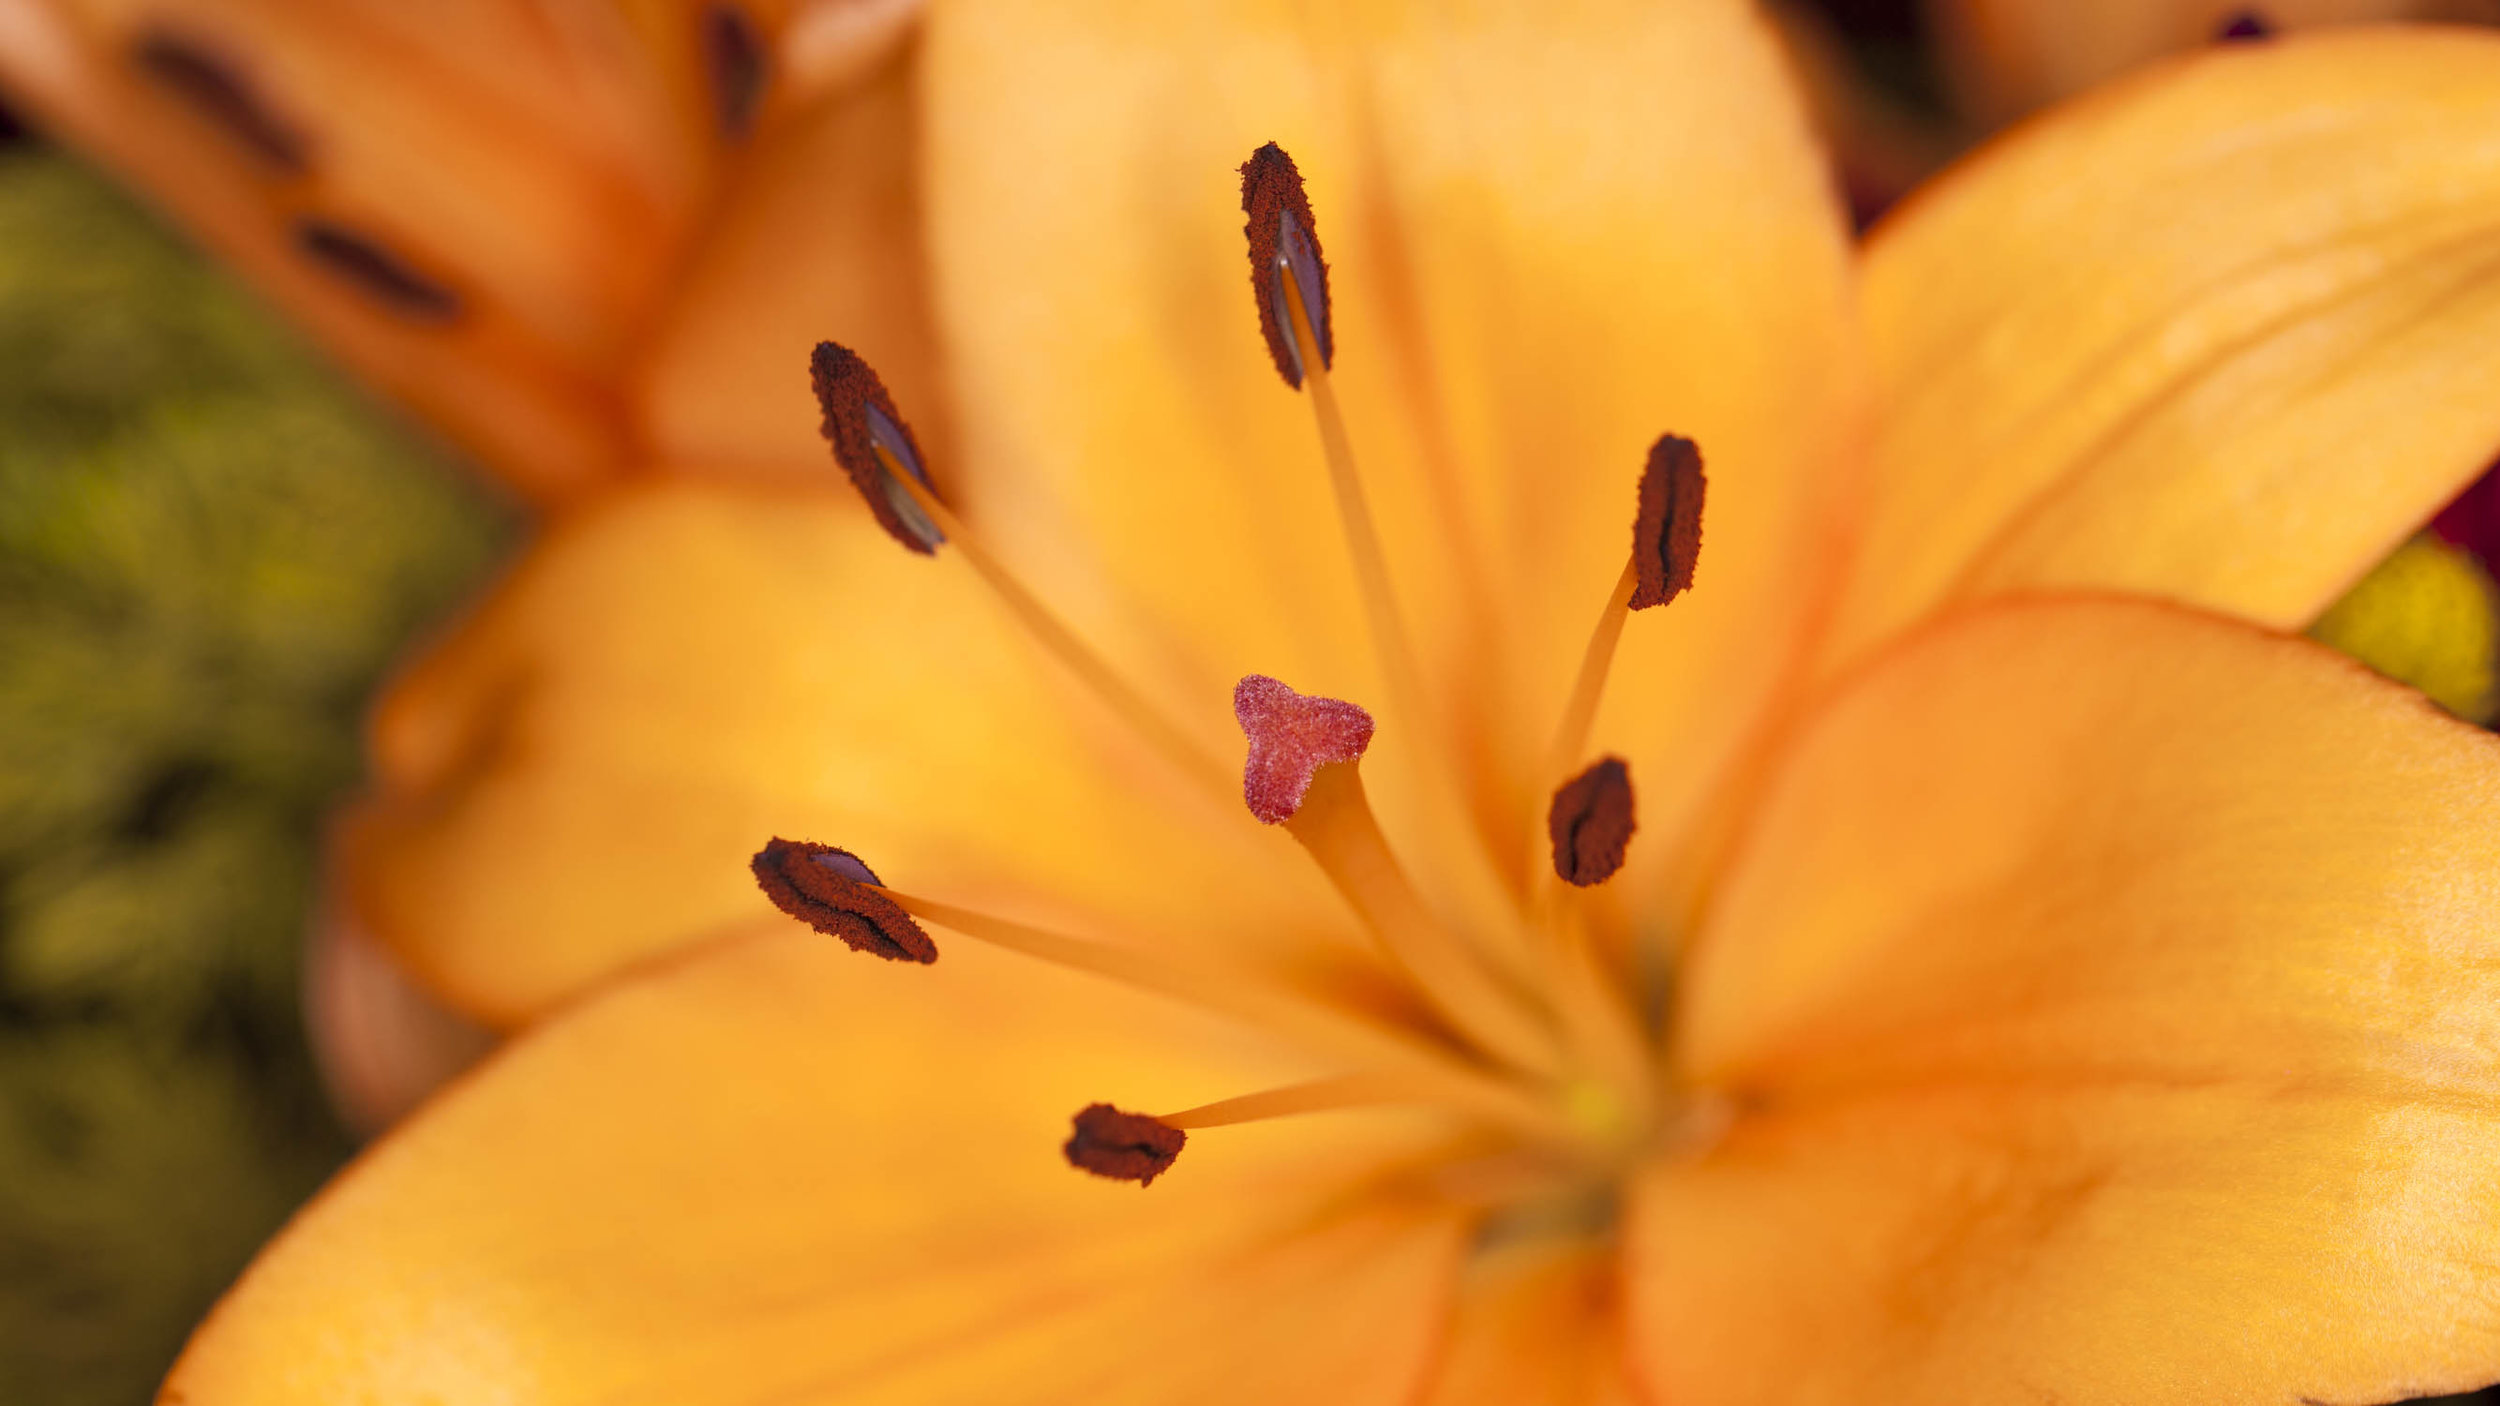
Macro photography is an exciting area of photography and is accessible to all photographers. There is something suitable for all budgets and skill levels. It is all about getting close up, magnifying the small and blowing it up to a larger than life size. We do this with the power of our lens and camera.

The first video covers shooting macro photography on a budget. We use cheap gear like a standard kit lens, macro reverse ring and extension tubes. This introduction is the place to begin if you are entering the world of macro photography for the first time.

The second video features a more advanced macro photography setup. It includes the use of a dedicated macro lens, macro flash, tripod and off camera flash. The better quality gear and increased skill levels will allow you to capture beautiful images in uncountable scenarios. Everything from a dragon fly hovering above a leaf, to a cool close up of a Star Wars lego character.

The third video covers the complex world of focus stacking. This area of macro photography overcomes the very shallow depth of field often associated with high magnifications. It allows us to capture amazing images with sharpness from front to back. The video includes shooting the images and the post-processing in Adobe Photoshop.

If you enjoy the guide please Subscribe to the YouTube channel to enjoy all the First Man Photography content as soon as it comes out. Please support me by using the links below if you decide to purchase any of the gear featured.

[embed width="" height=""]https://youtu.be/GH5y5iDjy0k[/embed]

[embed width="" height=""]https://youtu.be/jlCBF0CxYZw[/embed]

[embed width="" height=""]https://youtu.be/NWUmHZ6gqsA[/embed]

[embed width="" height=""]https://youtu.be/_nBZyHOT9rk[/embed]

Follow me on Instagram - http://instagram.com/adamkarnacz

Buy the Canon EF 100mm f2.8L Macro IS USM Lens

Buy the Neewer Pro4 Way Macro Focusing Focus Rail Slider

Buy the Canon EF 50 mm 1.8 STM Lens

Buy the Yongnuo YN-14EX Macro Ring Flash

Buy the Manfrotto 055 3 Leg Section Tripod - Aluminium

Buy the Manfrotto 496RC2 Ball Head with Friction Control

Macro Focus Stacking Tutorial

macro-focus-stacking-tutorial.jpg

Get super sharp macro images using the focus stacking technique.

This is the third video in the series covering Macro Photography. Focus stacking is about as complex and difficult as macro photography can get but the results of this dedication can be truly stunning. The first video covers shooting macro photography with budget gear and the second with more advanced gear. This video will assume you are familiar with the techniques described in the previous episodes.

https://www.firstmanphotography.com/tutorials/macro-photography-tutorial-using-budget-gear

https://www.firstmanphotography.com/tutorials/macro-photography-tutorial-using-advanced-gear

Focus stacking can be used in various areas of photography but is most naturally suited to macro photography. Essentially focus stacking is when we combine a number of images into a 'stack' to ensure sharp focus across the image where it would not normally be possible. In macro photography when we get in close to our subject the depth of field will be extremely small even when using small apertures such as f/16 or f/22. This means that many of our images will have large parts of it that are out of focus. This can be a desirable effect in many situations but for many shots a bigger depth of field is required such as taking portraits of insects. The only way to achieve this is through focus stacking.

Shooting the Image

Focus stacking is shot by taking a series of images with the same composition and gradually changing area of sharp focus. Depending on your aperture setting and the image you are shooting this could be anywhere from a few shots, up to 30+ frames. These images are then stacked in post-processing and the computer extracts the sharp area from each image and combines them to create one image with sharpness across the frame.

It is vital to keep the composition as still as possible between frames so a tripod is virtually essential. There are then a few ways to adjust your area of focus between frames:

  1. Adjust the lens focus ring.
  2. Move the object.
  3. Move the camera.

Only one of these options is truly accurate and effective and will produce good results every time. With many parts of macro photography you will want to get as close as possible to your subject to maximise the magnification. We therefore want to have the lens focused to it's minimum focus distance. If we then achieve focus stacking by adjusting the focus it means we have to initially focus on the furthest part of the subject away from the lens, then, bring the focus further out as we start taking our stacking images. The downsides of this are that accurate micro adjustments of your  focus ring can be extremely difficult. Also, changing the focus causes small adjustments to the focal length even when using a prime lens; this will cause problems when stacking in post.

Secondly moving the subject is unlikely to work unless you have it on something that can make precision movements. Let us discount this method for today. This leaves moving the camera and this is the method featured in this focus stacking video tutorial.

The best and easiest way to do macro focus stacking is to move the camera using a macro slider. The camera sits on top of the macro slider that is mounted on the tripod. The slider then lets us make fine adjustments moving the camera gradually closer to the subject. We start our stack by focusing just in front of the subject, at the minimum focus distance, and then gradually move the camera forward taking the focus across our subject as we shoot each image. Most macro sliders have scales on them to allow fine and accurate adjustments. There are also automated systems available that will move the slider and fire the camera for you. Once the images have been captured it is time to move into post processing.

Post Processing

All the processing is done using Adobe Photoshop and Lightroom. To get a 30 day FREE trial Click here.

1. Normal Image Adjustment

Assuming the stacking images have been shot in RAW the first thing to do is make your normal image adjustments to each image eg, exposure, contrast, white balance etc in Lightroom. Copy the settings and paste them to all your stacking images.

2. Export JPEGs

Create a suitable folder and export your images as JPEG’s. This will save you a massive amount of time when Photoshop processes the images than if you tried to use RAW. If you have edited the images in Lightroom prior to exporting then you will have already reaped all the benefits of working with RAW.

3. Merge the images

Open Photoshop then go File > Automate > Photomerge. Hit the ‘Browse’ button and select your stacking images. Leave on Auto and uncheck all the boxes at the bottom including Blend Images Together. Click Ok and let Photoshop run the images. It will the load the Merged images into layers in a new document.

4. Create the Stack

Next move down to the layers panel and select all the new layers Photoshop has created. Go to Edit > Auto-Blend Layer and then ensure ‘Stack Images’ is selected under the ‘Blend Method’. Select ‘Seamless Tone and Colours’ and then hit ‘Ok’. Photoshop will then do it’s thing and spit out something close to your final image.

5. Final Adjustments

It’s now time to make the final adjustments to your image as you see fit. You may need to clone out any imperfections you had not noticed or crop the edges of the image as Photoshop may have created some transparent areas of the image where it has pulled the stack together.

Your image should now be a well stacked image with sharpness from front to back. If there are areas of the image that are blurred then it is likely that the adjustments you made during shooting were too large. You can rescue this by cloning bits out.

Good luck and don’t forget to subscribe to the YouTube channel.

Subscribe Now

Follow me on Instagram - http://instagram.com/adamkarnacz

Landscape Photography Tutorial

landscape photography tutorial

The essential elements to capturing beautiful landscape photography images.

In this video we give you an introduction to landscape photography. Landscape photography is arguably the most popular area of photography as we capture the amazing scenes the world has to offer. Most people who have ever touched a camera will at some point have taken a landscape photograph. This does not mean it is easy however with most of these images being nothing more than snapshots. The interest in viewing these images is also massive with landscape photography shots capturing far greater attention on photo sharing mediums such as Instagram and Flickr.

With this in mind, truly great landscape photography is not as common as you might think. A quick flick through Instagram will show this and is proof that landscape photography is an art. Having the natural talent and 'eye' for things will be a large help but there are certain rules that, if followed, will allow you to start capturing some beautiful images.

Gear - Great landscapes can be captured with any type of camera including smartphones. To take things to the next level though you will need a camera with the ability to shoot at wider angles. Having these wider angles allows more of the scene to be captured. Extreme wide angles can also give the sense of how big the scene is when used correctly.

A tripod is also extremely useful for landscape photographs. It becomes essential for long exposure landscapes or even when the light begins to fade and your shutter speed slows down.

The Secret - The absolute key to getting amazing landscape photography images is to travel to somewhere with amazing scenery. A simple fact that is not always easy achieve.

landscape photography tutorial

Rule of Thirds - This is a common photography rule that gives guidance to composition and to what can create pleasing images. In landscape photography the rule of thirds is best applied to where we place our horizon line. Keeping the horizon line along the bottom third of the image or the top third of the image will create a much more pleasing image than a horizon that runs along the middle of the frame.

rule of thirds

The Golden Hour - The hour after sunrise and before sunset is known as the golden hour. When the sun is low in the sky it creates a beautiful golden light that will flood your scene and produce long interesting shadows. Use this to your advantage when composing your shot.

landscape tutorial

Focusing - Most landscape photography will require sharpness from the front to the back of the image. Focusing on the area about 1/3 of the way into your scene will usually provide the optimal focus. Hyperfocal distance dictates the science around this and can be read about here. If you have a key point to your image such a castle, then focus on that point.

landscape photography

Camera mode - Manual. Use landscape photography to introduce yourself to shooting in manual and controlling your exposure in every way.

Aperture - To get everything in focus we generally want to use a small aperture (large f/stop number). To get front to back sharpness, f/11 or f/16 will nearly always provide this. If your shot does not contain any foreground then f/8 can be used to maximise sharpness as many lenses are at their sharpest at f/8.

ISO - 100 or lower.

Shutter Speed - Control your overall exposure with the shutter speed. If the shutter speed starts to get slow then ensure you employ your tripod.

Lighting - Shooting into the sun might, at first, seem like a silly thing to do. However it can result in some really interesting images and includes all sunset shots. Shooting with the sun directly behind you will often result in flat images in terms of contrast. the same applies when the sun is directly above.

Filters — Your landscape photography can be taken to the next level by introducing filters such as neutral density gradients, circular polarises, infrared and big stop neutral density filters that allow you to capture long exposure landscapes.

Long Exposure Photography tutorial - https://www.firstmanphotography.com/tutorials/long-exposure-photography-tutorial

Infrared Landscape Tutorial - https://www.firstmanphotography.com/tutorials/infrared-photography-part-1

Use the timer - When using a tripod, using the timer or a shutter release cable will ensure there is no unwanted movement in the camera.

Following these simple rules will give you a solid base on which to start building your landscape photography portfolio. Be warned, it is an addictive pursuit and you will find yourself regularly checking weather forecasts, tidal times, sunset and sunrise times and travel times to certain locations. Good luck and enjoy.

Follow me on Instagram - http://instagram.com/adamkarnacz

Prime Lenses vs Zoom Lenses: Which is Better?

Cover.jpg

In this video we decide which is better: prime lenses or zoom lenses?

Before we answer this question let's first discuss the difference prime lenses and zoom lenses.

Zoom lenses are common on all compact cameras and have the ability to optically zoom in and change the focal length, getting you zoomed in and close to your subject. They are versatile and can be used in a variety of situations.

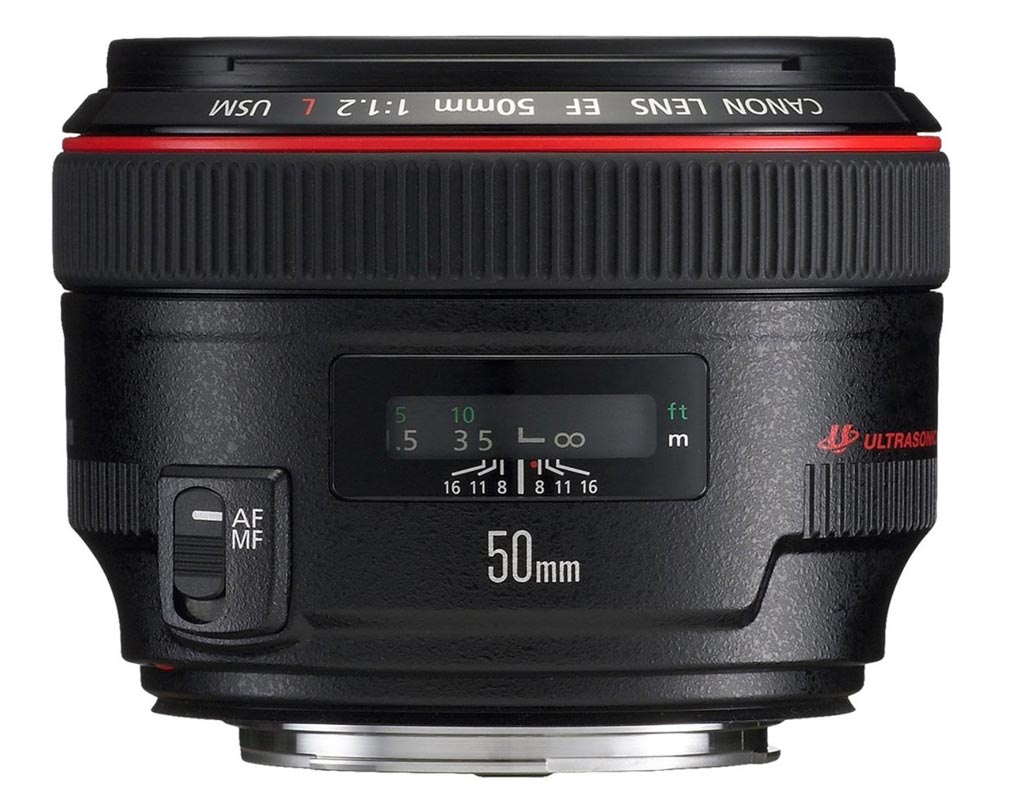
Prime lenses have a fixed focal length and cannot be zoomed. They are less versatile on their own but because of the more simple design they are sharper, cheaper and often have a bigger aperture.

Physical size and focal length does not define it as a zoom or a prime lens as there is a misconception that primes are small and zooms are big.

prime lens vs zoom lens

So which is best? Unfortunately there is no definitive answer to this and it is really a matter of both personal taste and what you will be shooting.

I love to shoot with prime lenses because the restriction on focal length can often force you to think more about your shot and the only way to zoom is to use your feet to get closer or move further away from your subject. They are great for portraits and low light shooting due to the large apertures and they can create creamy bokeh. This makes them a common sight in the camera bag of a wedding photographer.

Videographers also swear by prime lenses as they are generally lighter and more portable, easy to use and they give that traditional film look. For DSLR video, zooms will often come with image stabilisation that is essential for hand holding video although there are several prime lens on the market now that also have image stabilisation.

Zoom lenses on the other hand are getting better and better all the time and the difference in sharpness is not as pronounced as it used to be. A lens like the Tamron 24-70mm f/2.8 is such a versatile range that it is suitable for almost all situations and you really have to start pixel peeping before you see the difference in sharpness.

tamron 24-70

The only way to truly know which is best for you is to try them out. If you nailed me down ands asked which is better? - I think I would have to say prime lenses. If you ask me which spends most of the time on my camera then it is definitely the 24-70mm zoom.

Follow me on Instagram - http://instagram.com/adamkarnacz