Photography Tutorials

Perfect Your Landscape Photography Editing Workflow

Losing your images or misplacing them across numerous hard drives is a horrible feeling. Having an efficient workflow for your landscape photography images is important. Get it right today and it will look after you in the future. 

Follow First Man Photography for the latest updates:

I organise and edit my photographs using Adobe Lightroom and Photoshop. Lightroom is my main photo editing app as I have less and less need for Photoshop these days as Lightroom continues to evolve. They are truly awesome bits of software that I could not survive without. Click the link above to get a free trial. 

Get your landscape photography editing workflow right

A landscape photography editing workflow may differ from other types of shoots because generally there will be less individual images compared , to say, a wedding. It is however still important to maintain a solid naming structure on your hard drive. I use a theme as he top level eg, ‘Weddings’ or ‘Videos’. This is followed by ‘year’ and then sometimes ‘month’. I initially copy the files to hard drive and the import into Lightroom. 

Using Adobe Lightroom

Once in Lightroom I organise, mark and flag the images to help me decide which to keep and edit. This is detailed in the video. I am using a MacBook Pro so once I am finished editing I need to move the files over to my external storage drive. It is important to do this within Lightroom itself which will copy both the physical file and the Lightroom catalogue data. Watch the video now to get full details. 

No Landscape Vlog this week

I was unable to shoot a vlog this week due to suffering a dreadfully bad back. Instead I decided to stay in and shoot this video. I will be returning to the landscape photography vlogs next week.  Leave a comment down below and let me know what you think of this video, does your workflow differ? Which bits work, which bits don't? I would love to hear from you.

Landscape Photography Editing - High Cup Nick vlog images

Get an insight into how I edit my pictures in Adobe Lightroom from my latest landscape photography vlog at High Cup Nick in the Pennines. Get a free trial of Adobe Lightroom - https://www.firstmanphotography.com/get/photography-plan

Watch the vlog - https://youtu.be/5IC4xH2eSQo

Follow and subscribe to First Man Photography for the latest updates:

First Man Vlog - https://www.youtube.com/playlist?list=PLa6Vwwb8Hgm2doJUbTS5Bro5VS2PVyzXN

In this video I edit the images shot on my recent trip to High Cup Nick. The weather was poor and the trip was intended as a scouting mission but I am still pleased with some of the images captured.

We go through the edit in Adobe Lightroom of seven images and I discuss composition, camera settings and my thoughts I had whilst capturing the shots. I share my photo editing tactics to show you how I work in post production.

Some say that I edit my pictures very quickly and this may be true. I believe dong it quickly allows me to bring a natural feel to the edit employing the artistic and instinctive part of my brain rather than analysing things in too much detail that can sometimes lead to over processed images. I do often take a second look and tweak a couple of things and I also apply profiles and manage resolution when I print my images.

Subscribe to the channel

Editing Landscape Photographs from a Canon 5D Mark IV

Landscape Photography on a Canon 5D Mark IV

The Canon 5D mark IV has changed the way that I shoot and edit my landscape photography. You will either love or hate this new trick.

Follow First Man Photography for the latest updates:

Instagram - http://instagram.com/adamkarnacz

FREE eBook - http://www.firstmanphotography.com/ebook

Subscribe - http://bit.ly/FirstManSubs

Get Adobe Lightroom and Photoshop - https://www.firstmanphotography.com/get/photography-plan

First Man Vlog - Click here

The Canon 5D Mark IV is an incredible camera. I reviewed it previously in an epic real world review - see the link below:

https://youtu.be/5HGxkQw5hto

The dynamic range of the Canon 5D Mark IV is a huge improvement over previous generations. What is truly impressive though is the amount of detail that can be pulled out of underexposed and shadow areas. Even a 2-3 stop increase in exposure will still lead to a relatively clean image, especially when shot at ISO 100.

Subconsciously I have started to use it to my benefit especially in some of the landscapes I have been shooting lately that contain huge dynamic range. Purposely underexposing the image as a whole has allowed me to capture the highlights with perfect exposure and then raise the shadows in post-production using Adobe Lightroom.

The main benefit is a huge saving of time with barely no downside. Normally capturing a scene with such wide dynamic range would require the use of multiple exposures by bracketing, HDR, blending or the faff and inconsistent results of physical ND grads. The Canon 5D Mark IV lets me do it with one exposure.

The speed at which I am now capturing landscape photography, and then later editing it in Adobe Lightroom has improved my overall work flow. I can now deploy that time on other things and really concentrating on the story I want to tell with my work. At the end of the day, that is what I am trying to do.

London Eye Photo Edit

Blog-Cover.jpg

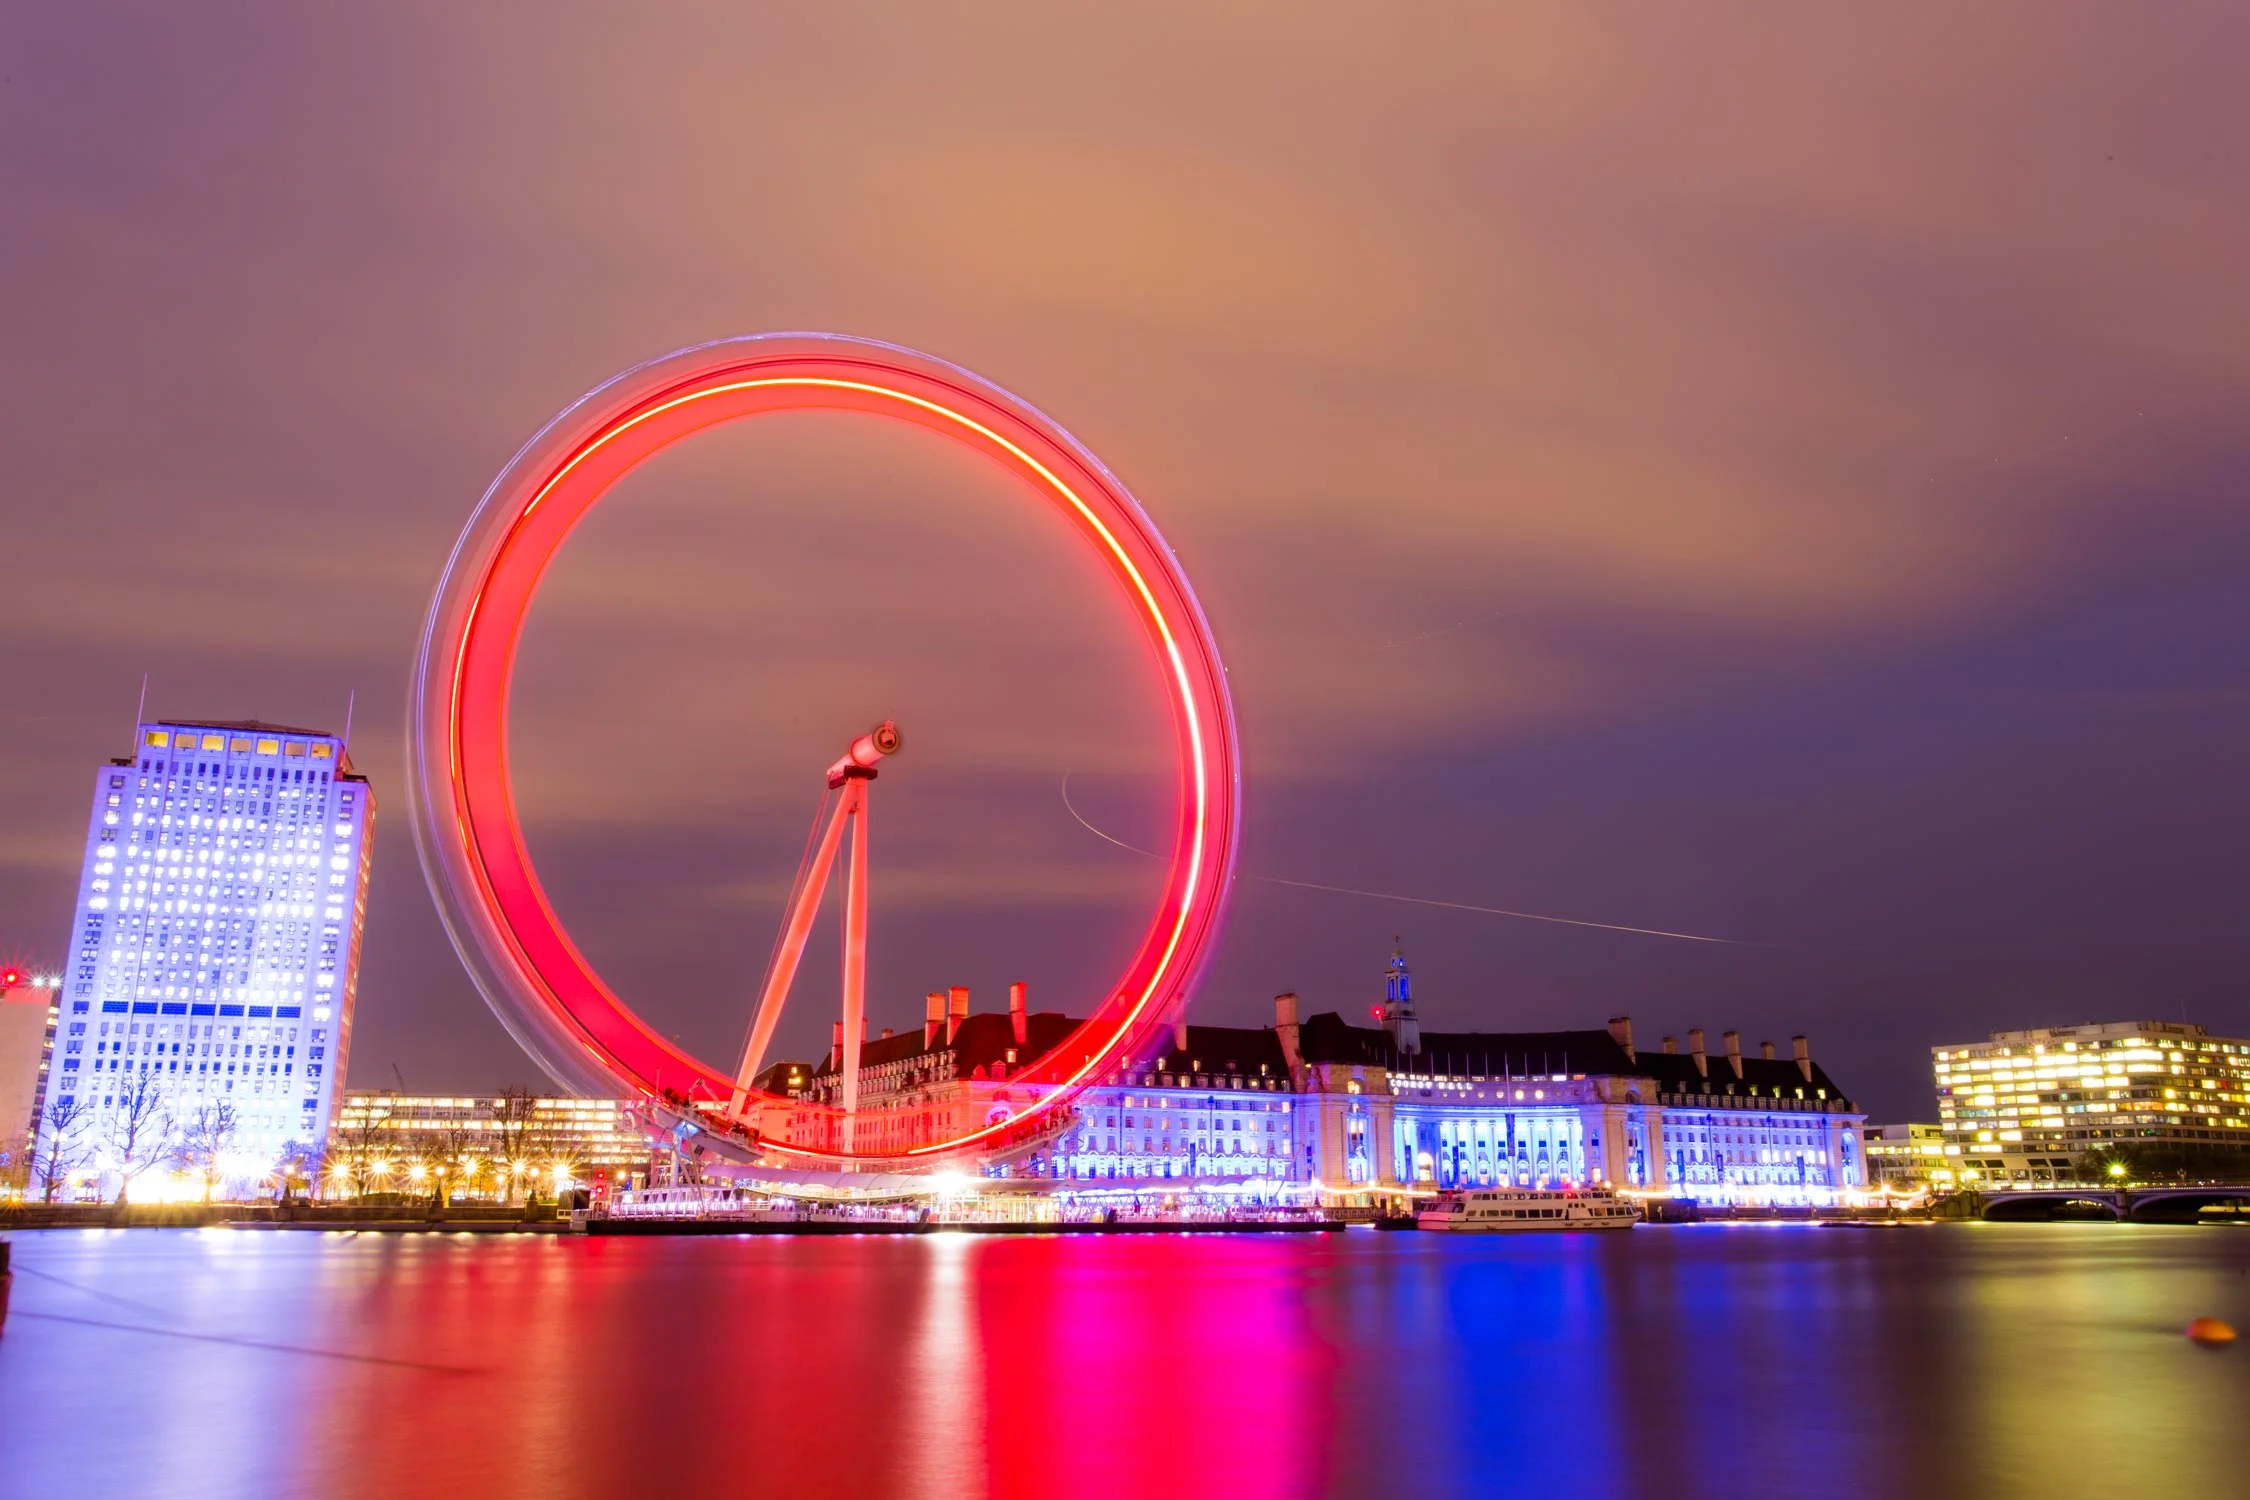
See how I use Abobe Lightroom to edit this long exposure of the London Eye.

Get a FREE trial of Adobe Lightroom  - Click here.

On my recent trip to London I had a very small amount of free time that I put to good use to head out and take a few shots around the Westminster area. This included a long exposure photo of the London Eye. Whilst it is not a totally unique shot, it is one I have wanted to capture for a while to have it in the bag.

Normally when shooting a long exposure I will use a 6 stop or 10 stop neutral density filter to cut down the light coming into my lens. It was already dark in this situation though so using the filters would have resulted in a very long exposure time when maintaining an low ISO. I therefore wanted the longest exposure I could get without the filters and this meant going to f/22 with the Canon 17-40mm lens. The exposure ended up being about 3 minutes which is enough to give the nice ring of light on the wheel and smooth out the River Thames.

I shot the image at 28mm. I would have liked a slightly wider composition but there were floating cranes at either side of me blocking the view.

In the video I put the long exposure image into Adobe Lightroom and go through the edit. The edit is very simple as we remain in Adobe Lightroom but you will be able to get a feel for the editing process I go through when I am in post-production. Hopefully you will be able to pick out what you like, and what you don’t like, and apply the techniques to you own images.

To have a go editing this image click the link below to download the RAW file. Feel free to use image for personal use, including printing. All I ask is that you credit me if you share it online.

Download RAW

If you haven't done so already, please Subscribe to the YouTube channel for new videos every Wednesday and Sunday.

Other videos: