See how I use Abobe Lightroom to edit this long exposure of the London Eye.
Get a FREE trial of Adobe Lightroom - Click here.
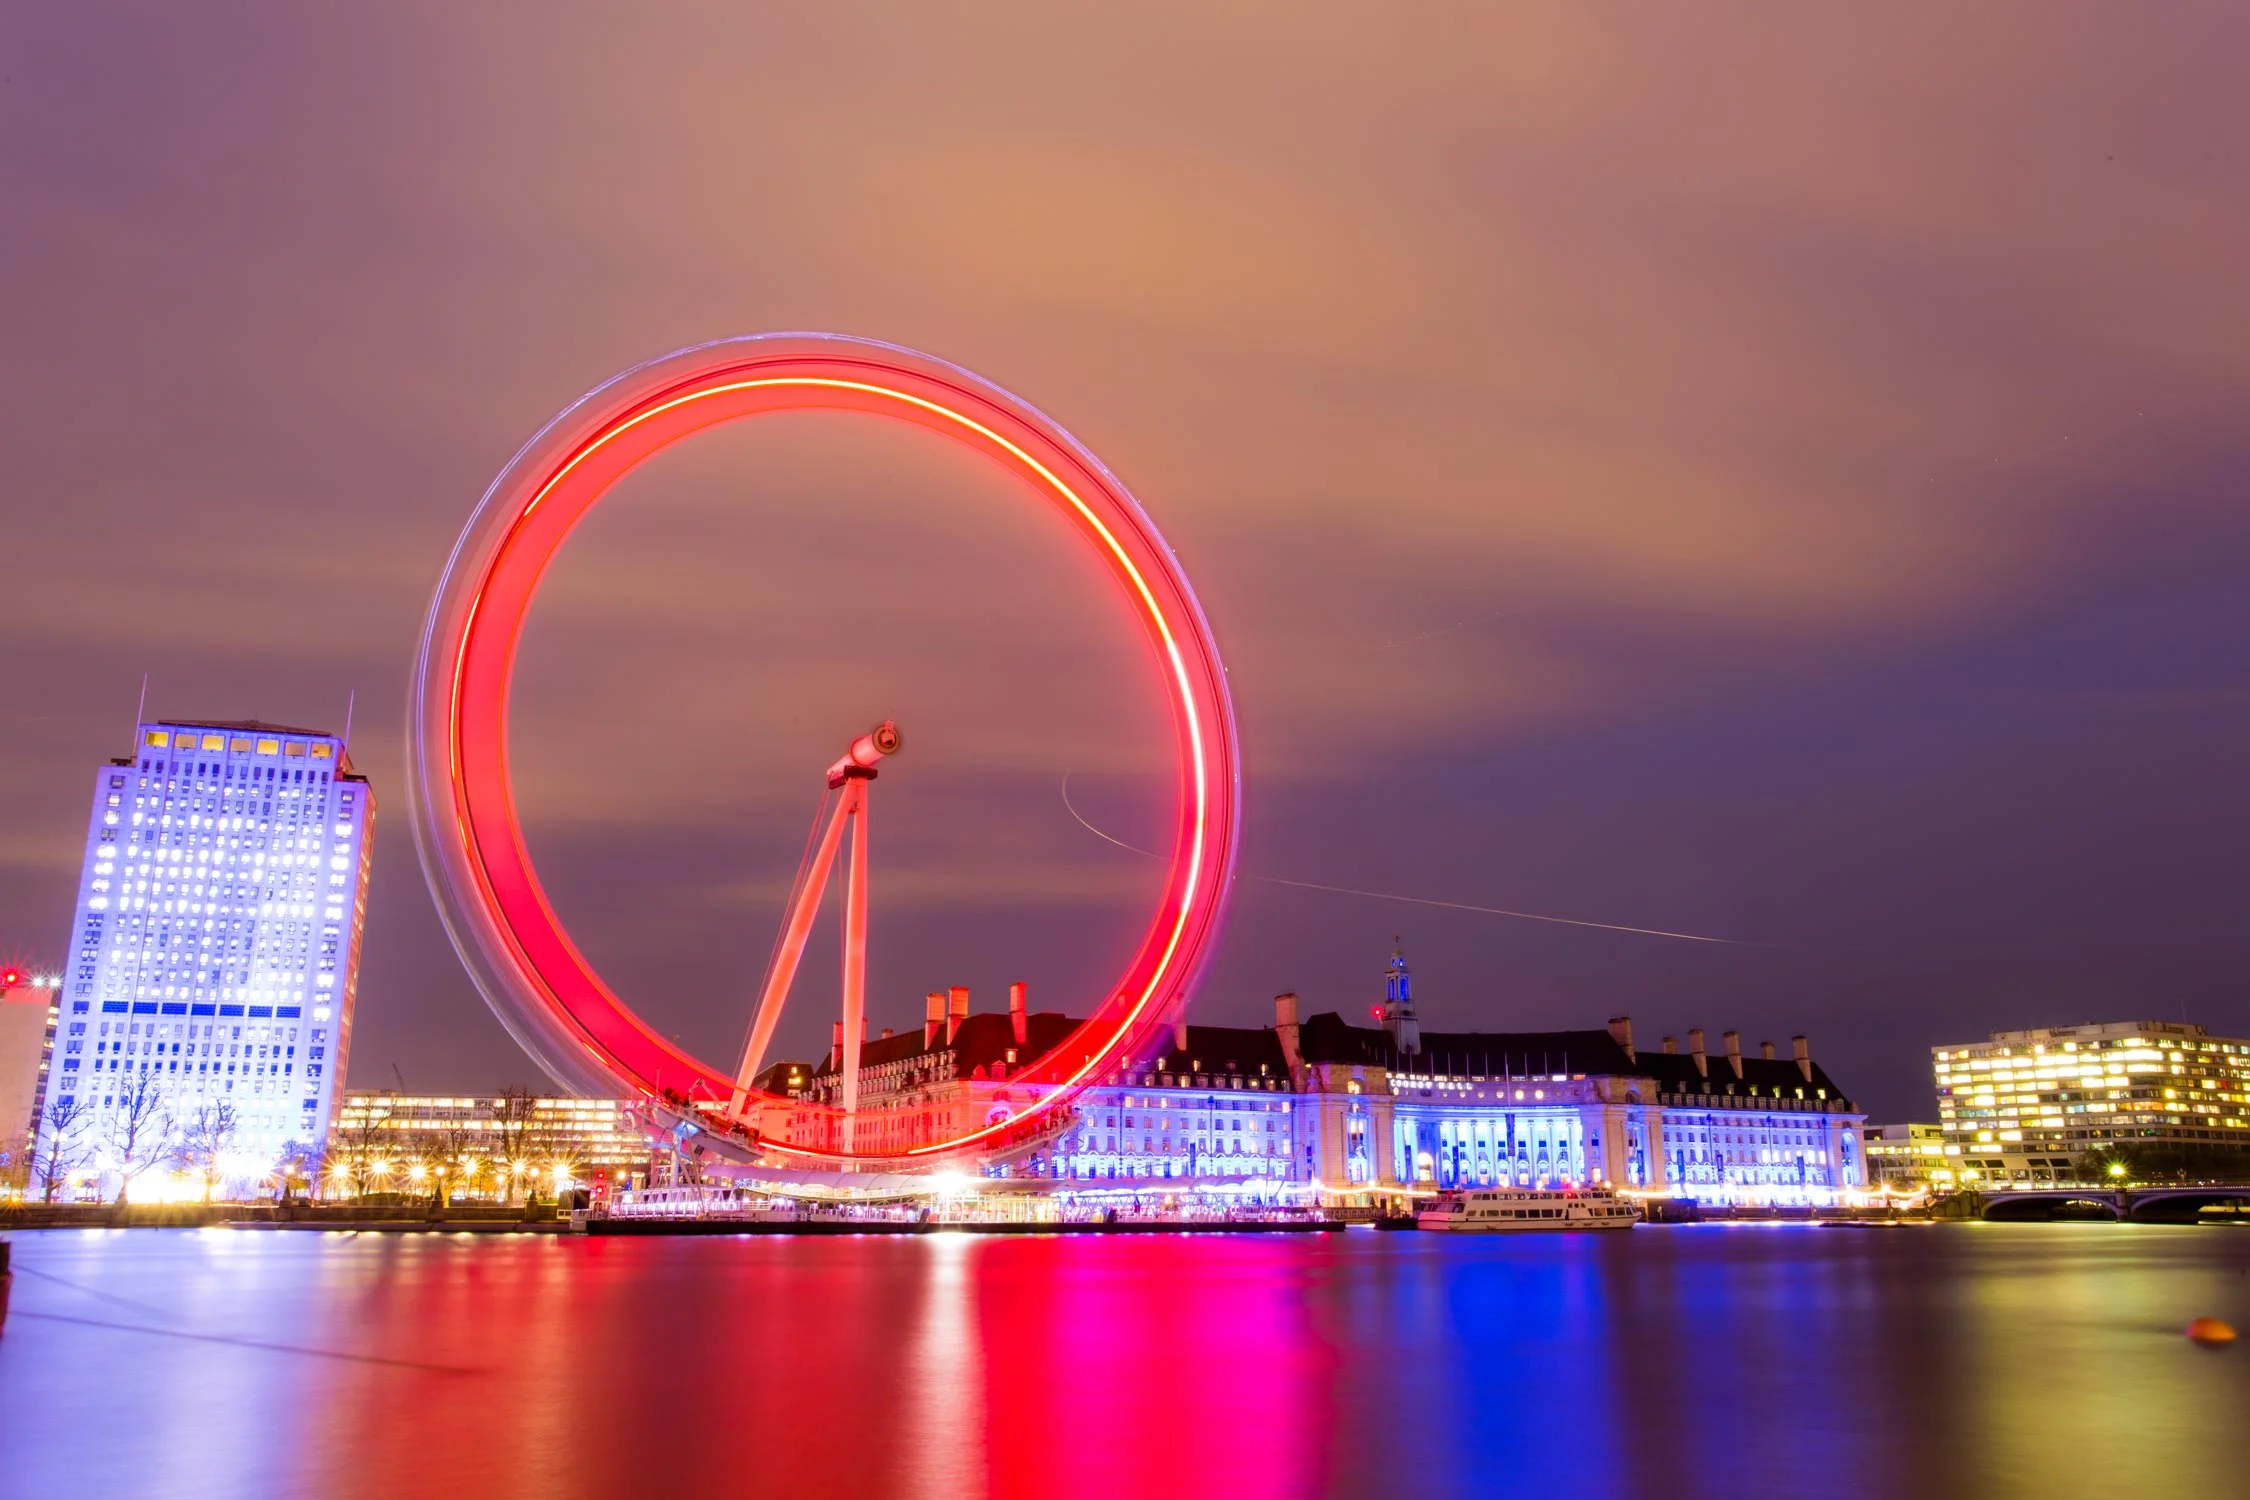
On my recent trip to London I had a very small amount of free time that I put to good use to head out and take a few shots around the Westminster area. This included a long exposure photo of the London Eye. Whilst it is not a totally unique shot, it is one I have wanted to capture for a while to have it in the bag.
Normally when shooting a long exposure I will use a 6 stop or 10 stop neutral density filter to cut down the light coming into my lens. It was already dark in this situation though so using the filters would have resulted in a very long exposure time when maintaining an low ISO. I therefore wanted the longest exposure I could get without the filters and this meant going to f/22 with the Canon 17-40mm lens. The exposure ended up being about 3 minutes which is enough to give the nice ring of light on the wheel and smooth out the River Thames.
I shot the image at 28mm. I would have liked a slightly wider composition but there were floating cranes at either side of me blocking the view.
In the video I put the long exposure image into Adobe Lightroom and go through the edit. The edit is very simple as we remain in Adobe Lightroom but you will be able to get a feel for the editing process I go through when I am in post-production. Hopefully you will be able to pick out what you like, and what you don’t like, and apply the techniques to you own images.
To have a go editing this image click the link below to download the RAW file. Feel free to use image for personal use, including printing. All I ask is that you credit me if you share it online.
If you haven't done so already, please Subscribe to the YouTube channel for new videos every Wednesday and Sunday.
Other videos: