Photography Tutorials

How to Remove Vignetting in Lightroom

Vignette-Removal.jpg

Quickly Remove Vignetting in Adobe Lightroom

In this short video tutorial we show you how to quickly and easily remove vignetting in Lightroom using a simple automated tool.

Very simply Lens Vignette is when the light falls off to the edge of the frame within your image. It results in a dark border around your image. Sometimes this is desirable in your image as it can draw the viewers attention to the main subject in the centre of the frame. On other occasions you will want to remove vignetting to have even exposure across the frame.

Lens vignette occurs with most modern lenses but is more obvious in some lenses than others. Large aperture prime lenses will generally create more vignette when shot wide open. This happens because they suck in so much light the internal barrel of the lens will block some of the light coming in from a wider angle compared to the light hitting the lens head on. This results in the darkened corner of the images and on many occasion you will want to remove vignetting in Lightroom to counteract this effect. Once stopped down, the smaller aperture directs the light away from the inside of the lens barrel so the effect is much reduced.

To remove vignetting in Lightroom all you need to do is head into the Develop module and under the Lens Corrections panel select the Enable Profile Corrections box. Once this box is checked it will remove the vignette based on a profile based on the camera or lens you used. These profiles are built into Lightroom.

On other occasions your photography can sometimes benefit from adding vignette to an image. This is also extremely easy to do and can be very effective in focusing a viewers attention. The addition of a vignette will be featured in an upcoming tutorial.

Please follow me on Instagram  - http://instagram.com/adamkarnacz

How to Edit Water Drop Photos

Waterdrop-Edit.jpg

Take your water drop photographs to the next level.

Welcome to the world of water drop photography. In this video we show you how to edit water drop photos in Adobe Lightroom to improve your images quickly and easily.

Capturing these water drop images in camera is the first stage. View the tutorial here: http://www.firstmanphotography.com/tutorials/water-drop-photography

If you are interested in taking water drop photos or have already caught the bug there is a nice little community going on Instagram at #waterdrop. Follow me now at Instagram - http://instagram.com/adamkarnacz

Water drops are clearly an area of photography that people are loving and there are some great images going up. However there are a few key elements that could improve the images I am seeing. Nice straight lines on your water bath is a must but most other things can be corrected or improved in post production, the issues are:

  • Exposure - Get you exposure up so it’s nice and bright.
  • Contrast - Add more. Boom!
  • Saturation - These images are all about colour!!!!
  • Clarity - This is the key to your image popping off the screen/print

Hopefully this will help you take your images to the next level and I look forward to seeing what you create. Please tag me in your shot on Instagram for me to view them.

Good luck and happy shooting.

Infrared Photography - Part 2 - Editing

edit-infrared-photos.jpg

How to Edit Infrared Photos in Photoshop and Lightroom

In this video tutorial we show you how to edit infrared photos from the raw red image that comes out of the camera.

If you have never seen Infrared Photography before then come and feast your senses. Capturing the light normally invisible to human eyes opens up a world of creative possibilities that would otherwise not exist.

This video tutorial is split into two parts with the first part showing you how to capture the raw infrared image whilst on location. This second part will guide you through the post processing where we bring our plain red image to life.

Watch part one on capturing the image. http://www.firstmanphotography.com/tutorials/infrared-photography-part-1

To shoot infrared photography you do not need a special type of converted camera. The only requirement is a small investment in an infrared filter that will attach to your current lens. These filters remove all the colours of the spectrum apart from the wavelengths at the extreme red end which includes infrared. I recommend the Hoya R72 Infrared Filter and this can be purchased for between £30 and £90 depending on the size of your lens, see the link below. The only drawback with this filter is it lets only a small amount of light through so to properly expose an image it will require a long exposure. Whilst this makes portraits tricky there are still endless possibilities in the realm of landscapes and cityscapes and there are not many photographers out there doing it. Just check Flickr to confirm this.

The characteristics of infrared light differ from that of 'normal' white light we are used to experiencing everyday. For example, green foliage such as grass and trees reflect a large amount of infrared light meaning they will be very bright in your final processed image. This is known as the 'Wood Effect' named after Robert W. Wood who pioneered Infrared photography. It is caused by the transparency of chlorophyll to infrared light allowing the light to pass through into the cells of the plants and be reflected back again. Viewed normally, chlorophyll will reflect all the green light back giving leaves and grass it's green appearance.

Capturing infrared photography in this way requires a long exposure. Please see the long exposure tutorial here:

http://www.firstmanphotography.com/tutorials/long-exposure-photography-tutorial

Hoya Infrared R72 Filter

Infrared Photography - Part 1

Fewstone-IR.jpg

How to Capture an Infrared Photography Landscape. 

If you have never seen Infrared Photography before then come and feast your senses. Capturing the light normally invisible to human eyes opens up a world of creative possibilities that would otherwise not exist.

This video tutorial is split into two parts with the first part showing you how to capture the raw infrared image whilst on location. The second part will guide through the post processing where we bring our plain red image to life.

Watch part 2 on editing infrared photos. http://www.firstmanphotography.com/tutorials/edit-infrared-photos

To shoot infrared photography you do not need a special type of converted camera. The only requirement is a small investment in an infrared filter that will attach to your current lens. These filters remove all the colours of the spectrum apart from the wavelengths at the extreme red end which includes infrared. I recommend the Hoya Infrared R72 Filter and this can be purchased for between £30 and £90 depending on the size of your lens, see the link below. The only drawback with this filter is it lets only a small amount of light through so to properly expose an image it will require a long exposure. Whilst this makes portraits tricky there are still endless possibilities in the realm of landscapes and cityscapes and there are not many photographers out there doing it. Just check Flickr to confirm this.

The characteristics of infrared light differ from that of 'normal' white light we are used to experiencing everyday. For example, green foliage such as grass and trees reflect a large amount of infrared light meaning they will be very bright in your final processed image. This is known as the 'Wood Effect' named after Robert W. Wood who pioneered Infrared photography. It is caused by the transparency of chlorophyll to infrared light allowing the light to pass through into the cells of the plants and be reflected back again. Viewed normally, chlorophyll will reflect all the green light back giving leaves and grass it's green appearance.

Capturing infrared photography in this way requires a long exposure. Please see the long exposure tutorial here:

http://www.firstmanphotography.com/tutorials/long-exposure-photography-tutorial

The infrared photography image captured by the camera will be very red and require some careful post-processing. The second part on how to post-process the images will be available very soon.

Hoya Infrared R72 Filter - UK

Removing People With A Long Exposure

Castlerigg-Stone-Circle.jpg

Expose for longer and the people will definitely leave.

Often as a photographer you are faced with a scene that would be absolutely perfect were it not for one thing. People. The selfish people simply do not appreciate your artistic vision and understand that they are not required in your shot. This is particularly the case at a famous landmark, nature spot or city scene in front of a beautiful old building where you have no chance of keeping everyone out of your shot.

Not the sort of people to give up easily, we must consider our options for removing people.

Photoshop them out

The tools available in Photoshop to remove things from our images are becoming evermore sophisticated and effective. However in a many scenes this will detract from the overall quality of your final image so we turn our attention elsewhere.

Exposure

We are not talking the indecent kind, although that could potentially work too, it is probably not recommended. No, we are talking about slotting your camera into Bulb mode and cranking the exposure right up to 11. With a nice long exposure you will very effectively remove anything from your shot that is moving. The longer the exposure time, the more chance you have of taking the slower moving, and temporarily stationary, people out.

Last year whilst in the Lake District I headed over to Castle Rigg Stone Circle with a solid plan. Thanks to it’s ancient history it is a very popular site and people are free to climb on the stones. It is always especially busy around sunset just when us photographers are trying to capture the best light. On my arrival, there were a lot of frustrated photographers trying to catch that tiny moment when no one was in shot. I knew it was not going to happen so I doubled up my 10 stop and 6 stop ND’s and went for an 8 minute exposure to remove even the most stubborn spoil sports who insisted on staying still for a good few minutes at a time. My relaxed attitude seemed to cause a few of the other shooters there some confusion as I stood back removing people with my long exposure. It turned into a bit of an impromptu workshop on how to capture long exposures and everyone would have gone away happy if only they had brought their tripods.

removing people with a long exposure

How to capture long exposures will be the next major video tutorial to be released here soon.

This article was first released on Medium at https://medium.com/@AdamKarnacz/removing-people-with-a-long-exposure-e25a5b859f8c

How to Do Light Painting Photography

Light-Painting.jpg

A Light Painting Photography Tutorial

In this video tutorial we give a quick guide on how to get started with light painting photography, including camera settings, the gear that you will need and a couple of ideas to get you going.

Light painting is becoming a very popular form of photography as more and more people own cameras that are capable of taking long exposures. A quick search of ‘light painting’ on google reveals just how creative people are getting and there are some amazing images out there. in this guide we show you how you can create your first light painting images within a few minutes.

Gear
  • The essential gear you will need for light painting are:
  • A camera capable of taking long exposures - this includes all DSLR’s
  • A tripod or solid surface to place your camera on.
  • A torch or smartphone to use as our ‘paint brush’.
  • A darkened room.

Light painting photographs can be done in two ways. Firstly, by pointing your light source directly at the camera so that the light is the only thing that appears in the resulting image. Secondly ,we can paint the light into an existing scene to add some extra interest to the images. This can include landscapes, portraits and still life images. In this tutorial we are going to be using the first method to give you the basic skills to then go and create some images for yourself.

Setup

Set up is very straight forward. Simply set your tripod up in a room big enough that you will be able to get your full body in the frame. Attach your camera. Zoom out or use a lens that ensures most of your body fits in the shot when you stand in front of the camera. The background is not important. Start out by getting your focus. Again this is not massively important as we will be using a large depth of field but it does not hurt. Hold a light stand or ask some one to stand in for you. Stretch you arms out in front of you and put the stand down. Then return to the camera and focus on the stand; when we paint we will be holding our hand out in front. Just remember where you were stood. Once this is done flick to manual focus so no further adjustments are made.

Camera Settings

We are going to be Manual Shooters here so flick your mode dial to M. When deciding on camera settings it is always best to start with ISO. In this case we will go for ISO 100 for a nice noise free image and also to help minimise the ambient light that we do not want in our image. Aperture comes next. This setting will really depend on the power of your light source, or ‘paint brush’, but I always find f/11 or f/16 a good place to start. Shutter speed needs to be long enough to paint your image but not so long that too much ambient or reflected light creeps into the picture. I find 5 to 10 seconds to be ideal. The last setting is to switch on the shutter timer. The 2 second timer should be enough for you to push the shutter and jump in front of the lens.

Shooting

Your light source is going to be the dominating factor on how your image looks. A one bulb torch can produce great results but LED torches with 2-4 LED’s can add extra interest to your ‘brush’ stroke. There are numerous light painting apps available for your iPhone or Android smartphone that produce multi coloured images on the screen which you then wave in front of the camera. You can get very creative and use pretty much anything that emits light. Coloured LED strips or fairy lights are particular effective especially when spun round in circles.

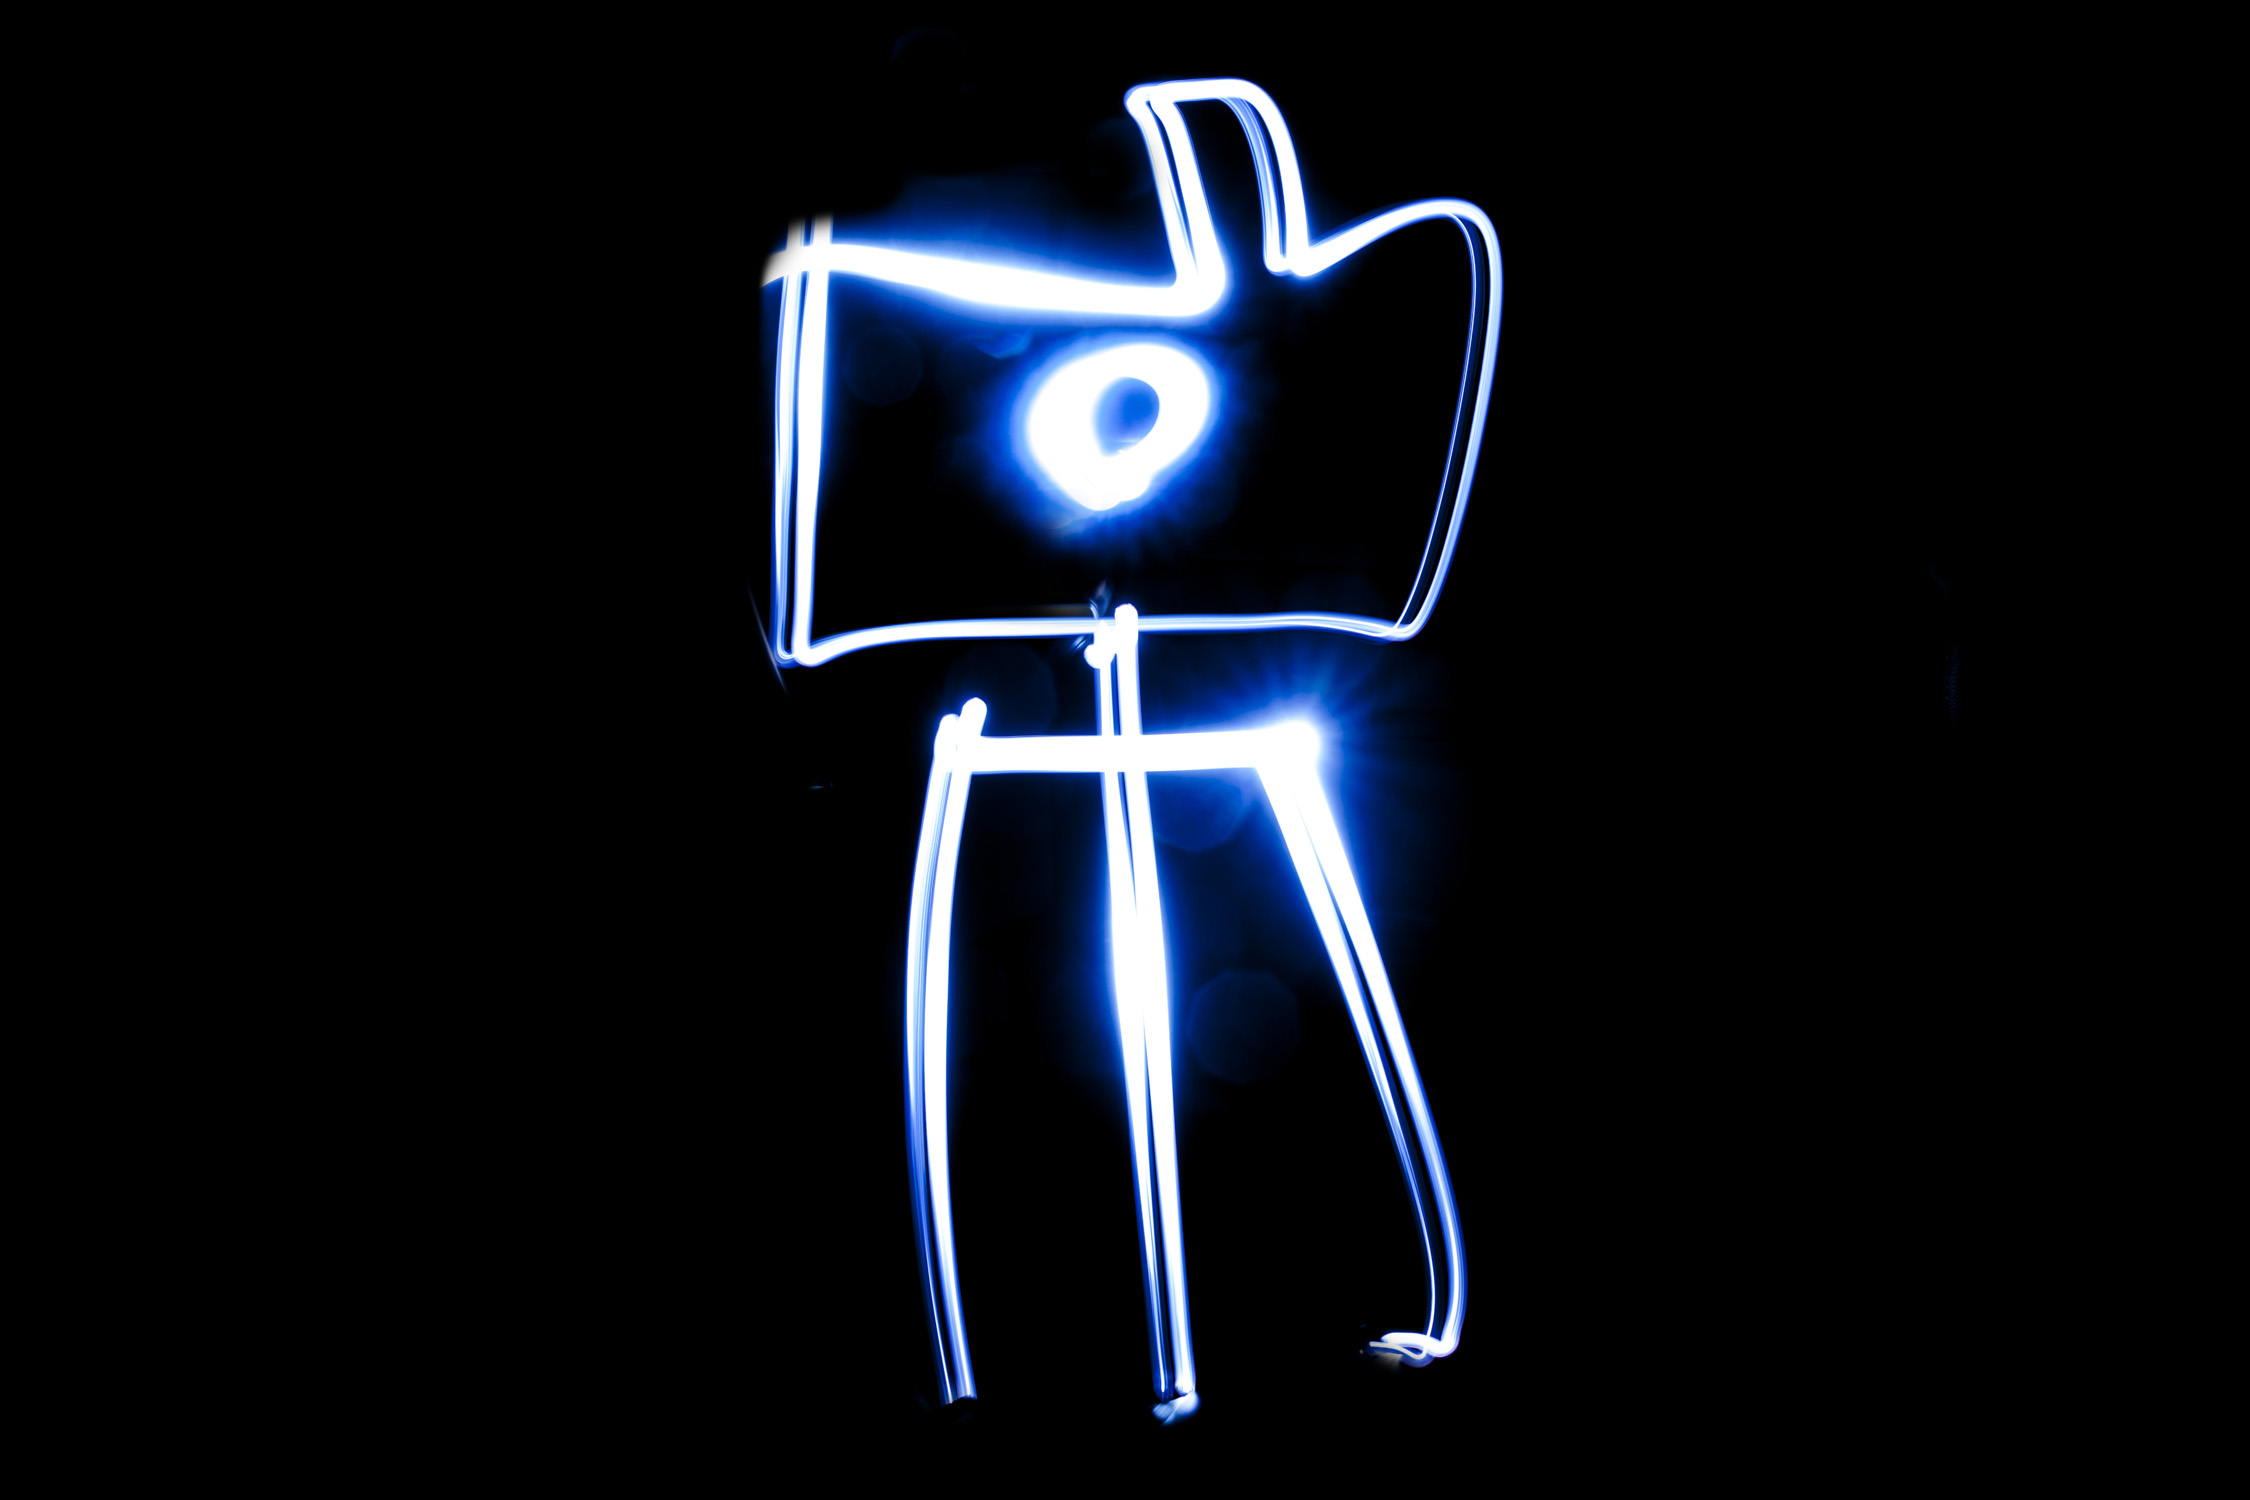
When you are ready, turn out all the lights so the room is dark. Press the shutter button, get into the spot where you focused earlier and wait for the timer to shoot the shot. When you hear the shutter it is time to start waving your arms around with your light source. When painting try and fill the frame as much as possible, so if you are writing your name for example, write it big. Here it is time for you to get creative.

Check the resulting image and adjust the aperture if the exposure is not quite right. Your image will end up looking something like this. The final stage is post-processing.

light painting

Post-Processing

Post-processing will depend on how many shots you have taken to achieve your overall image. If it is just one shot then you will be using just Lightroom. To combine images we’ll be heading over to Photoshop.

In Lightroom we are simply looking to darken the background and isolate the actual painted light. The is achieved by increasing contrast, darkening the shadow areas and bring the blacks right down. I then like to add lots of clarity to bring out more contrast and really add some definition to our painted light strokes.

Once this is done, copy your settings and paste them to any additional images. Open into Photoshop as layers.

In Photoshop we are going to create a new black background layer and then change the blending option on your existing layers to ‘Lighten’. This means only the light parts of that layer will show through making it easier to combine the sections of your image. Once this is done simply Transform each layer to the correct size and move each part into position. I then clone out (or paint black) any areas that I want to remove.

light painting

Create Your Own Images

This should give you the basics of capturing light painting images. The painted light can easily be composited into various kinds of images meaning the only limit is your creativity.

I look forward to seeing the images you have created. Share them in the First Man Flickr Group and hopefully some will make it to the Photo of the Week Show next week.

https://www.flickr.com/groups/firstman/

Digital Camera Modes Explained

Mode-Dial-Close.jpg

What is the difference between the camera modes on my mode dial?

When you first pick up a digital camera you would be forgiven for being overwhelmed by the sheer number of settings and camera modes available to you. This video tutorial is going to break these camera modes down by going through what is available on your mode dial and how, and when, you would use them. Basically the camera modes on the mode dial control how the camera controls exposure when taking a picture.

mode dial

If you have invested in a decent camera it is likely that it will have a mode dial that is used to select between the camera modes. The letters used vary between manufacturers but the following modes will be present on most cameras.

Auto - This is exactly as it sounds and is usually denoted by a green rectangle. Point, shoot and you're done. This is designed for people who want to get average snap shots without any fuss. When the lighting conditions become even slightly tricky this mode will fail you. Please do not use this mode.

P - The P mode, as many think, does not stand for professional. It means 'Program' and is simply another auto mode. Again, please do not use it. Either stick on full auto or have the courage to progress to one of the camera modes below.

Av or A - This mode is called aperture priority. When using this mode you will manually adjust the aperture setting and the camera takes care of everything else. The aperture controls the amount of physical light getting to the sensor by adjusting an iris within the lens. The aperture setting is denoted with an f/stop number eg f/2.8, f/4, f/5.6 etc. The aperture setting also controls the depth of field your image has. A smaller f/stop number will give you a more blurred background, especially when the distance between the camera and your subject is small and the distance between your subject and the background is large. Take a picture of your finger as close to the lens as you can focus and you will see what I mean.

TV or S - This is your shutter priority mode. This mode controls the shutter speed on your camera. When an image is exposed the shutter opens allowing light to hit the sensor. This setting varies the amount of time the shutter is open therefore affecting exposure. Measurements are in fractions of seconds or seconds, eg 1/200th of a second. The camera will then take care of everything else including the aperture setting. This mode is useful when you want to freeze the action, such as a bird in flight where a faster shutter speed is required. Conversely a slower shutter speed will introduce some movement into your image such as the clouds in the image below.

camera modes

M - Manual mode. Of all the camera modes, if any were to be called professional, this is it. You set aperture and shutter speed along with ISO. This mode ignores the cameras light meter and shoots exactly as you set it. If you are becoming serious about photography then this is the mode you should be aiming to shoot in most of the time.

B - Bulb Mode. Many DSLR cameras will have this mode. It is essentially the same as manual but the shutter remains open as long as the shutter button is depressed. Using a cable remote, the shutter can be locked open to achieve some seriously long exposure pictures.

This is a very brief run down of each of the main camera modes. When you decide to come out of auto it is important to start to understand the relationship between aperture, shutter speed and ISO. This is often described as the 'exposure triangle'.

Thankfully my eBook covers all the basics of exposure including the 'exposure triangle' and is available as a free download now!! Please follow the link below.

http://www.firstmanphotography.com/ebook

I'm Adam, this is First Man Photograph.......Out!!


Follow First Man Photography for the latest updates:

Remove Objects Using the Clone Stamp Tool

Featured-Image.jpg

How to Use the Clone Stamp Tool in Photoshop.

In this video we show you how to use the clone stamp tool in Photoshop. The clone stamp tool is used to remove unwanted elements and objects from your pictures and can include anything from a simple spot to a more complicated object like a person. This video will show you how to make fast edits, in a non destructive way, using the clone stamp tool in Photoshop so you can give your images a more complete and professional look.

It is always best to capture your image as best you can 'in-camera' but sometimes there is just no way you can avoid things being in your images. For example if you are shooting a wide landscape such as a beach scene it may not be possible to shoot it without a couple of people walking their dog in the distance. Sometimes this may enhance your image but often it will be best if they are not there. This is where the clone stamp tool in Photoshop can be used to realise the initial artistic impression you started with. As a point of note people can also be removed in camera by shooting a long exposure and this is particularly effective in a city scene where you will never have an empty street during daylight hours. On this occasion however we will use the clone stamp tool.

The clone stamp tool in Photoshop will become one of your go to tools as a photographer. Along with the spot removal/spot healing brush and the patch tool you may find that you have little use for any of the other tools; especially if you are using Lightroom to enhance and edit your photos and you shoot things as close to perfect as possible in camera.

You can also use a clone stamp tool in Lightroom but I have found that this is not as powerful or easy to use as the clone stamp tool in Photoshop.

Water Drop Photography Tutorial

Learn How To Shoot Water Drop Photography.

Welcome to the world of water drop photography. In this video we show you how to capture water drops using both a basic set up and a more complex setup using the SplashArt 2 dropper system.

I first started shooting water drop photography a few years ago when I noticed a few popping up on Flickr. I was instantly struck by these amazing moments of nature that we see so often in our lives but never have the chance to study. Fascinated, I decided to see what it took to capture these images and I felt I could produce something original using my own lighting ideas and composition.

Having set up, using something very close to the basic setting featured in the video, my first capture of a water drop was extremely satisfying. I was instantly hooked. I quickly upgraded my equipment and bought the SplashArt 2 kit so I could produce and capture water drop collisions repeatedly. Once in the arsenal it left me more time to play with my lighting setup, composition and drop consistency. In water drop photography changing the consistency of the liquid has a direct result on the final image. Milk is slightly thicker so behaves differently and the different surface tension produces different looking drops. I eventually took this to an extreme adding Xanthan Gum to my liquid. This thickens and smooths the liquid to the point where the final drops have a crystal like appearance.

water drop photography

Understanding the theory of water drop photography is key to giving you the ability to fully explore the creative possibilities. Normally we freeze action by increasing shutter speed and this works perfectly in most conditions. However in water drop photography the action is frozen with the flash. When using flash to light a scene the shutter speed is limited by the flash sync speed of your camera. On most DSLR's this limits you to about 1/200th or 1/250th second which is not quick enough to freeze a water drop. The flash burst is much faster than this so exposes the scene so quickly that it freezes the action. Further, Speedlite flash guns discharge their light faster at lower powers so the lower the power you can manage to use the better your image will be frozen.

After some experimentation I settled on using 1/32 flash power. The shutter speed does not really matter but I set it at 1/200 to avoid any ambient light sneaking into the image. Aperture needs to be as high as possible to ensure all the drop is in sharp focus but needs to be balanced with ISO to obtain a well exposed image that is not too noisy. The majority of my shots have used f/11 and an ISO of around 400.

water drop photography

Hopefully this will arm you with the skills and knowledge required to start shooting your own images. To move things on further you can add extra flash guns and multiple droppers to ensure that every image will be unique.

Once you have captured the images, post-processing them can take them to the next level. I share my secrets in this video - https://www.firstmanphotography.com/tutorials/how-to-edit-water-drop-photos

Once you have created some water drop photography I would love to see some of your images. Please post them to Flickr and add them to the First Man Photography group and I will feature some of my favourites.

https://www.flickr.com/groups/2838380@N23/

For a more detailed guide on how to use the SplashArt drop system follow the link below.

https://www.firstmanphotography.com/tutorials/water-drop-photography-splashart-dropper

Splash Art 2 Kit