Photography Tutorials

Adobe make BIG Lightroom CC changes!!

What is the difference between Adobe Lightroom Classic CC and Adobe Lightroom CC? In this video we discuss some of the big changes that have been made by Adobe this week that is causing many photographers to be nervous.

Get a FREE trial of Adobe Lightroom CC and Photoshop - https://goo.gl/YznzDv

Follow First Man Photography for the latest updates:

Adobe Lightroom Changes

Adobe Lightroom has gone through some big changes in the last few days. It’s a staple of millions of photographers worldwide and changes like this can make many of us nervous. In this video I’m gonna go through some of the changes, discuss how it might affect everyone, from the absolute beginner to the seasoned pro and share a couple of my thoughts. 

On Wednesday Adobe updated their full suite of apps and some of the biggest changes involved Lightroom. For years it has been the main software used by photographers all over the world. Prior to this week it hadn’t been updated since 2015 and has been plagued with slow speeds and has become increasingly complicated. 

Problem Solving Approach

Adobe have now tried to solve these problems by splitting Lightroom into two parts. Lightroom CC and Lightroom Classic CC. These names have caused some confusion.  Adobe Lightroom Classic is pretty much the same program we have always known and has been updated with new features like luminosity masking and much needed performance improvements. Lightroom CC is now a stripped back version of Lightroom that is cloud based. It is basic but powerful. It still edits raw files but works seamlessly across all your devices including your desktop and even a web browser. 

This has been much needed. Recently on my workshops I have come across photographers who are new to photography or just getting back into it after years of being away and the essential step of post processing is something that has been intimidating and difficult to learn. With Lightroom CC we can now make all the most straightforward edits without the complexity and still shoot in raw. The files and the edits are stored in the cloud so there is no need to try and manage all your files on an ageing computer. They can be made on your iPad, phone or other devices with the Adobe servers doing the hard work. 

More User Friendly?

The interface has been reworked to be more easily understandable and user friendly. The app imports all your cloud based collections from your current Lightroom mobile account. You can load in new files and edit them like normal. I can see this being useful even for seasoned shooters. One way I can see me using this is for simple family pictures, quick shoots or even weddings. I will load in the raw images into Lightroom Classic, select the keepers and place them into a collection and the come over to Lightroom CC where I can use any of my devices as suits me to make the simple edits required for these type of shots. I can still open them into photoshop from the desktop version of Lightroom CC. If need to make more complex images like bracketed shots or combine panoramas then I can move back into Lightroom Classic.

Cost

From the start of next year all Lightroom products will now be subscription based. The basic package is the Lightroom CC package.  This includes Lightroom CC and 1TB of cloud storage for £$10 per month. Next is the photography package. This includes Lightroom CC, Lightroom CC classic, Photoshop and 20gb of cloud storage. The final package is the same as the photography plan but with 1TB of storage and costs £$20 per month. 

Photographer Nerves

Understandably there has been some nervousness and confusion about the changes Adobe have made here. They are clearly targeting the 95% percent of the world who have previously been happy to never edit their images.  It makes the rest of us worry that we are going to be neglected. I don’t think that will be the case though. I think Adobe could have done a better job just by naming things a little differently. Adobe Lightroom CC and Adobe Lightroom Pro CC would have been much more descriptive and made us traditional Lightroom users feel special, rather than old and out of date. 

Landscape Photography Editing - High Cup Nick vlog images

Get an insight into how I edit my pictures in Adobe Lightroom from my latest landscape photography vlog at High Cup Nick in the Pennines. Get a free trial of Adobe Lightroom - https://www.firstmanphotography.com/get/photography-plan

Watch the vlog - https://youtu.be/5IC4xH2eSQo

Follow and subscribe to First Man Photography for the latest updates:

First Man Vlog - https://www.youtube.com/playlist?list=PLa6Vwwb8Hgm2doJUbTS5Bro5VS2PVyzXN

In this video I edit the images shot on my recent trip to High Cup Nick. The weather was poor and the trip was intended as a scouting mission but I am still pleased with some of the images captured.

We go through the edit in Adobe Lightroom of seven images and I discuss composition, camera settings and my thoughts I had whilst capturing the shots. I share my photo editing tactics to show you how I work in post production.

Some say that I edit my pictures very quickly and this may be true. I believe dong it quickly allows me to bring a natural feel to the edit employing the artistic and instinctive part of my brain rather than analysing things in too much detail that can sometimes lead to over processed images. I do often take a second look and tweak a couple of things and I also apply profiles and manage resolution when I print my images.

Subscribe to the channel

Editing Landscape Photographs from a Canon 5D Mark IV

Landscape Photography on a Canon 5D Mark IV

The Canon 5D mark IV has changed the way that I shoot and edit my landscape photography. You will either love or hate this new trick.

Follow First Man Photography for the latest updates:

Instagram - http://instagram.com/adamkarnacz

FREE eBook - http://www.firstmanphotography.com/ebook

Subscribe - http://bit.ly/FirstManSubs

Get Adobe Lightroom and Photoshop - https://www.firstmanphotography.com/get/photography-plan

First Man Vlog - Click here

The Canon 5D Mark IV is an incredible camera. I reviewed it previously in an epic real world review - see the link below:

https://youtu.be/5HGxkQw5hto

The dynamic range of the Canon 5D Mark IV is a huge improvement over previous generations. What is truly impressive though is the amount of detail that can be pulled out of underexposed and shadow areas. Even a 2-3 stop increase in exposure will still lead to a relatively clean image, especially when shot at ISO 100.

Subconsciously I have started to use it to my benefit especially in some of the landscapes I have been shooting lately that contain huge dynamic range. Purposely underexposing the image as a whole has allowed me to capture the highlights with perfect exposure and then raise the shadows in post-production using Adobe Lightroom.

The main benefit is a huge saving of time with barely no downside. Normally capturing a scene with such wide dynamic range would require the use of multiple exposures by bracketing, HDR, blending or the faff and inconsistent results of physical ND grads. The Canon 5D Mark IV lets me do it with one exposure.

The speed at which I am now capturing landscape photography, and then later editing it in Adobe Lightroom has improved my overall work flow. I can now deploy that time on other things and really concentrating on the story I want to tell with my work. At the end of the day, that is what I am trying to do.

Landscape Photo Editing in Adobe Lightroom - Waterfalls Vlog Images

In this landscape photo editing session I use Adobe Lightroom to edit the images from the Winter Woes and Waterfalls vlog and discuss composition and post processing techniques. Get a free trail of Adobe Lightroom and Photoshop - https://www.firstmanphotography.com/get/photography-plan

Watch the Vlog here - https://youtu.be/tYVuZS_oHJE

Google NIK Collection Video - https://youtu.be/ALkbAwitdrg

Follow First Man Photography for the latest updates:

Instagram - http://instagram.com/adamkarnacz

FREE eBook - http://www.firstmanphotography.com/ebook

This video is the full live landscape photography editing session from the images I captured on my recent vlog at Ingleton Waterfalls and Ribblehead Viaduct. The post processing is done in Adobe Lightroom.

The video is relatively long and probably not for everyone but gives you the chance to really see how I edit my images from start to finish.

During the edit I discuss several Lightroom editing techniques such as using the graduated filter tool. I also provide more information about the composition of the shots shots and discuss the rule of thirds and leading lines.

If you find the format of the video useful please let me know and I will document my future editing sessions in the same way.

Subscribe to the YouTube channel.

Landscape Photo Editing in Adobe Lightroom - Flamborough Vlog Images

Landscape Photo Editing - Flamborough

In this landscape photo editing session I use Adobe Lightroom to post process all the images from the recent Flamborough vlog.

Get a free trail of Adobe Lightroom and Photoshop - https://www.firstmanphotography.com/get/photography-plan

Watch the Flamborogh Vlog here - https://youtu.be/hiWX_DKOMRc

Follow First Man Photography for the latest updates:

Instagram - http://instagram.com/adamkarnacz

This video is the full live landscape photo editing session from the images I captured on my recent vlog at Flambrough Head. The post processing is done entirely in Adobe Lightroom.

The video is relatively long and probably not for everyone but gives you the chance to really see how I edit my images from start to finish. Especially when I made a couple of silly mistakes at the time of shooting.

During the edit I discuss several Lightroom editing techniques such as using the graduated filter tool. I also provide more information about the composition of the shots shots and discuss the rule of thirds and leading lines.

If you find the format of the video useful please let me know and I will document my future editing sessions in the same way.

Finally, for those of you who celebrate it, have a very Merry Christmas. To everyone else, i appreciate you watching, you are awesome.

Subscribe to the YouTube channel.

Aviation Photography - Lightroom Photo Edit

Blog-Cover-1.jpg

It’s not everyday a helicopter flies so close to my house, when that happened today aviation photography came to the front and I captured a shot. The image was far from perfect so in this video I take you through my editing process to bring it up to scratch. Get Adobe Lightroom and Photoshop today - https://www.firstmanphotography.com/get/photography-plan

The free trail has currently been replaced for a limited time purchase offer. Please see the Adobe site for details by clicking the link above.

Aviation Photography

I must admit that I am not the biggest fan of aviation photography. I really dislike shots that feature an aircraft surrounded by nothing but blue sky. This is especially the case when the rotor blades of helicopters are frozen in time.

To capture the image of the helicopter today I used my Canon 400mm f5.6L lens. I stuck it out the window, whilst handholding, and took the shot having waited for the chopper to get into a good position where I was happy with the composition.

I much prefer aviation photography when there is a sense of movement in the image. To achieve this I reduced my shutter speed down to 1/50 second. The chopper was hovering so I managed to hold the camera steady enough to capture the image with some lovely movement in the rotor blades. This caused a slight loss in sharpness and the image is far from perfect but in the video I walk you through the steps I took to bring it up to scratch.

In the video I also use the clone stamp tool in Adobe Photoshop to remove an irritating telephone wire that I could not prevent being in my frame.  Watch this Aviation Photography Lightroom photo edit it now to see how I post-processed the image.

Subscribe to the YouTube channel.

London Eye Photo Edit

Blog-Cover.jpg

See how I use Abobe Lightroom to edit this long exposure of the London Eye.

Get a FREE trial of Adobe Lightroom  - Click here.

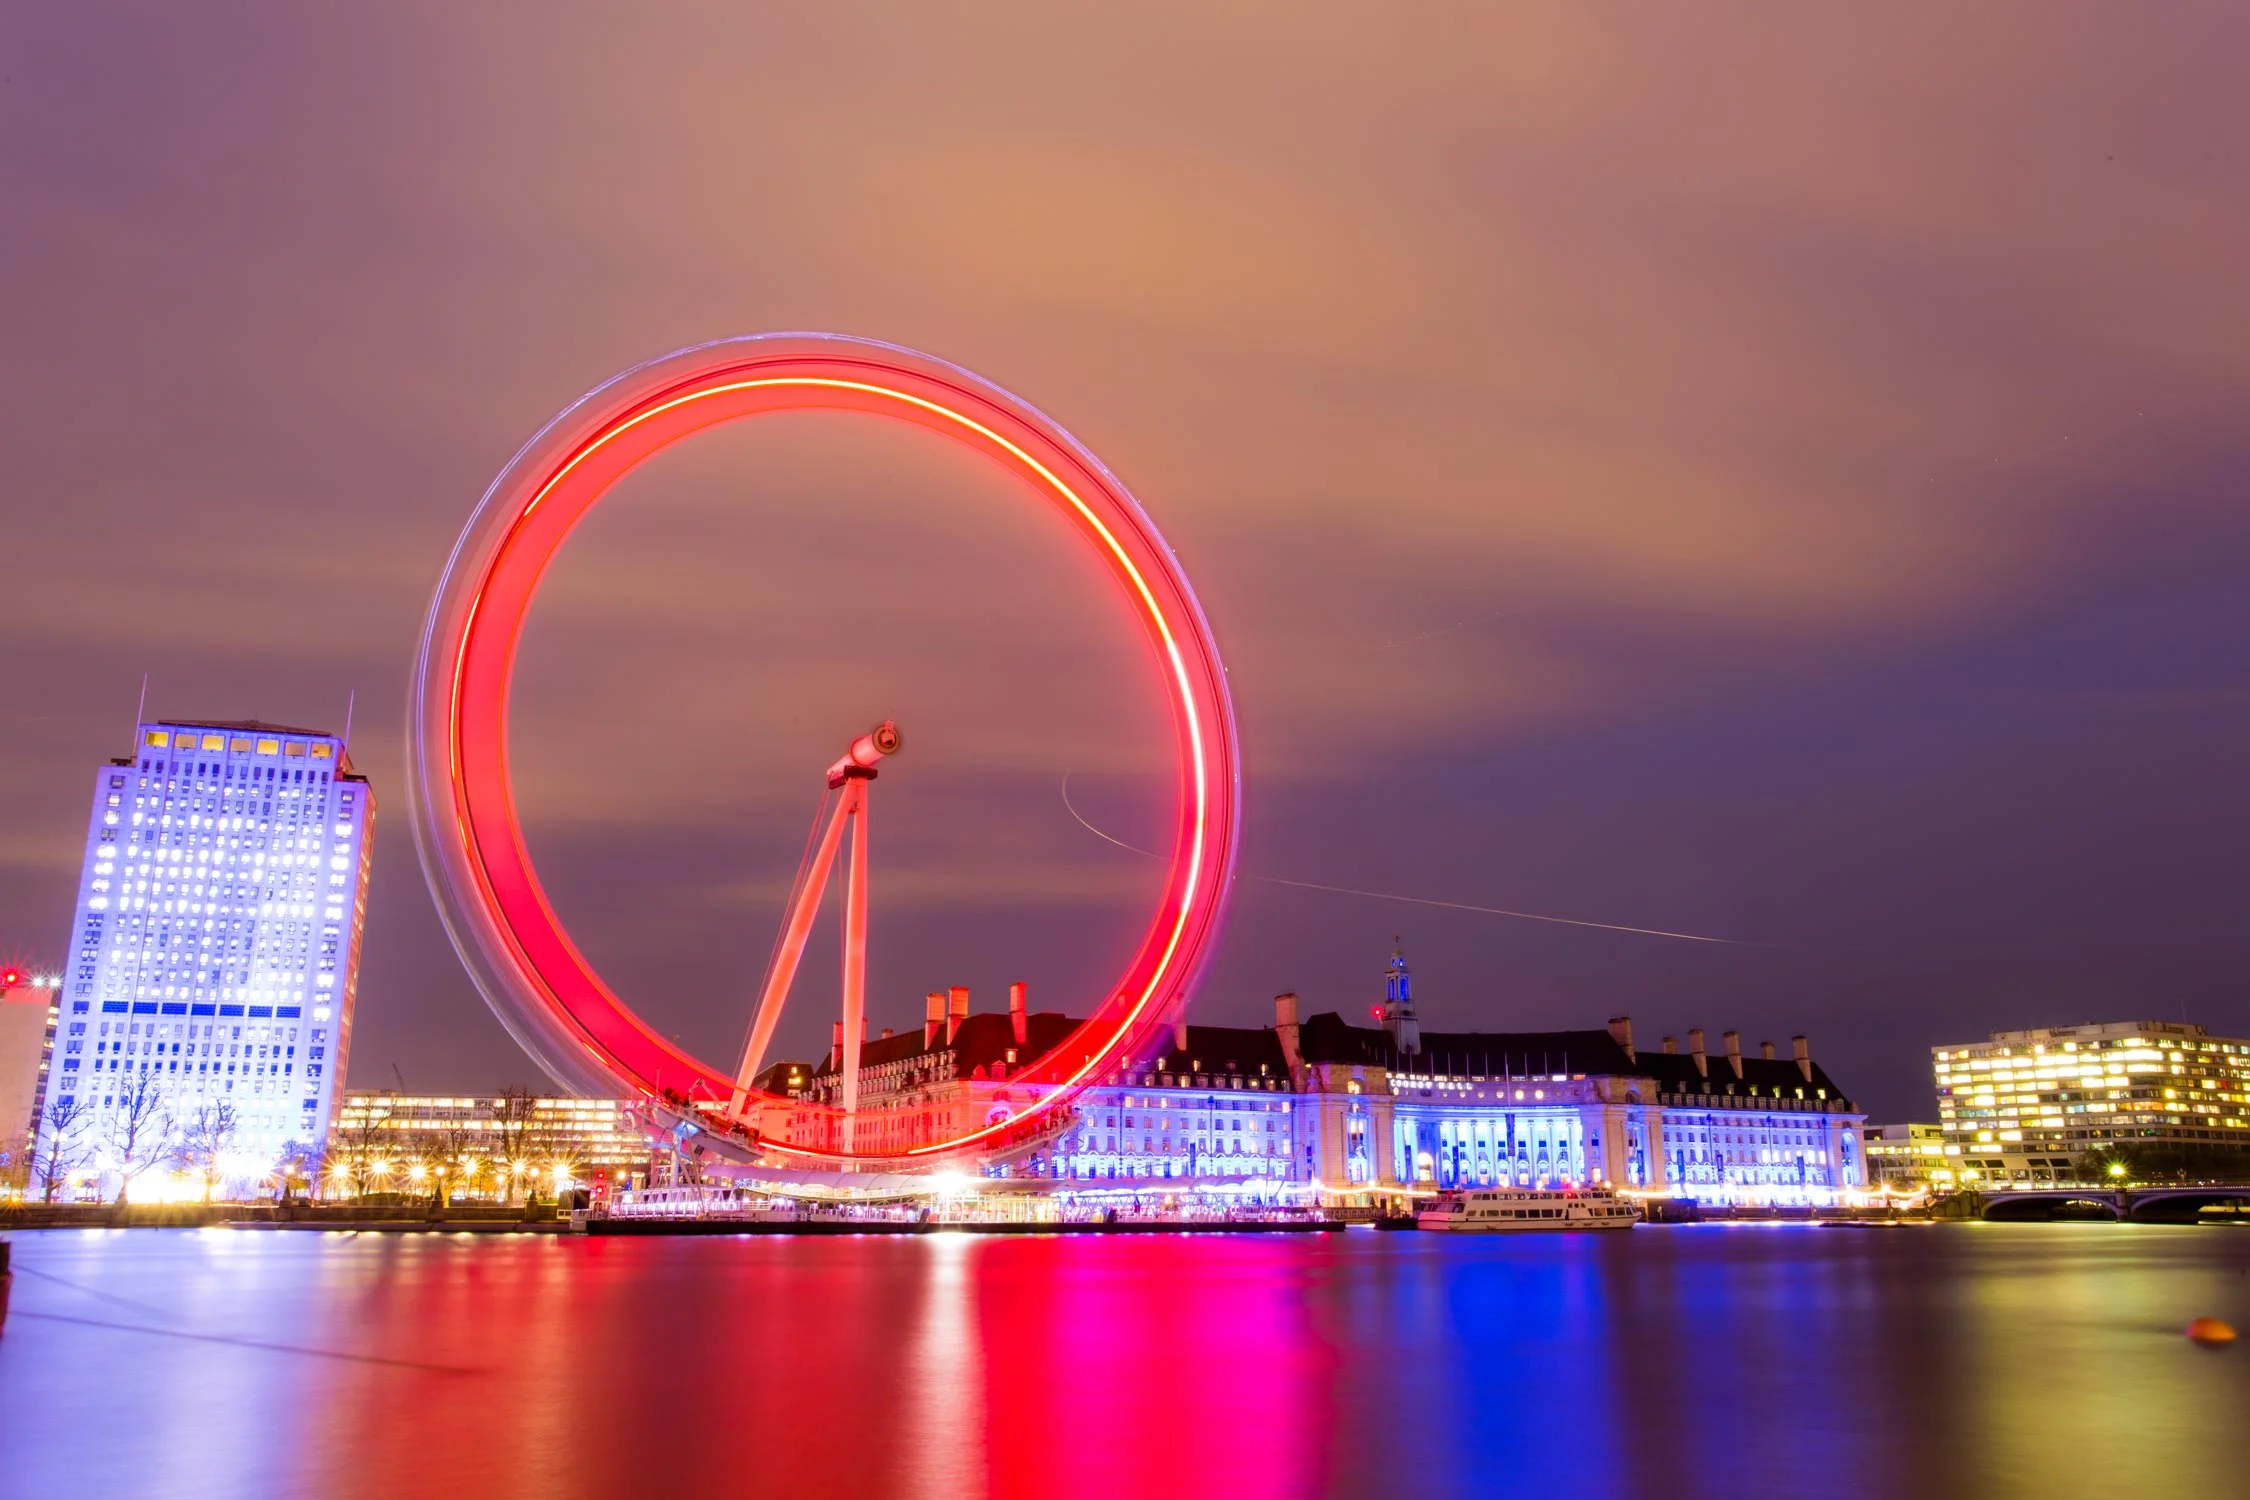
On my recent trip to London I had a very small amount of free time that I put to good use to head out and take a few shots around the Westminster area. This included a long exposure photo of the London Eye. Whilst it is not a totally unique shot, it is one I have wanted to capture for a while to have it in the bag.

Normally when shooting a long exposure I will use a 6 stop or 10 stop neutral density filter to cut down the light coming into my lens. It was already dark in this situation though so using the filters would have resulted in a very long exposure time when maintaining an low ISO. I therefore wanted the longest exposure I could get without the filters and this meant going to f/22 with the Canon 17-40mm lens. The exposure ended up being about 3 minutes which is enough to give the nice ring of light on the wheel and smooth out the River Thames.

I shot the image at 28mm. I would have liked a slightly wider composition but there were floating cranes at either side of me blocking the view.

In the video I put the long exposure image into Adobe Lightroom and go through the edit. The edit is very simple as we remain in Adobe Lightroom but you will be able to get a feel for the editing process I go through when I am in post-production. Hopefully you will be able to pick out what you like, and what you don’t like, and apply the techniques to you own images.

To have a go editing this image click the link below to download the RAW file. Feel free to use image for personal use, including printing. All I ask is that you credit me if you share it online.

Download RAW

If you haven't done so already, please Subscribe to the YouTube channel for new videos every Wednesday and Sunday.

Other videos:


Water Drop Photography Edit Session

Water-Drop-Edit-Session.jpg

Post-processing a water drop photography shoot.

In this video I go through the post processing of the images shot in the previous video where I cover how to use the SplashArt 2 water dropper to shoot water drop photography.

https://www.firstmanphotography.com/tutorials/water-drop-photography-splashart-dropper

Post processing or editing is a vital part of the photography process and when it comes to water drop photography things are no different. The process starts when importing the images to a computer. In the video I already had the images on the computer thanks to shooting the session with the camera tethered. This is an extremely useful way of shooting studio photography as it allows you to view the images full screen rather than relying on the cameras own screen. Instantly being able to see all the detail of an image is a clear advantage.

How to do water drop photography - https://www.firstmanphotography.com/tutorials/water-drop-photography

With the images already on the computer it is then a case of assessing the images and discarding the ones that are not useable or simply not to your standard. Adobe Lightroom offers a number of options to rank and rate your images. My workflow involves initially flagging the images I am happy with and then making a second pass to score the images using the star ratings. This quickly highlights which images from a shoot I will editing, speeding up my workflow.

I then enter into the editing process. With water drop photography, using Adobe Lightroom water drop images from the same shoot can be made to look very different. This comes mainly through the powerful colour adjustments that Lightroom offers when working with RAW images.

The video goes through the editing of the water drop photos with my editing techniques and workflow being explained. The workflow is very similar in any photo shoot so can be applied to almost any type of photography.

Get a free trial of Adobe Lightroom - Click here.

SUBSCRIBE to the YouTube channel and follow me on Instagram

Landscape Photography Editing - Fine Art Landscape

fine-art-landscape-editing-video-cover.jpg

How I edit a fine art landscape.

In this video we go through the editing techniques and post-processing to create a fine art landscape using Adobe Lightroom.

To get FREE trial of Adobe Lightroom Click here.

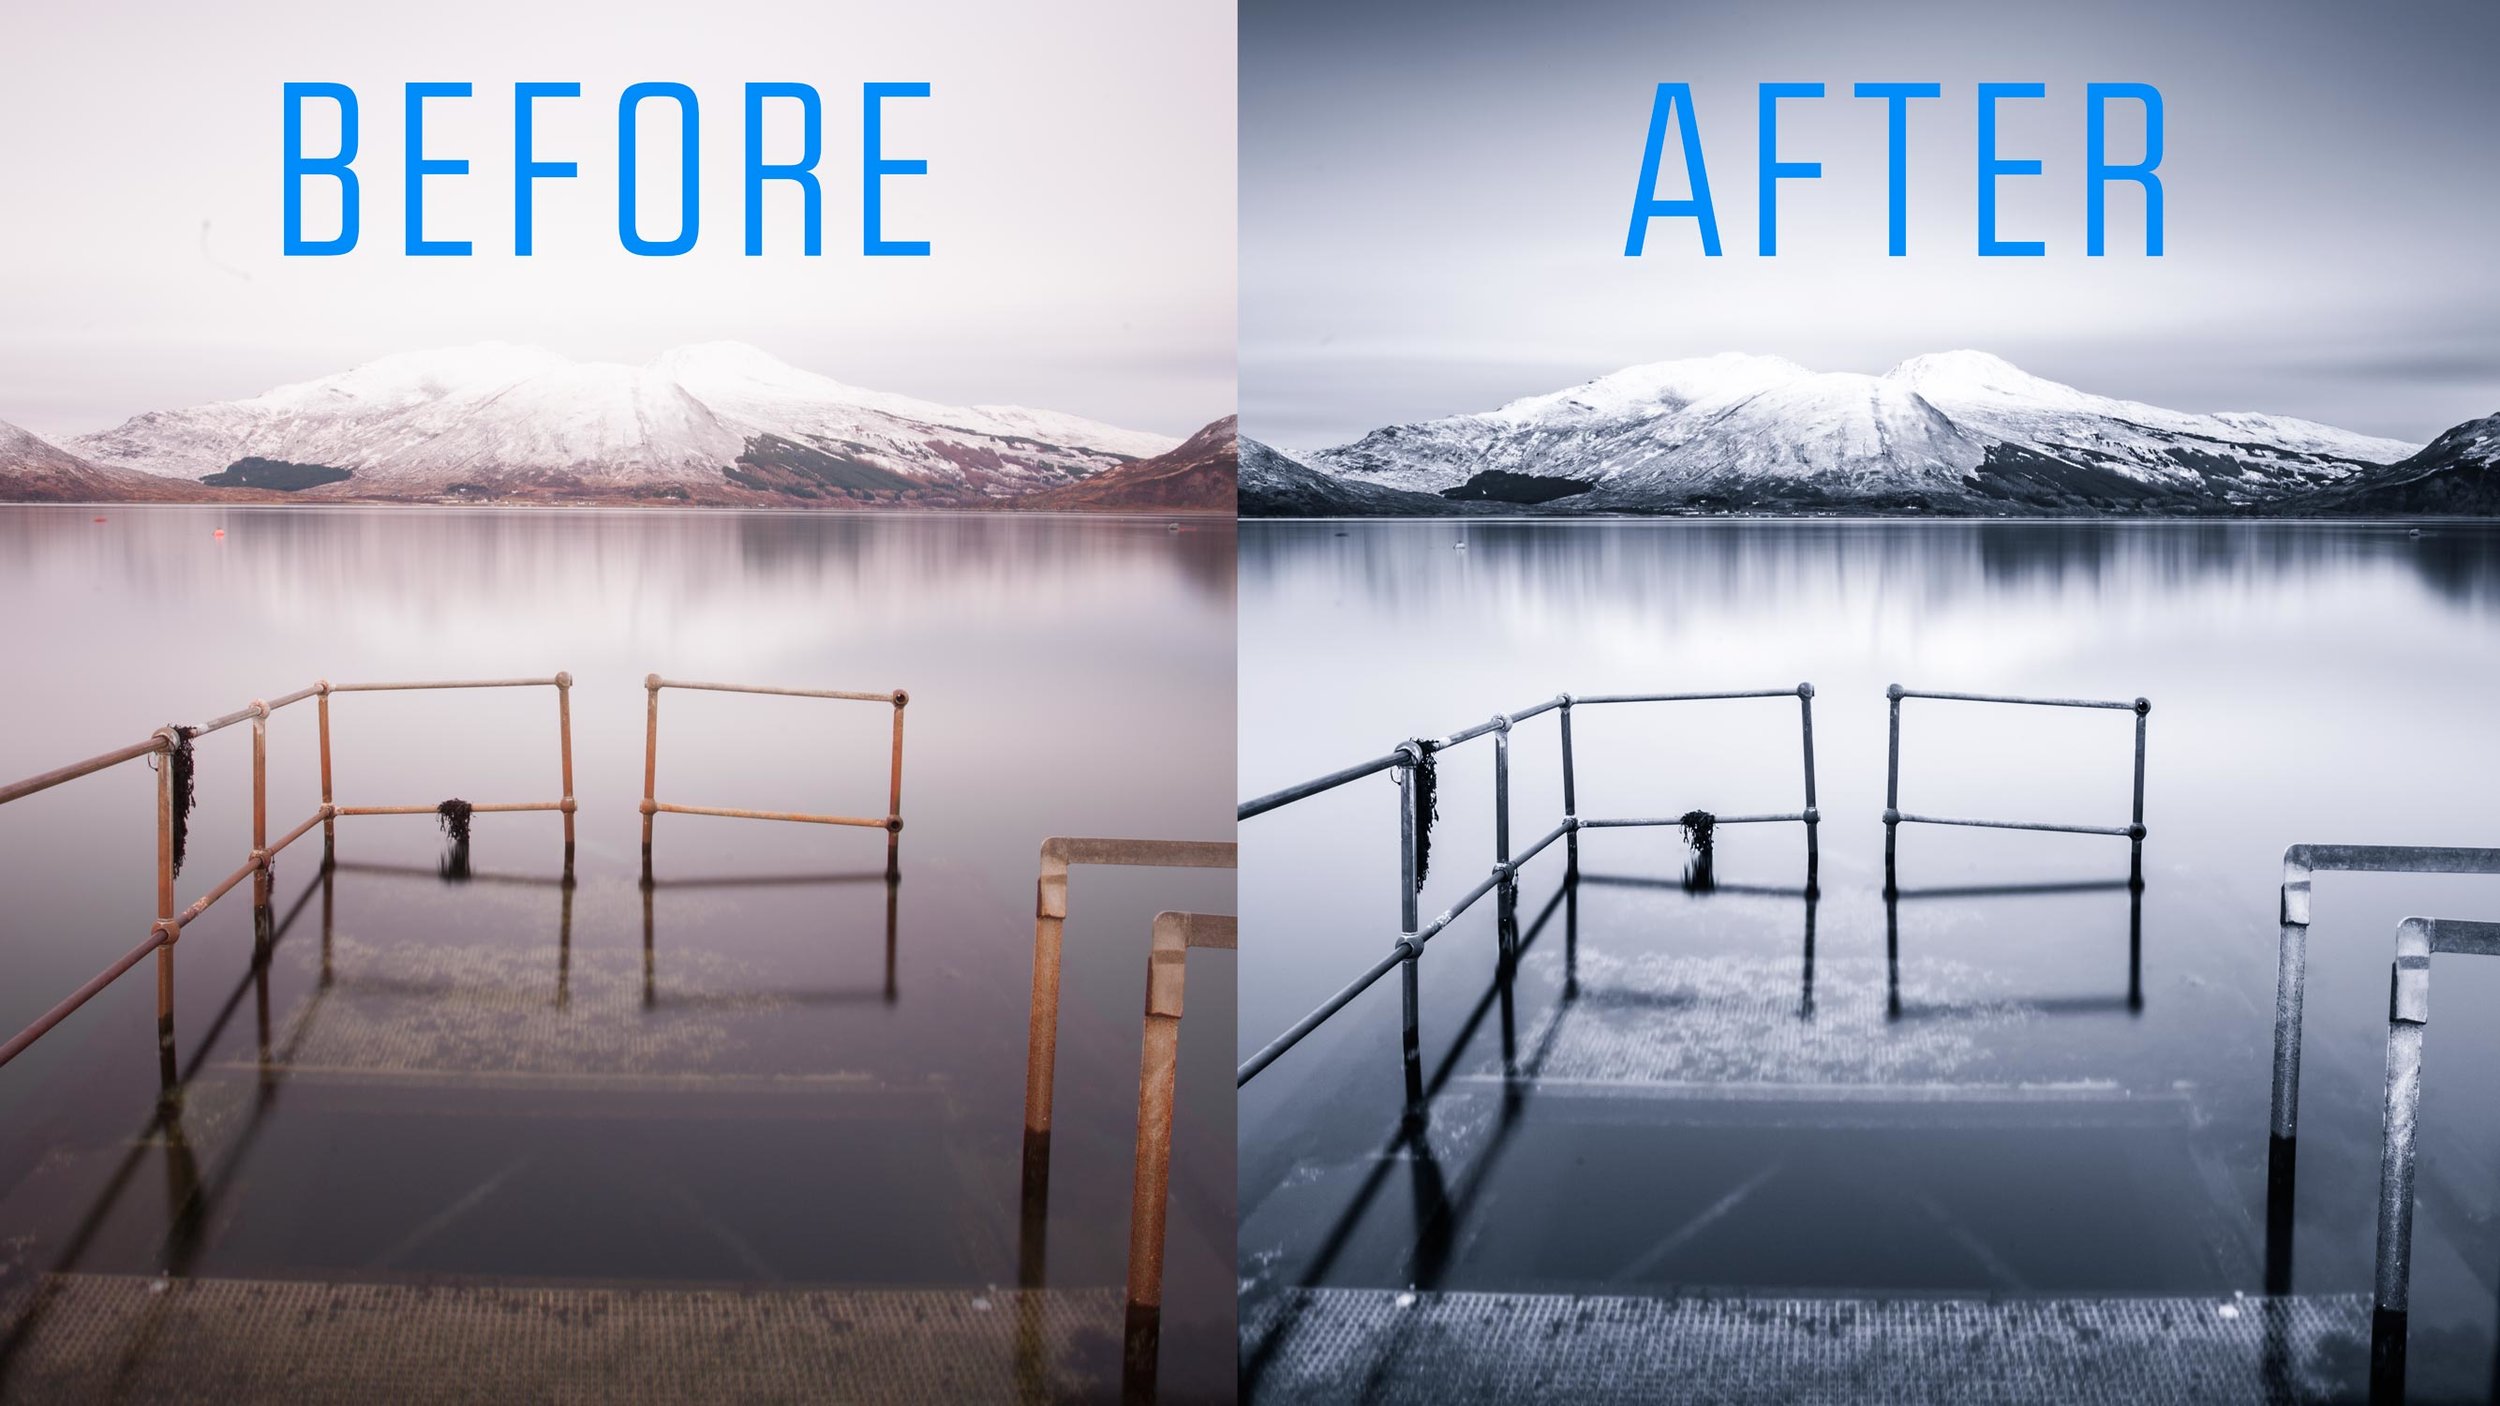
This video has come about thanks to the suggestion of a valued subscriber who asked me to go through the post processing of some images. Happy to oblige I went through the edit of one of my recent shots taken whilst in Glenelg on the West Coast of Scotland. Since we have been on a landscape theme recently I thought some landscape photography editing would be a good place to start.

With the conditions I was faced with on the day, the scene immediately screamed black and white. I went ahead and shot a four minute long exposure, planning to turn the image into a fine art landscape photograph. Long exposure lends itself very well to fine art photography.

The fine art landscape editing is done purely in Adobe Lightroom although the final touch is added using Silver Efex form Google's Nik Collection. This final step does not feature in the video as I will be creating future tutorials covering this.

The image used was shot in raw. We go through all the steps and sliders used in Lightroom to post process the image and complete our fine art landscape edit.

During the post processing we use a software version of the ND grad filter and use this to bring out some detail and drama from the sky. This is a very effective landscape photography editing tool and is starting to render the physical version of this filter useless. See my recent video discussing camera filters.

If you enjoy the video and find it useful please let me know and I will make photography editing videos a regular feature.

Follow me on Instagram - http://instagram.com/adamkarnacz

Subscribe to the YouTube channel - Subscribe Now